

The ultimate beginners guide to make your own 3-string cigar box guitar
By Glenn Watt
Do you wonder how difficult it would be to make a cigar box guitar?
Are you worried that you don’t have the tools or experience to do such a thing?
Look, not only can you make a cigar box guitar, but you will with this easy-to-follow plan.
This plan starts out by listing the tools you’ll need.
Then you’ll see the resources and hardware that you’ll use.
After that, you’ll follow a clear, step-by-step plan filled with crisp, colorful images to build a 3 string, fretless, cigar box guitar.
Enough with all the talk. Let’s do this!
Let’s begin with the tools and resources.
Don’t worry, these lists are short.
You’ll be building in no time.
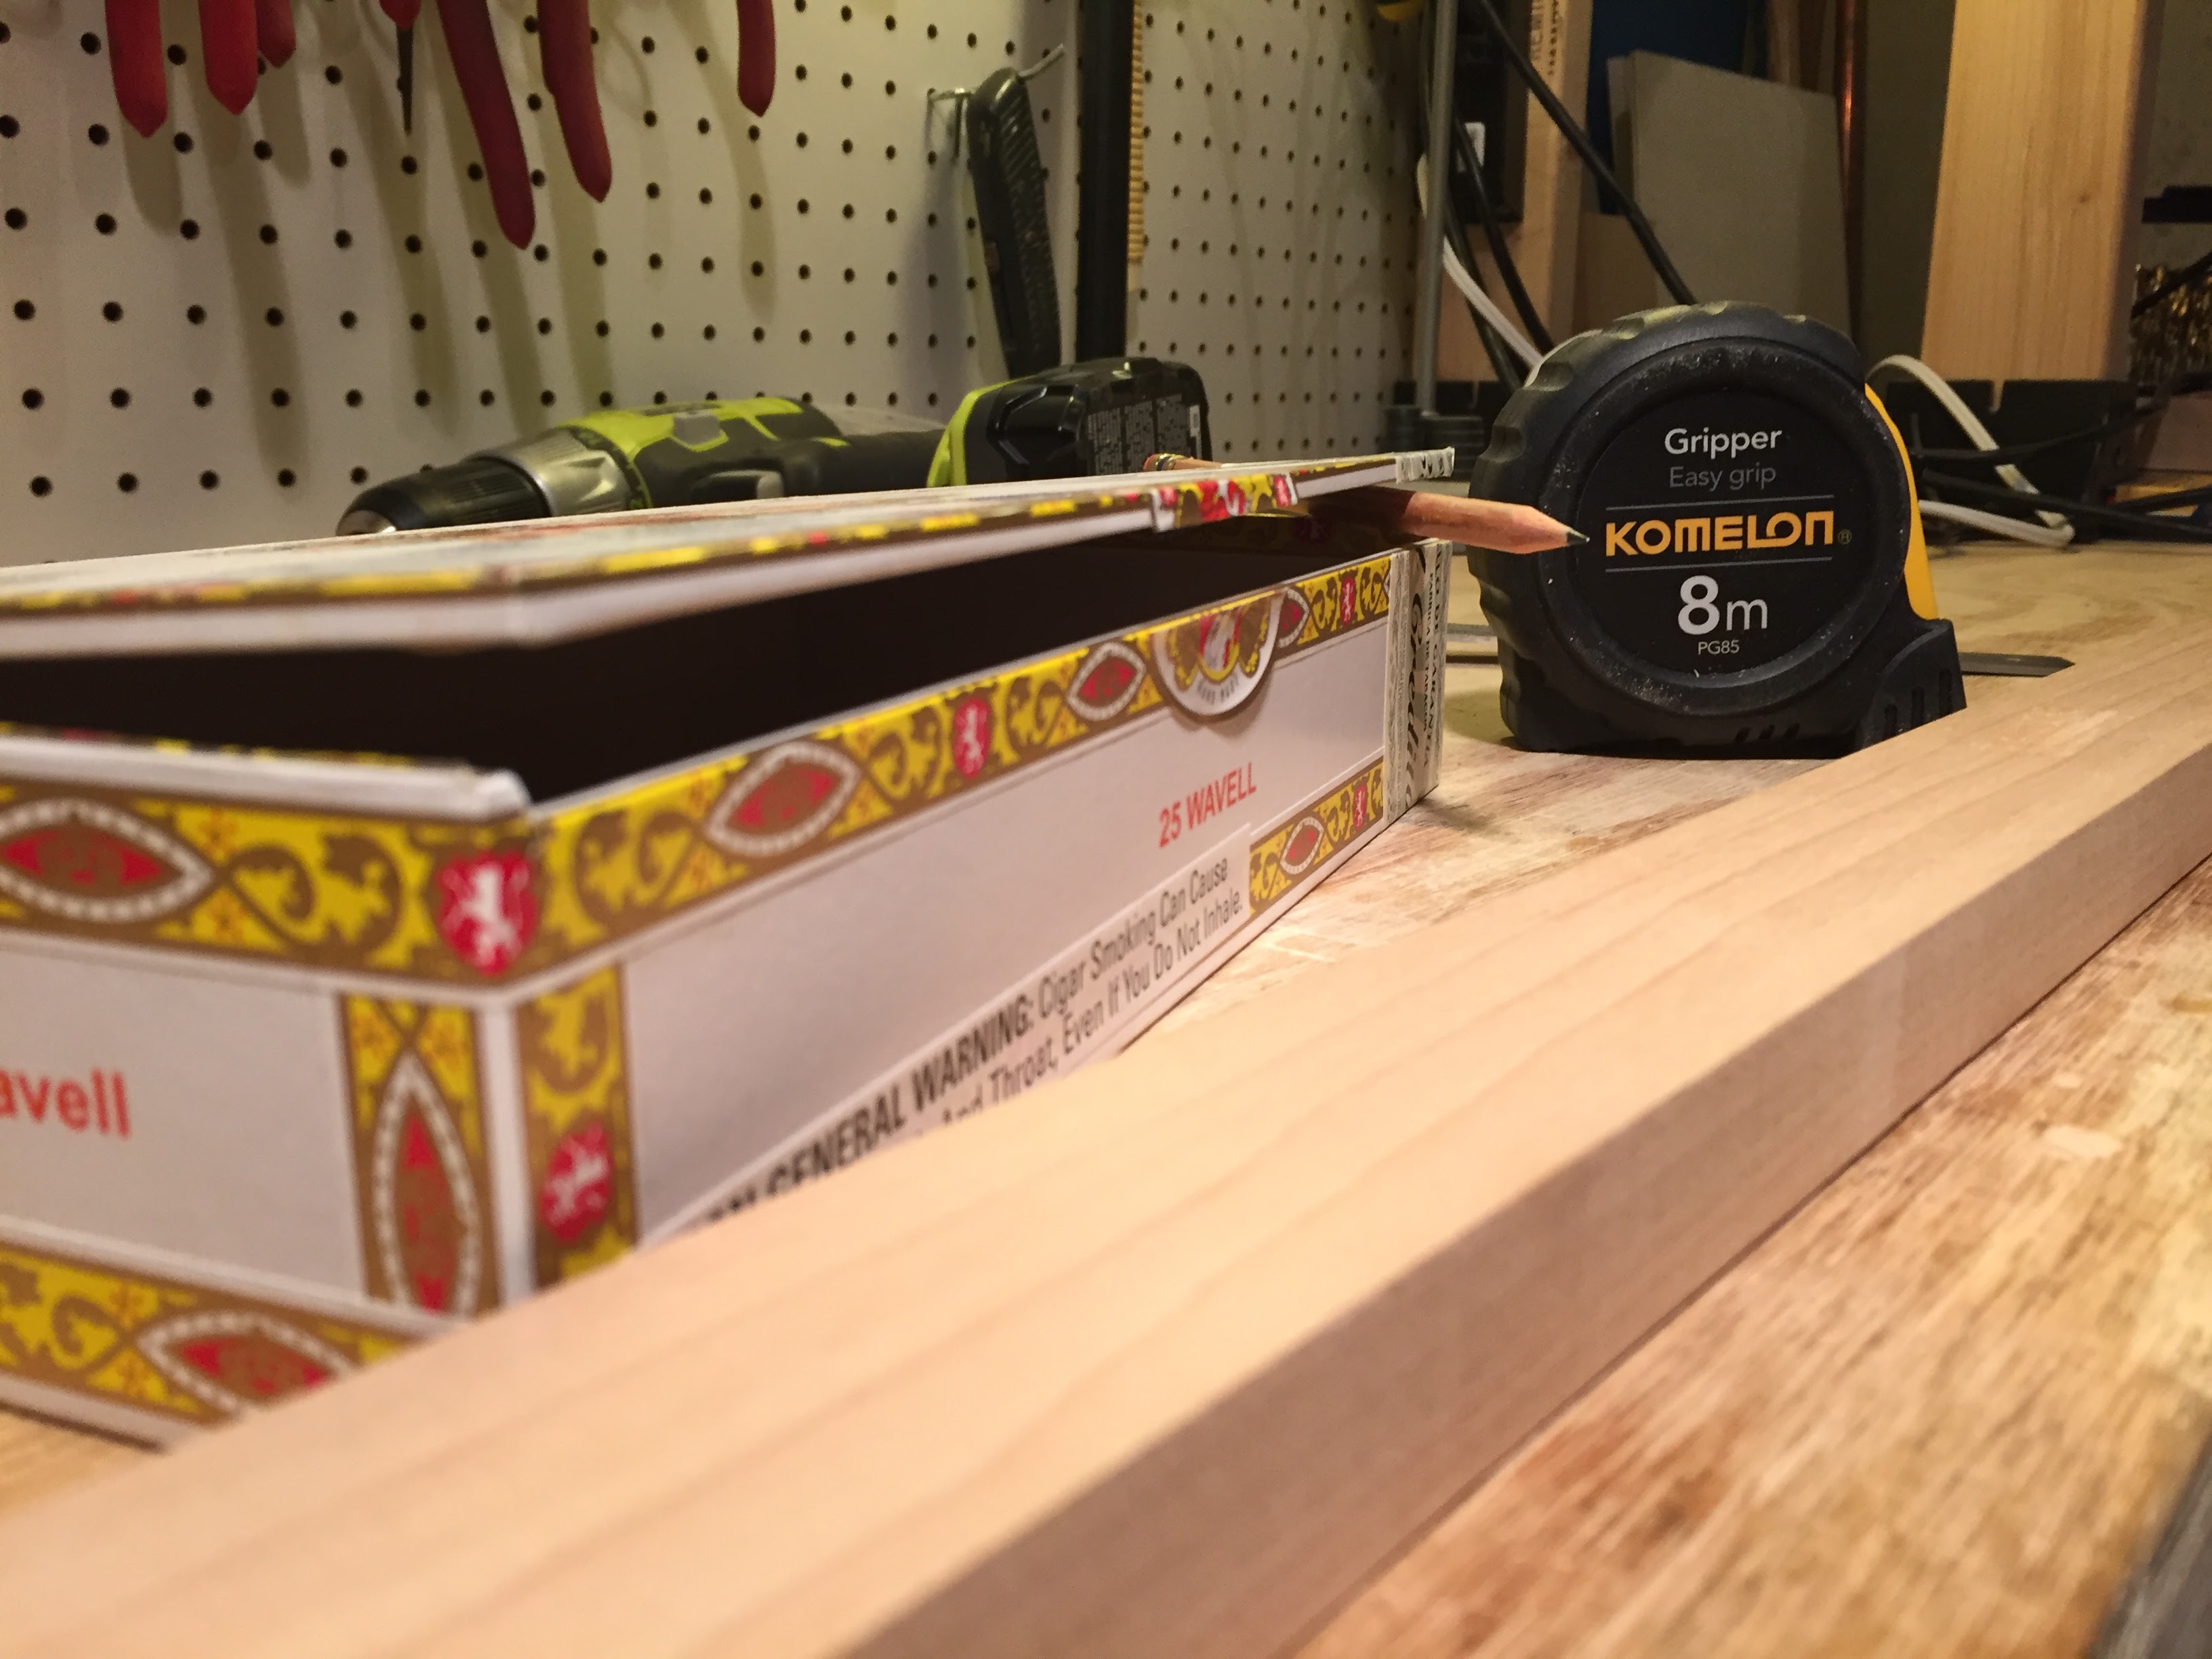
Tools used
- square
- tape measure or yard/meter stick
- small handsaw
- file / rasp
- razor knife
- clamps
- drill
- drill bits
- driver bits (flat-head and cross-point / Phillips)
- flat-head screwdriver
- mallet / hammer
- awl or something with a firm point
Hardware and resources
- Flat-lid cigar box
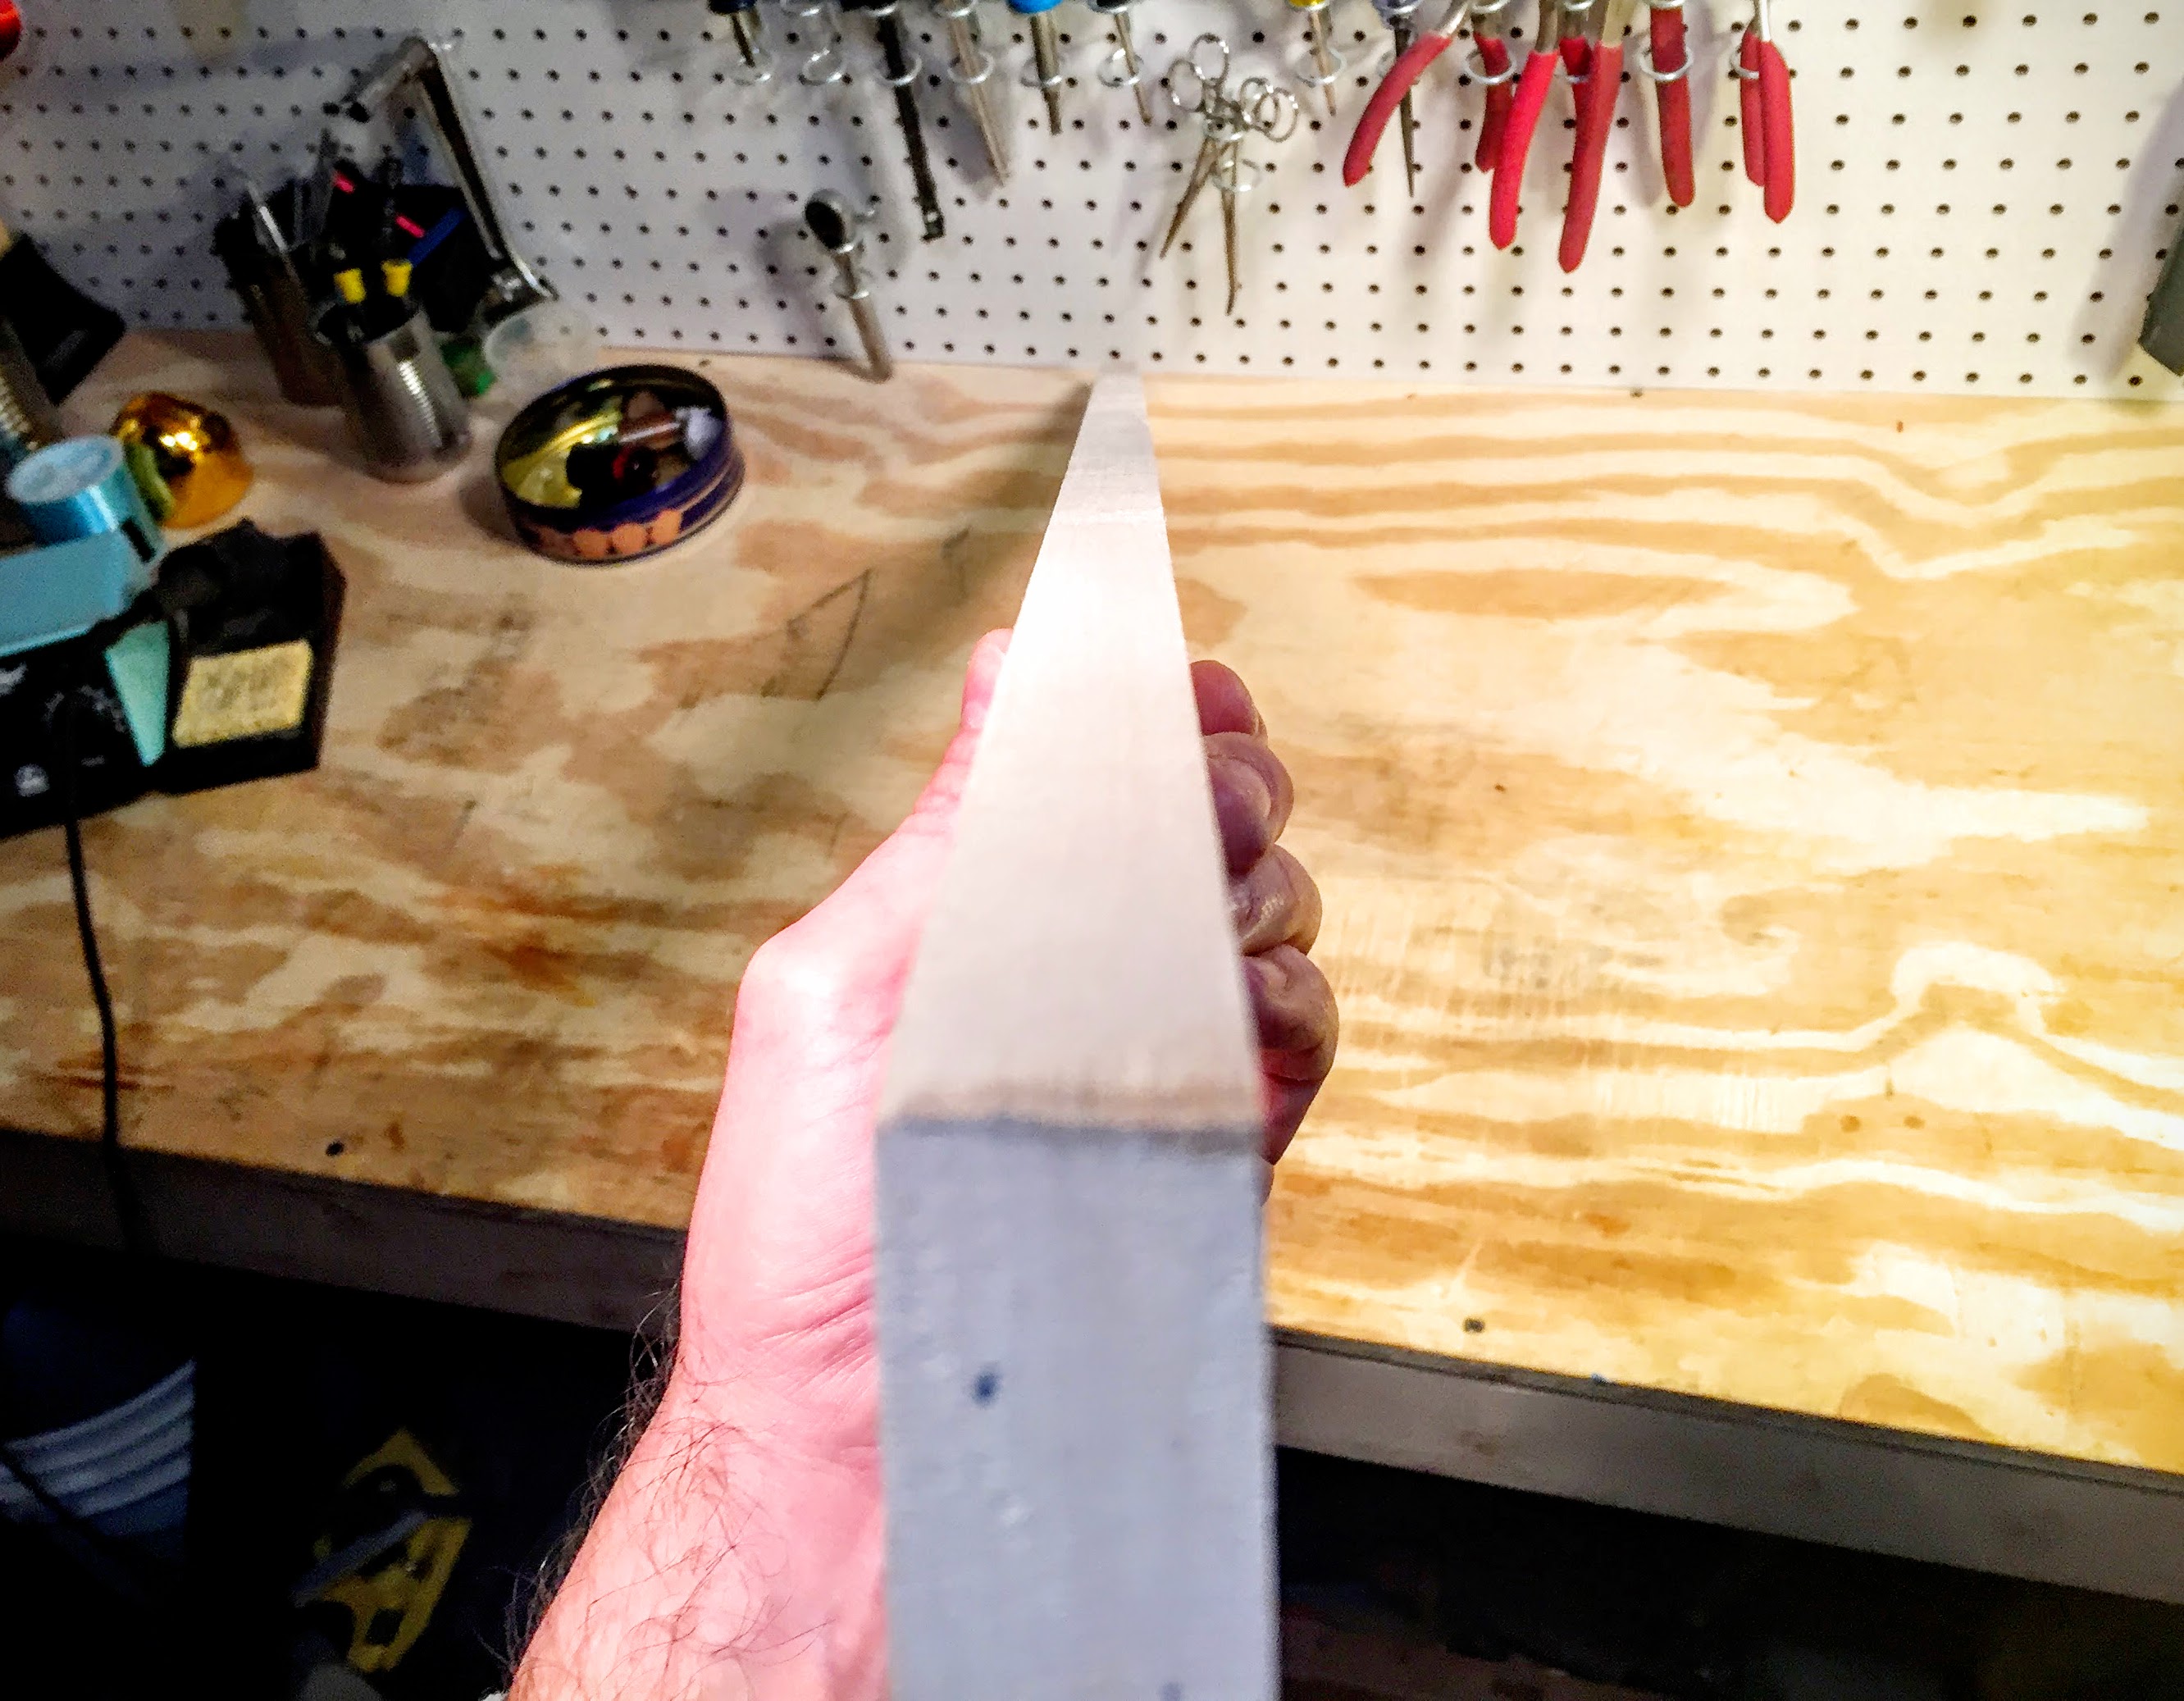
- 4 foot (1219mm) length of 1″ x 2″ (19mm x 38mm) hardwood, such as maple or oak
- Strings
- Tuners
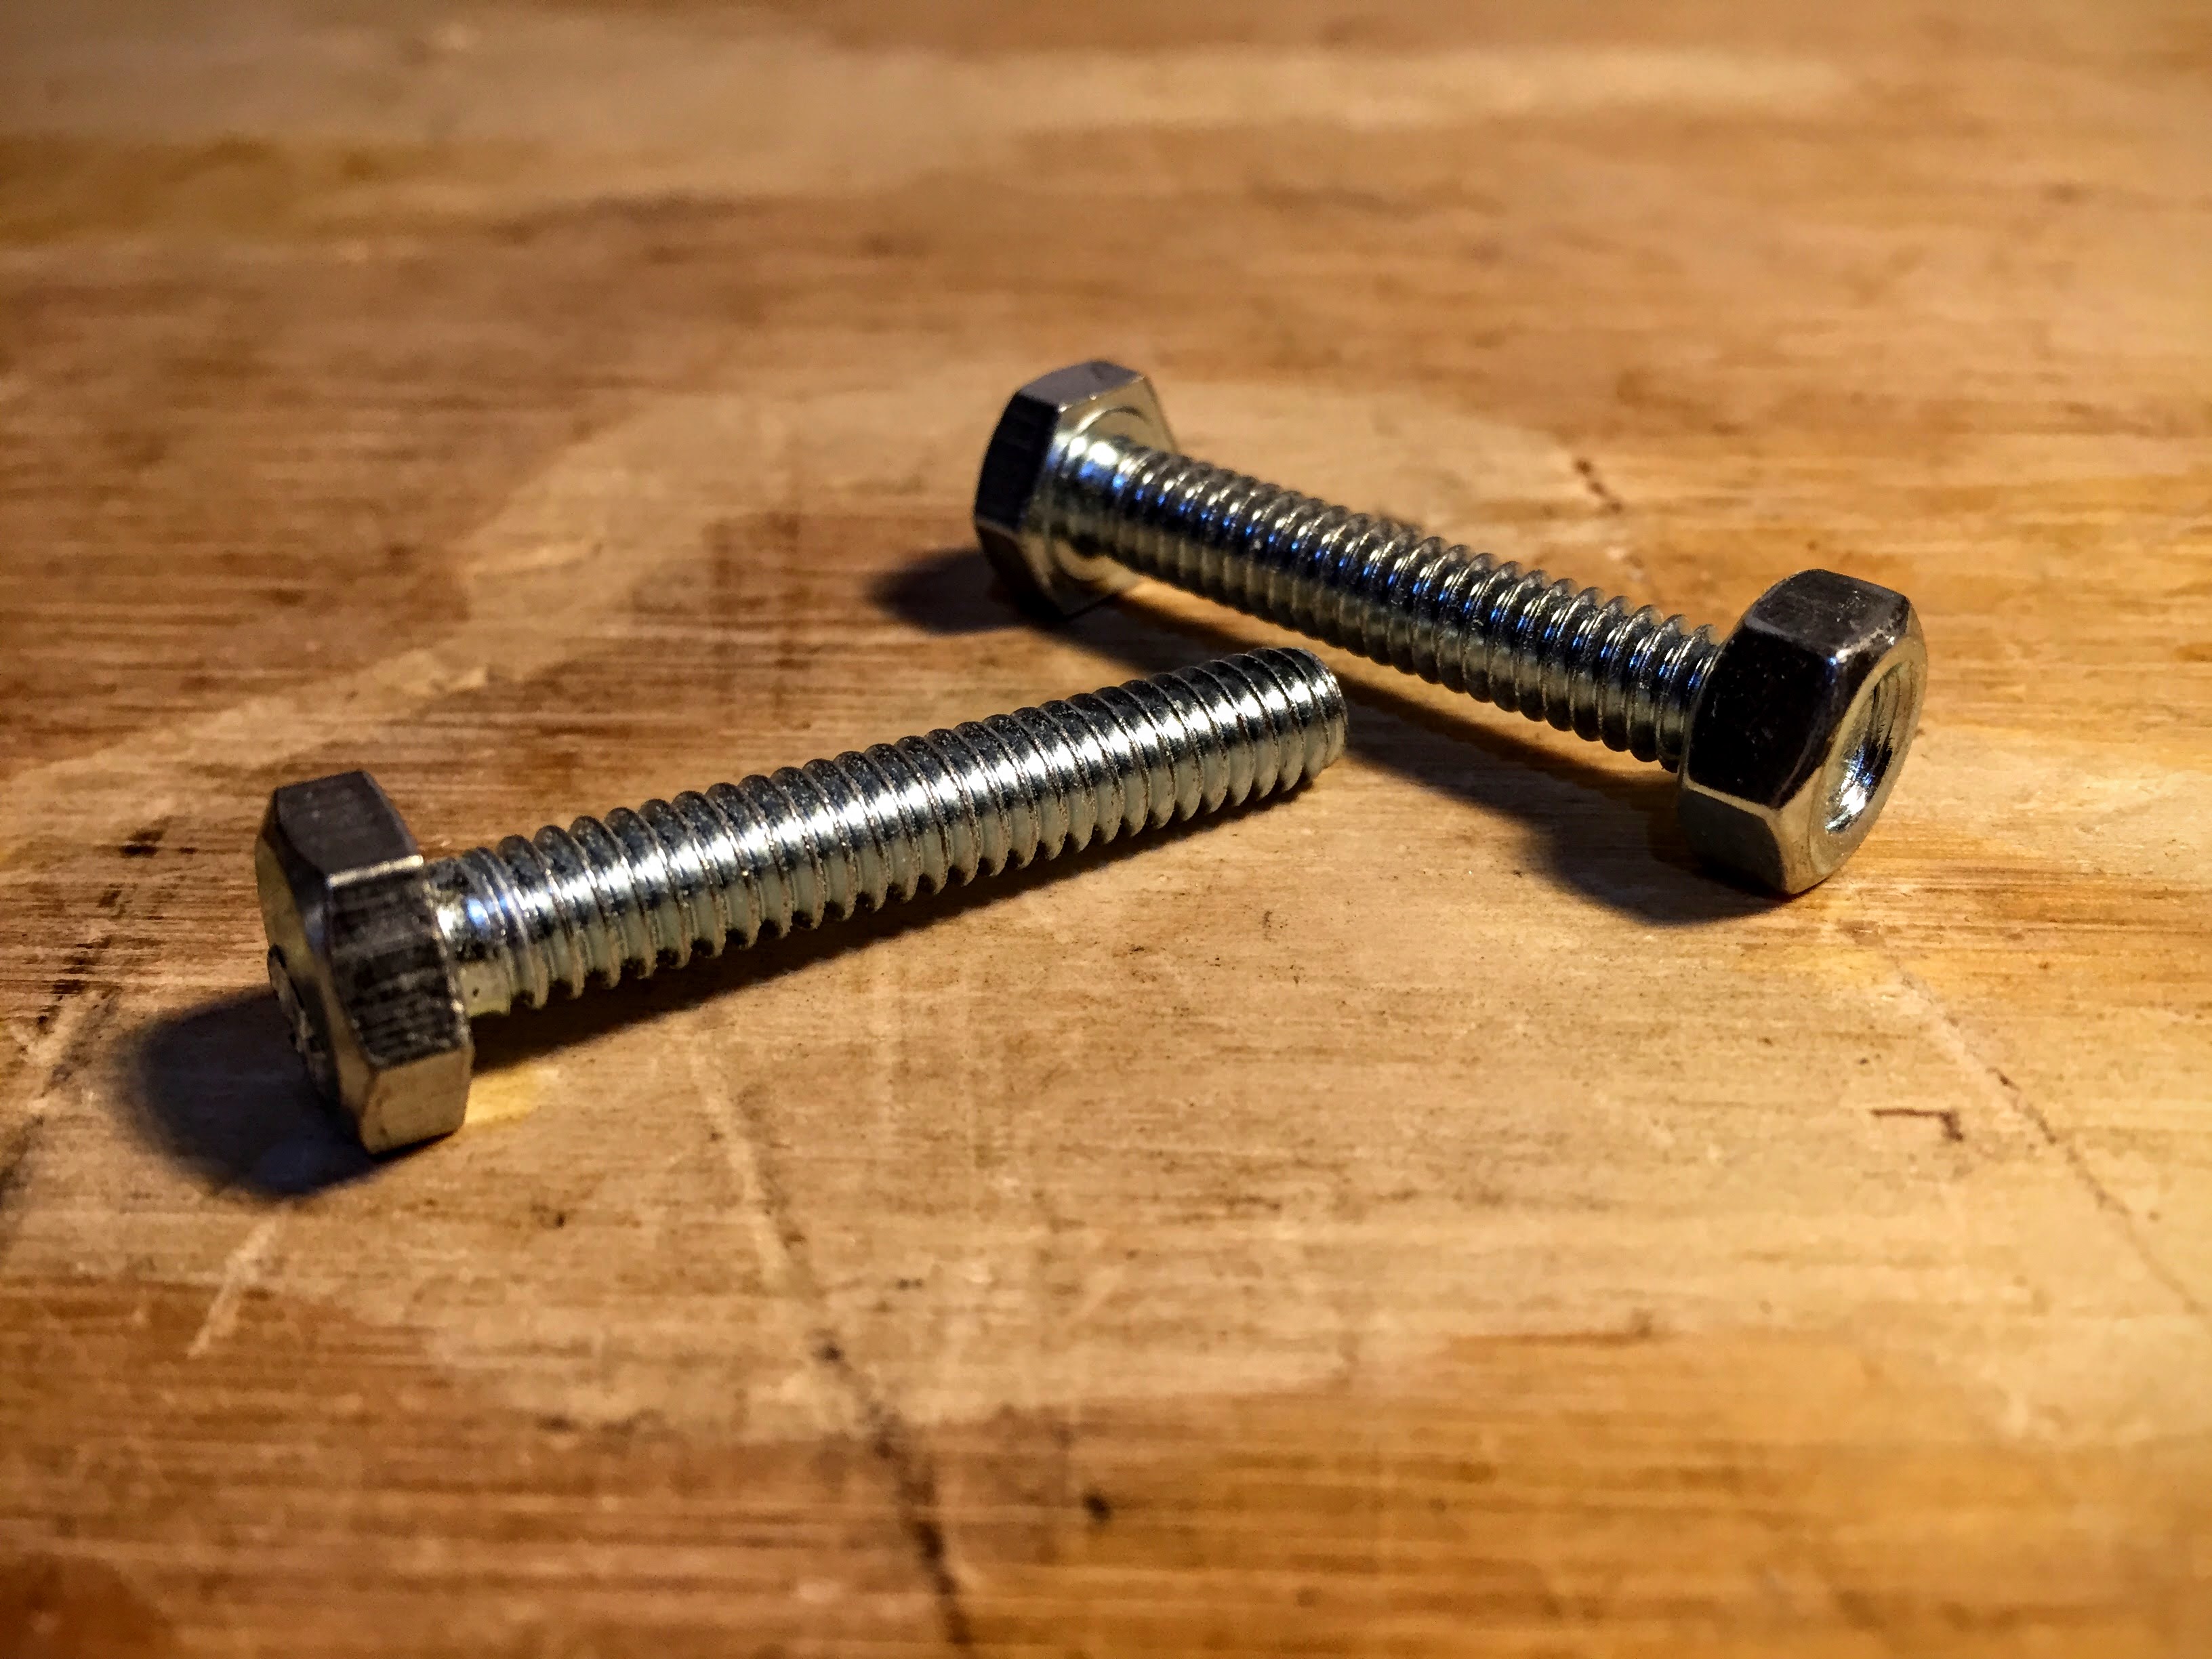
- 1 1/2″ (38mm) hex bolts, qty. 2
- nut to fit one of the hex bolts
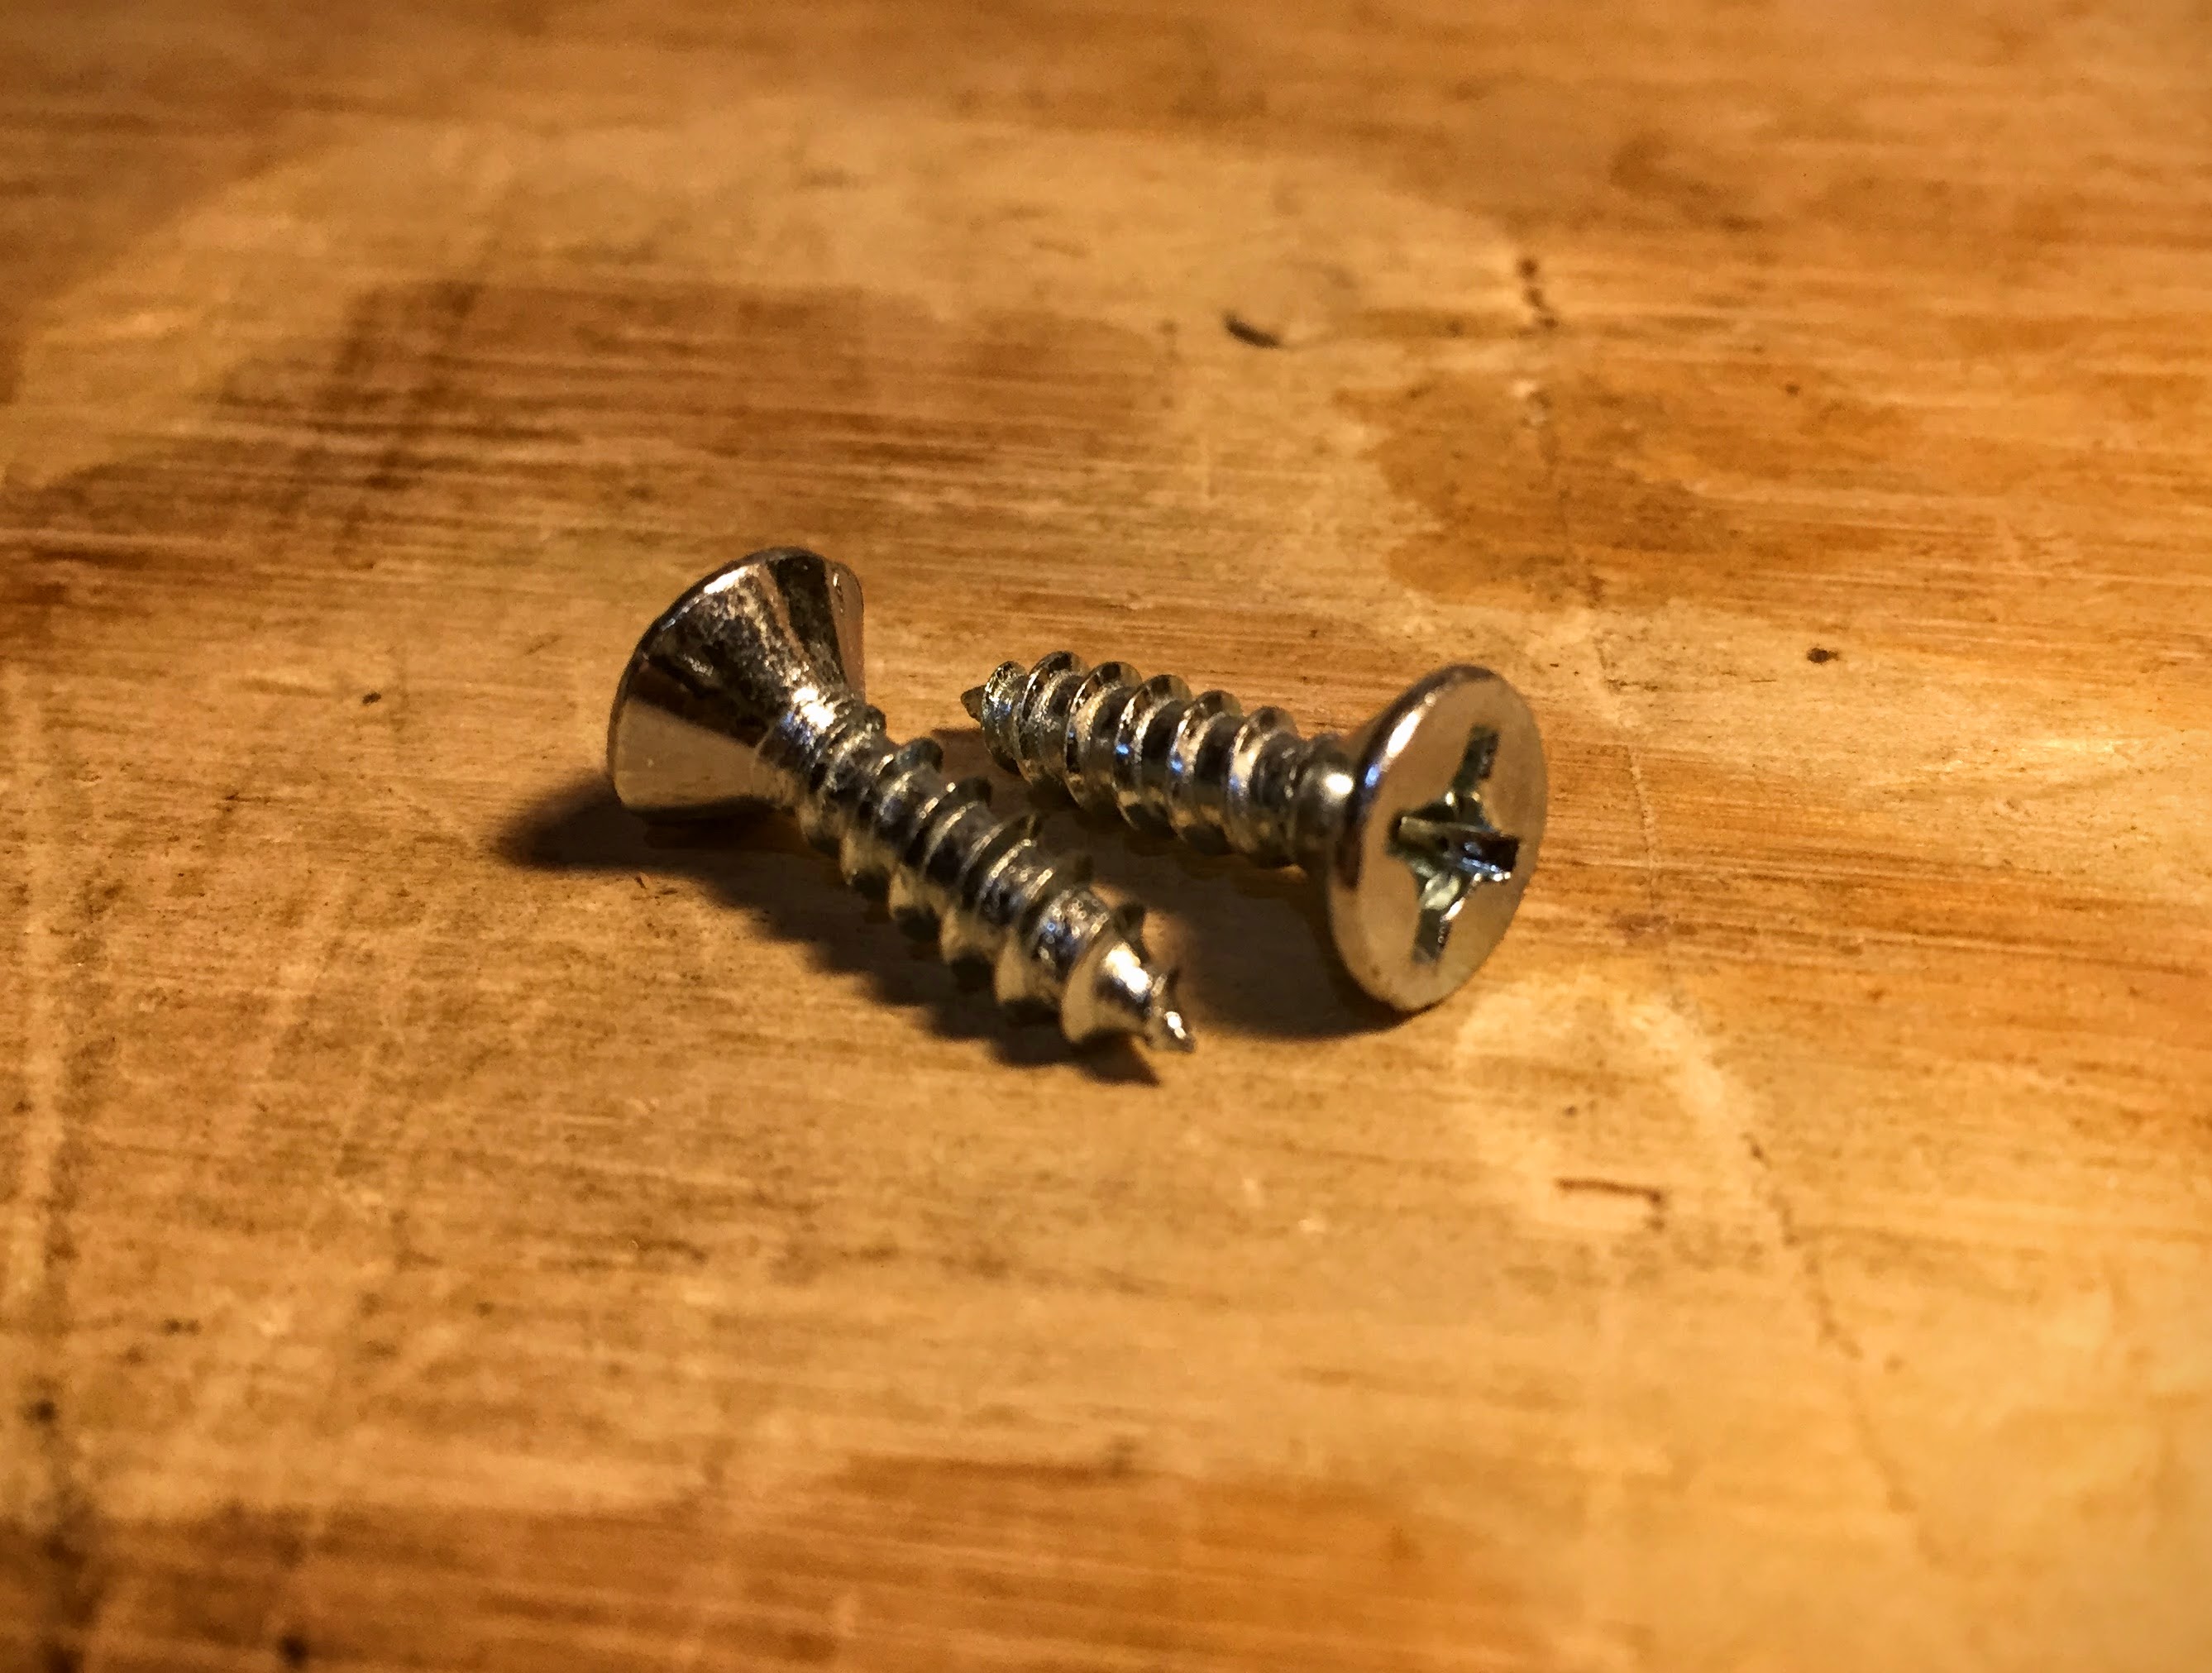
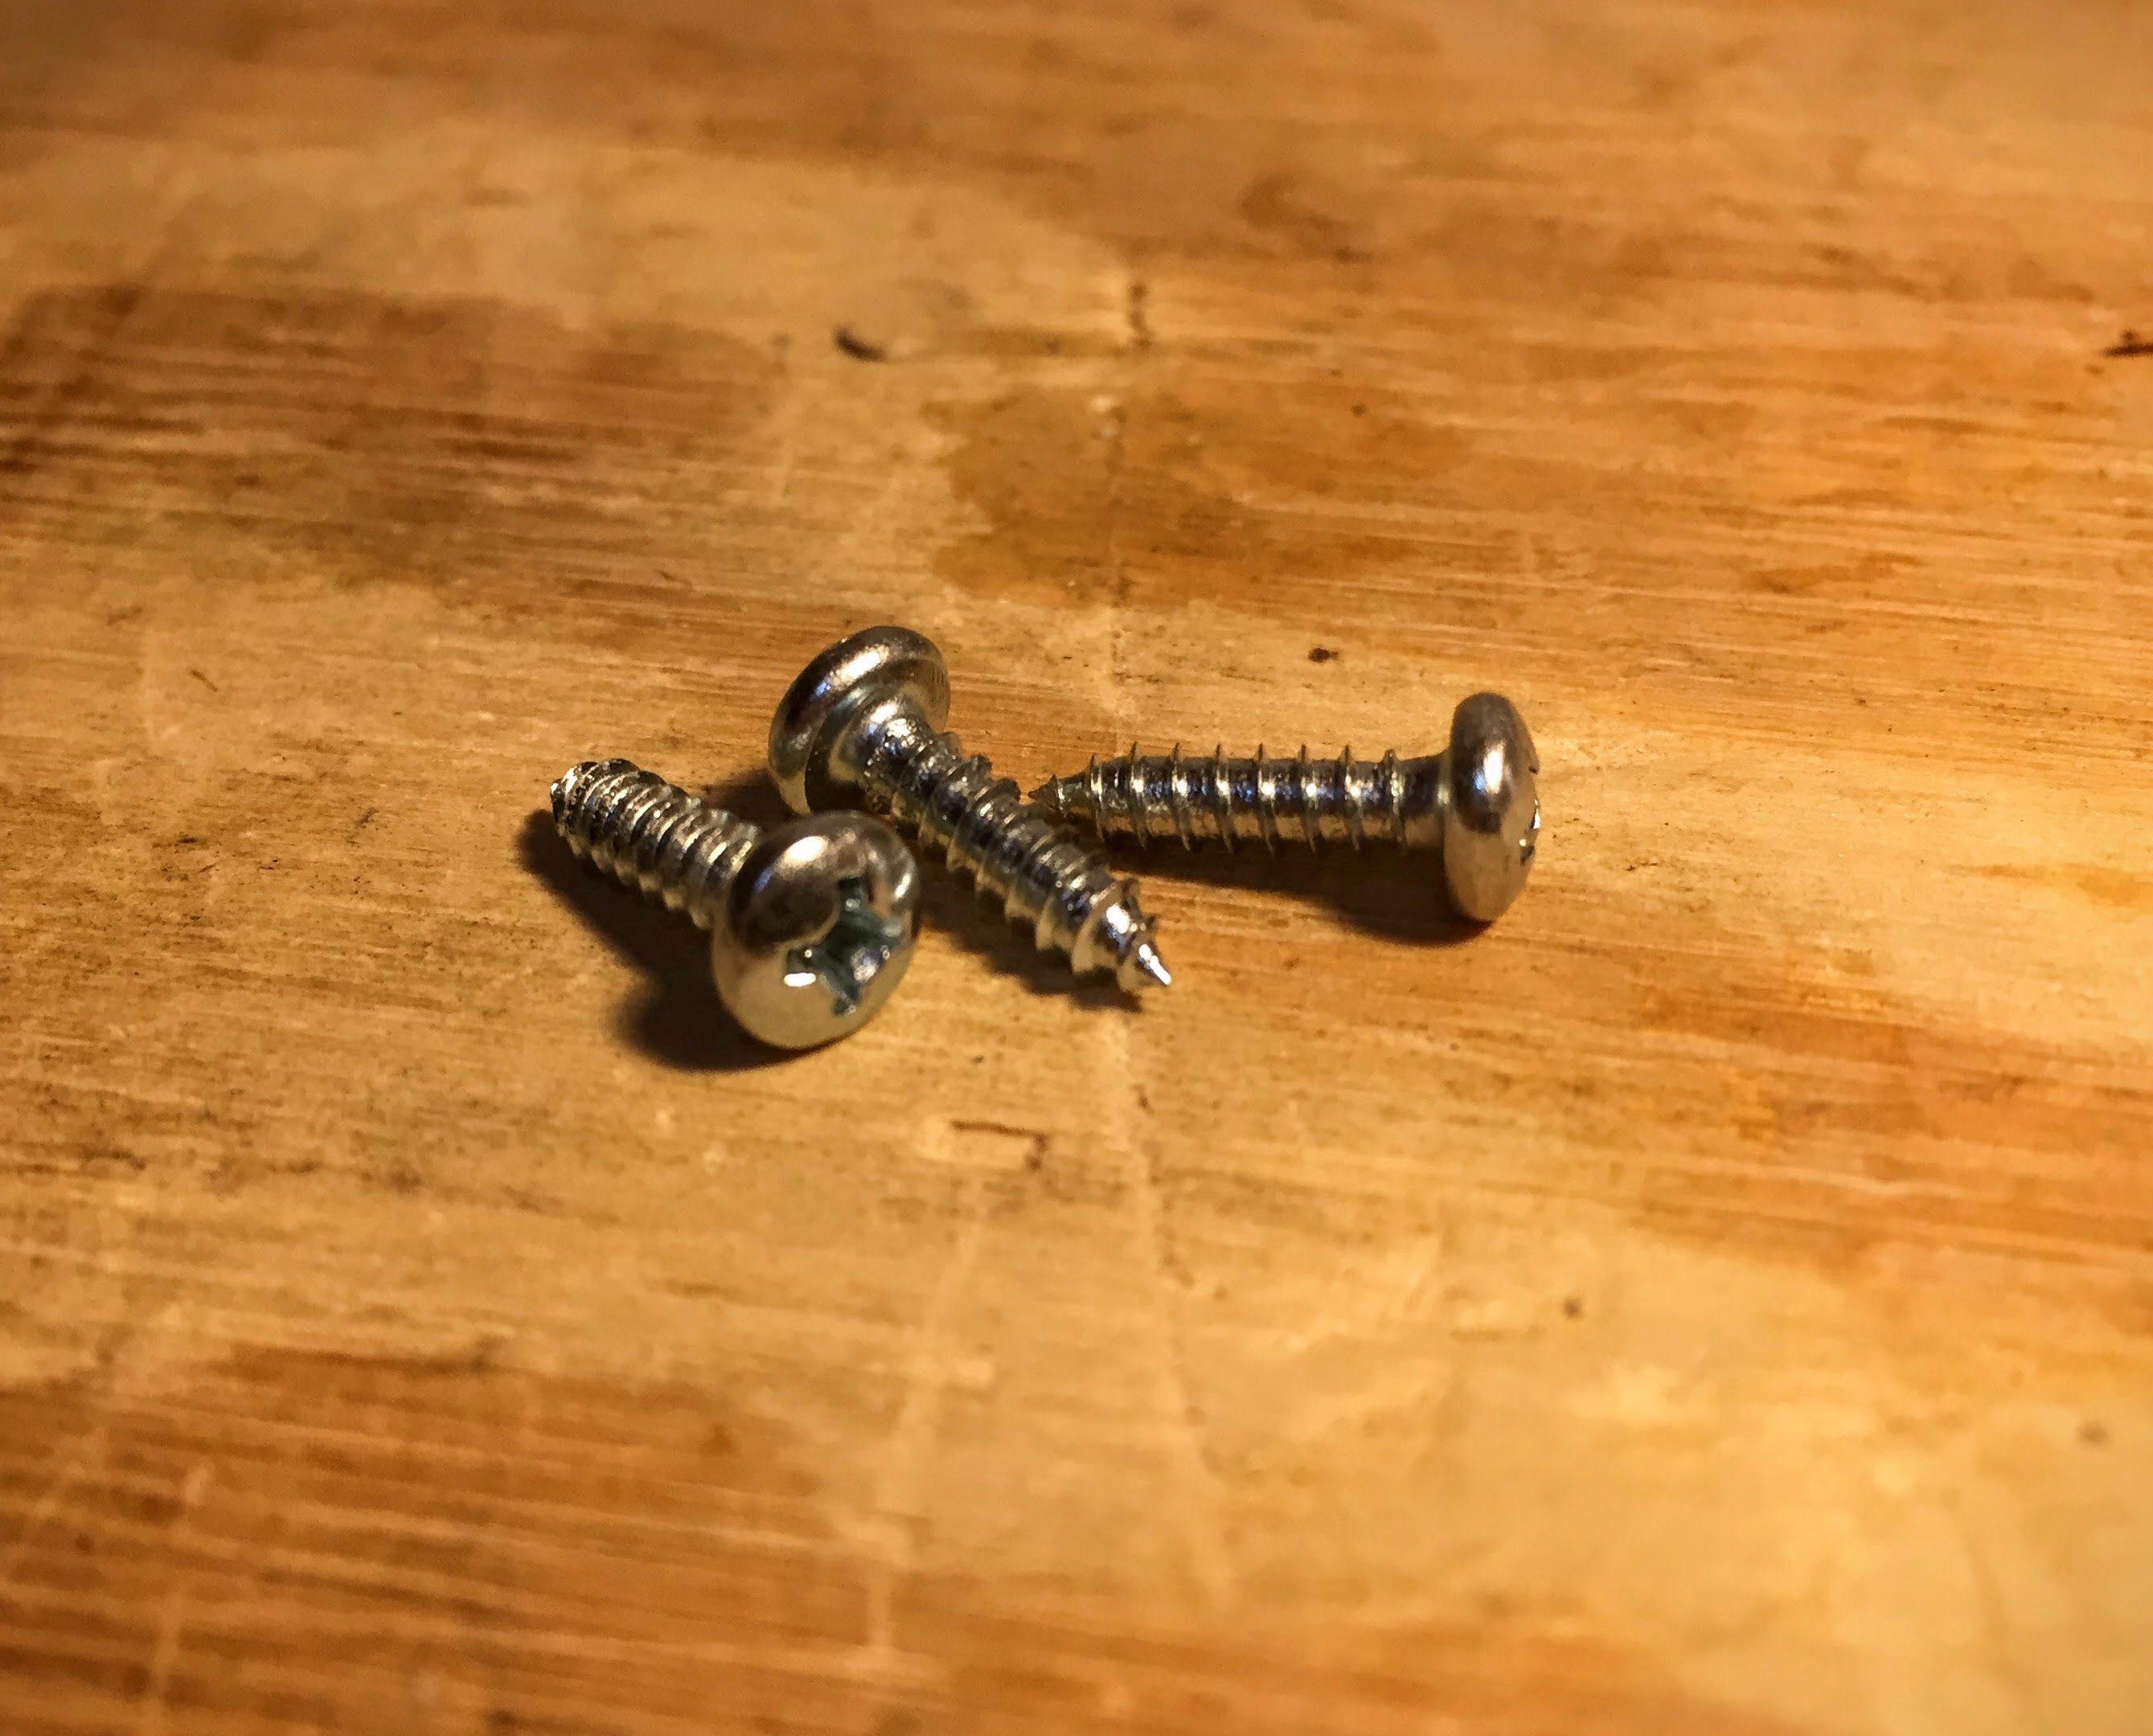
- 3/4″ (19mm) #10 wood screws with countersunk heads, qty. 2
- 1/2″ (13mm) #6 round-head screws, qty. 3
- sandpaper (2 different grits works well, such as 80 and 220)
- painter’s tape
- boiled linseed oil
Now that we’ve got that out of the way, it’s time for you to start.
The Plan
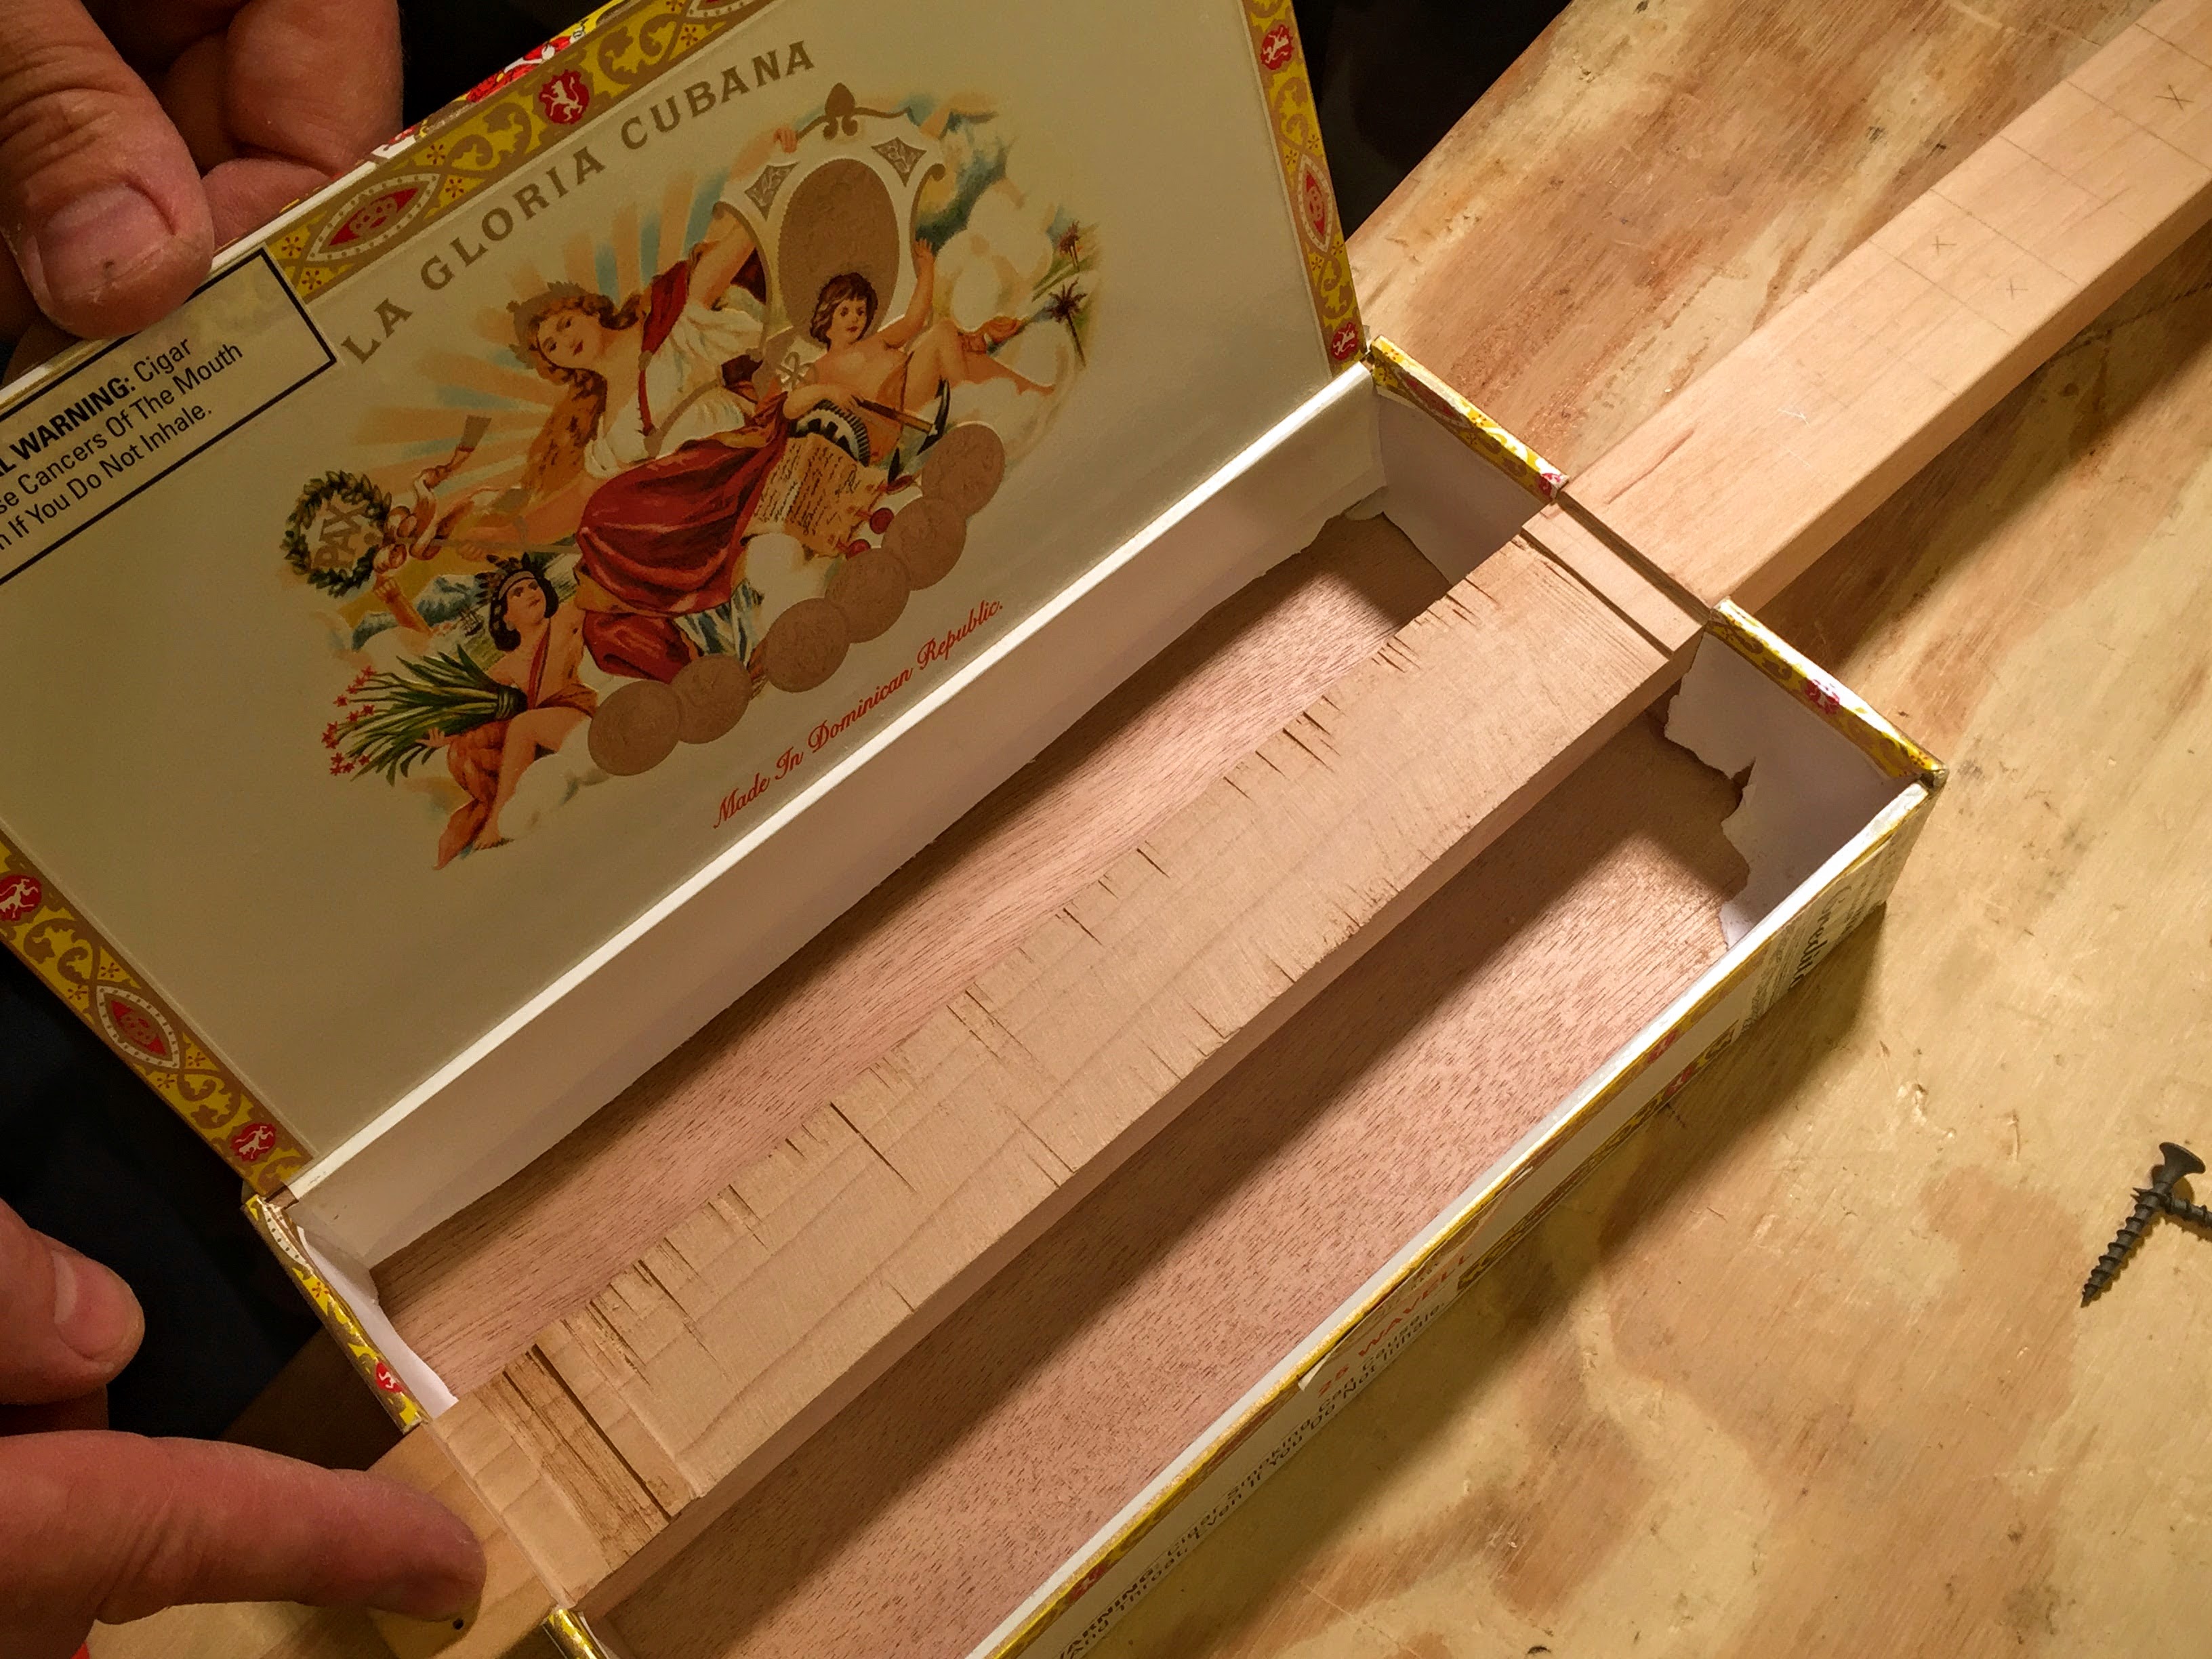
Notch the cigar box
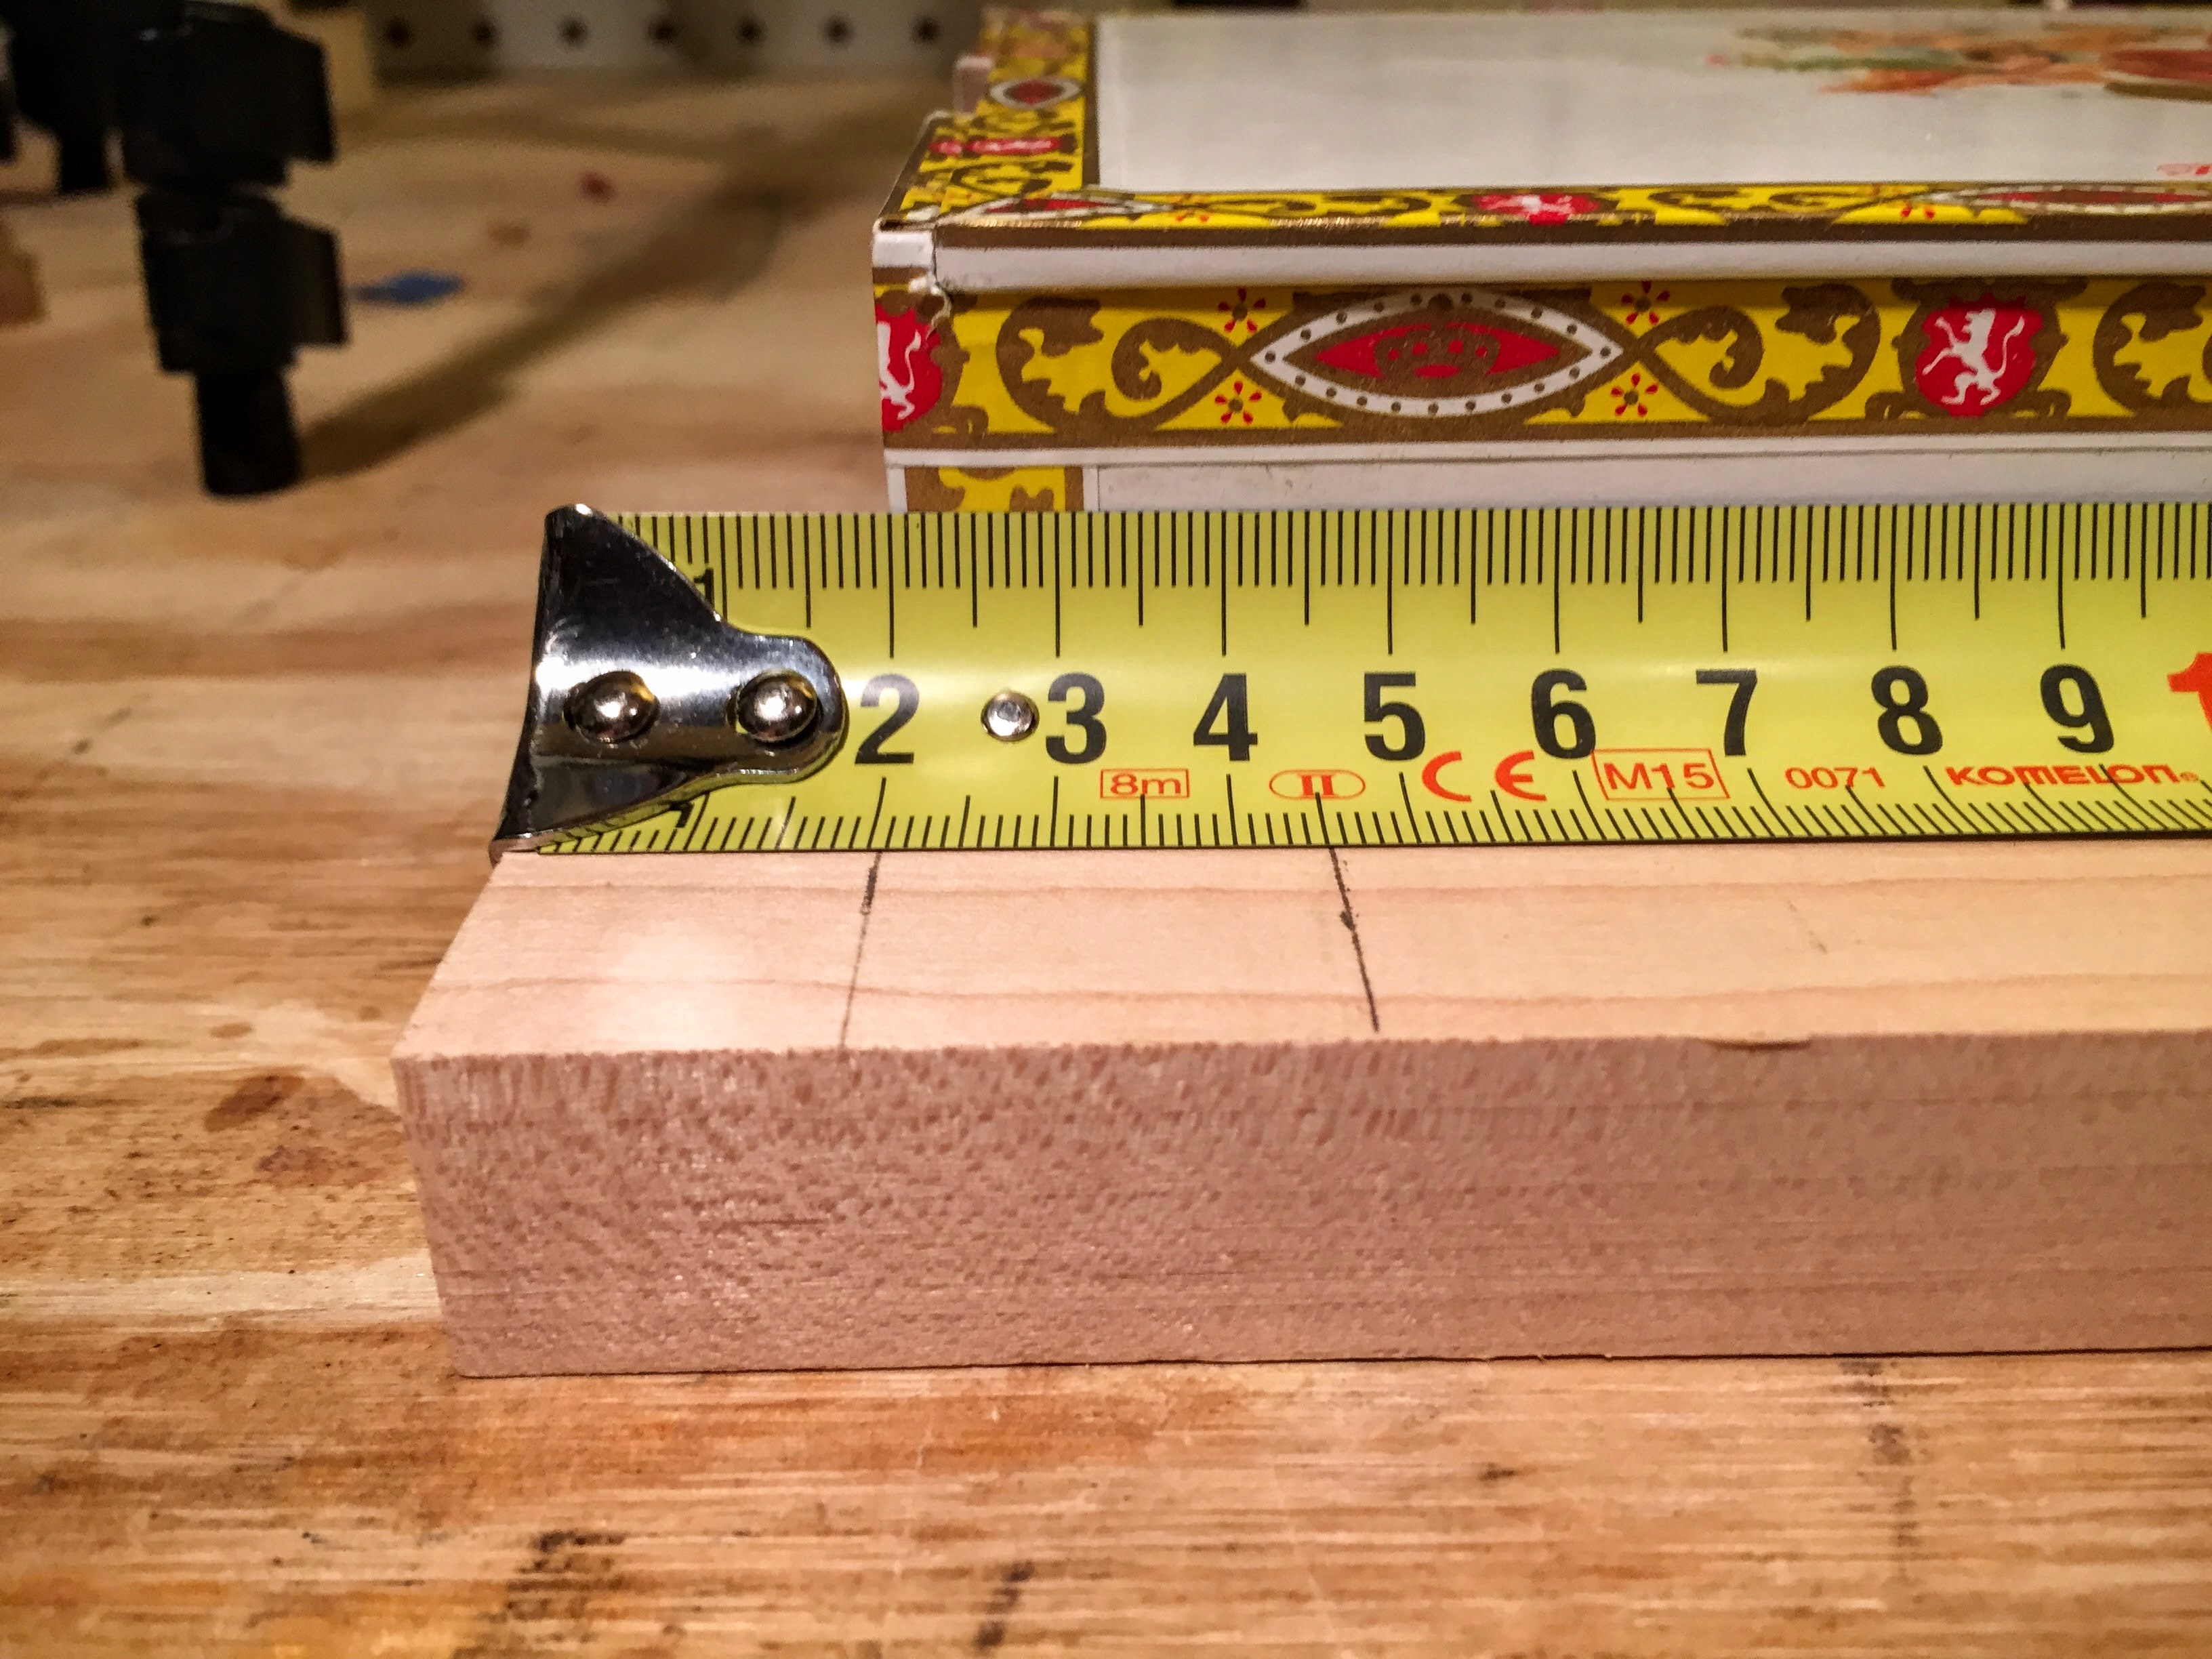
Find the center of one end of the box using the box lid as the top edge.
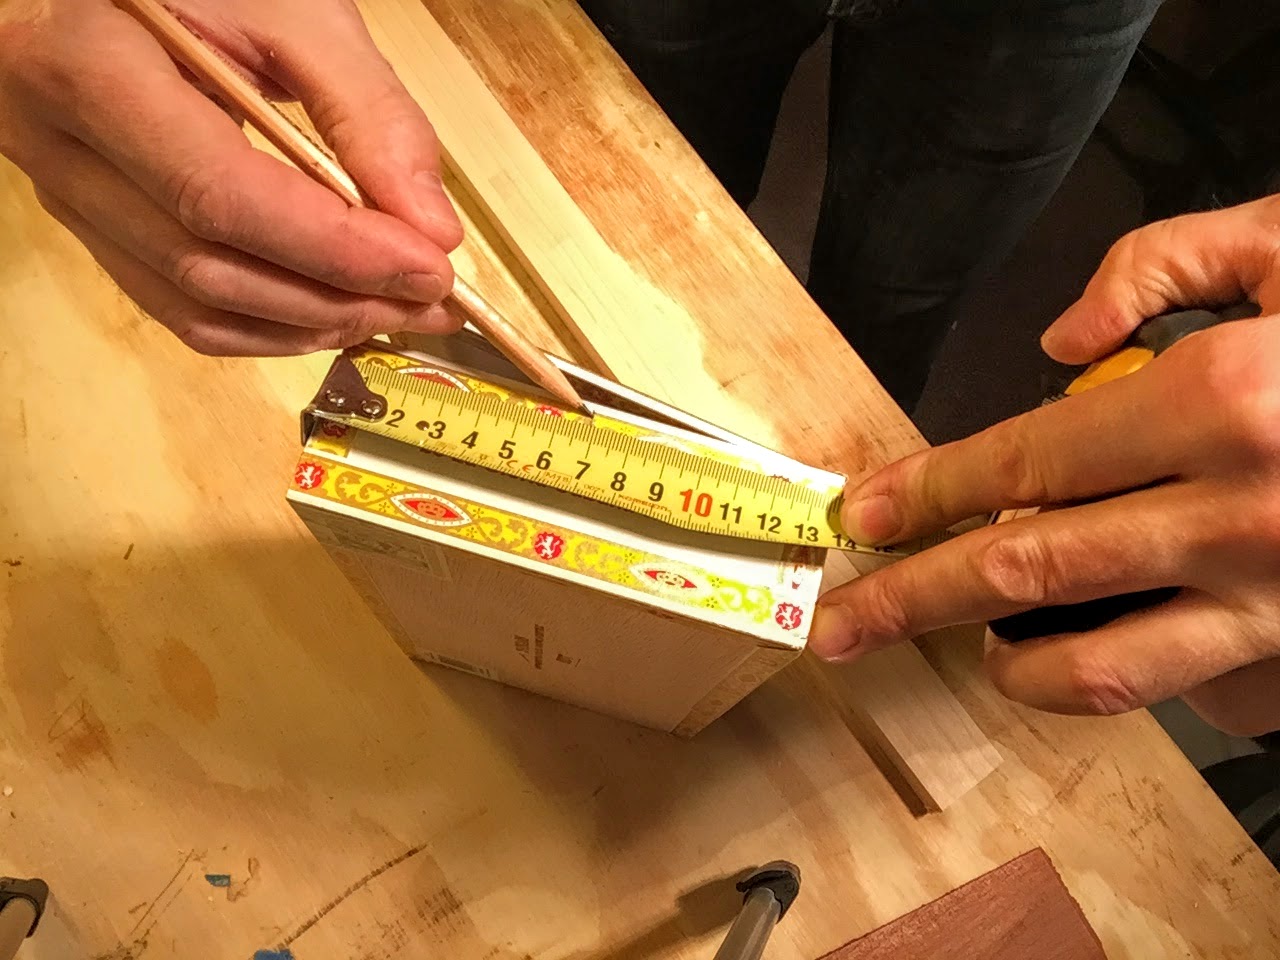
Measure 3/4” (19mm) to both sides of the center.
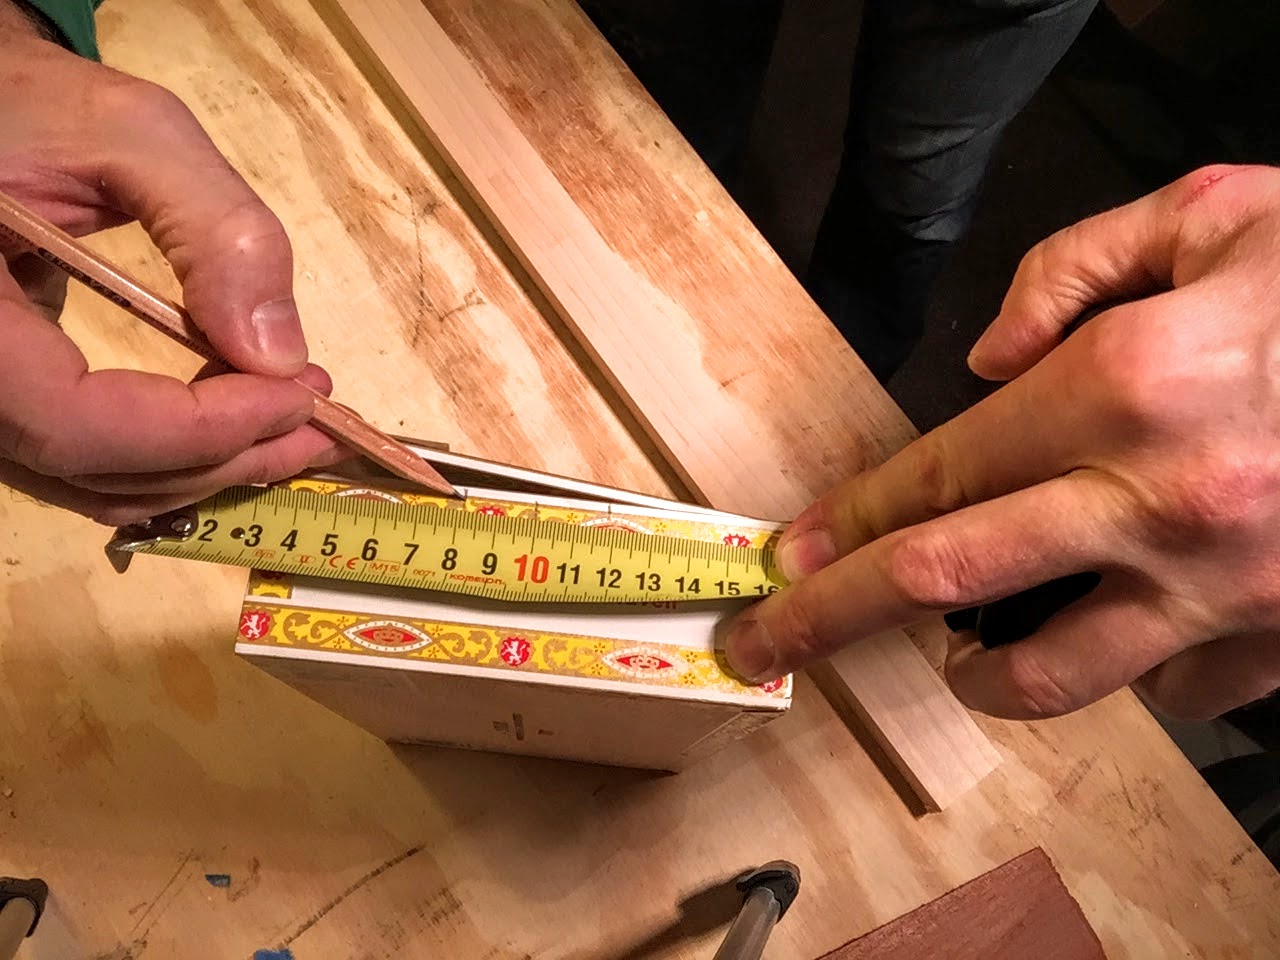
From those two points on both sides of the center, measure down from the box lid 3/4” (19mm), drawing lines from both spots.
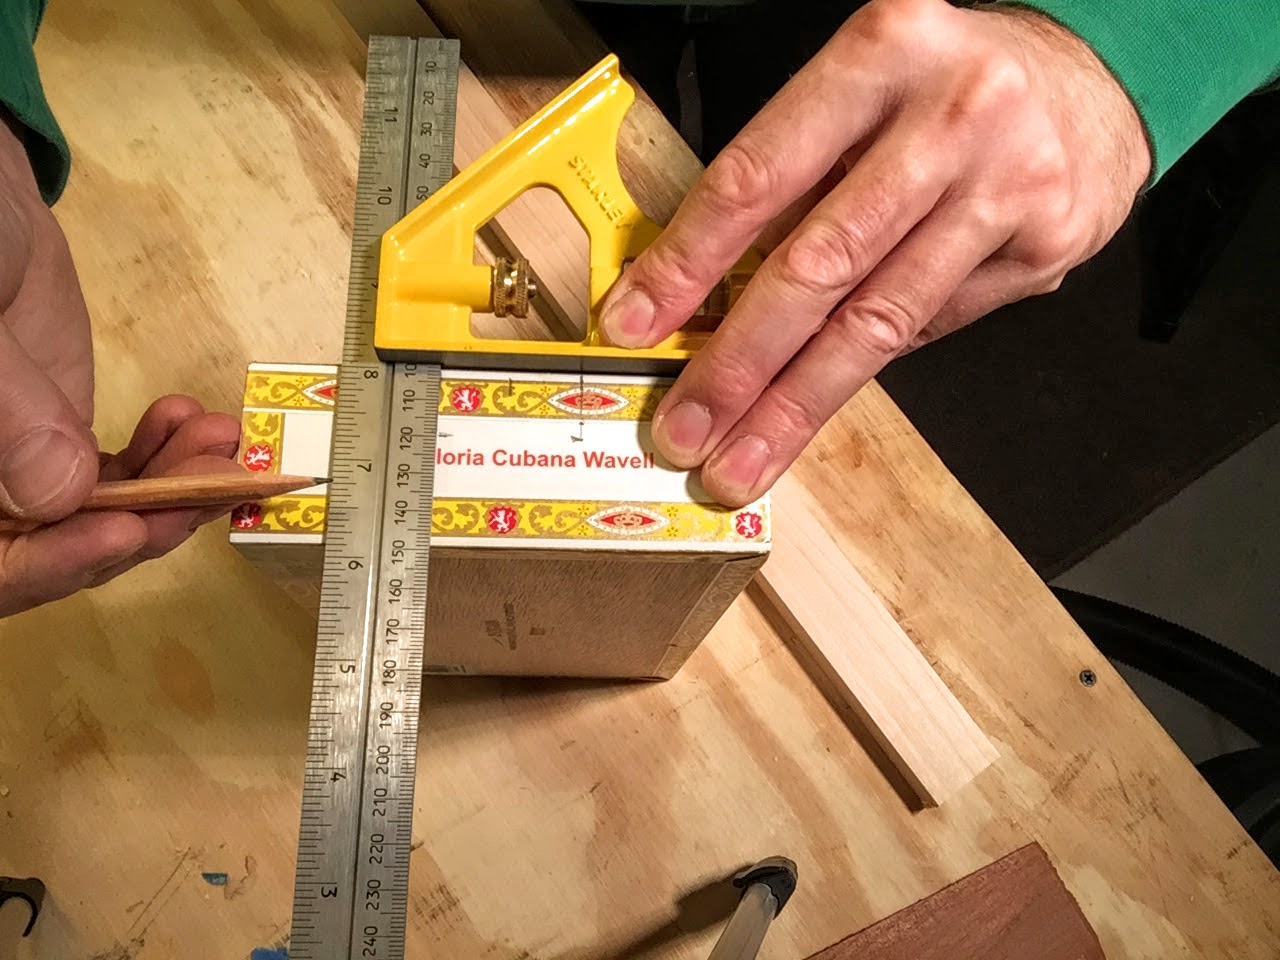
Connect those two lines. This will give you a rectangular space that’s 3/4” (19mm) x 1 1/2” (38mm).
Repeat on the other end of the box.
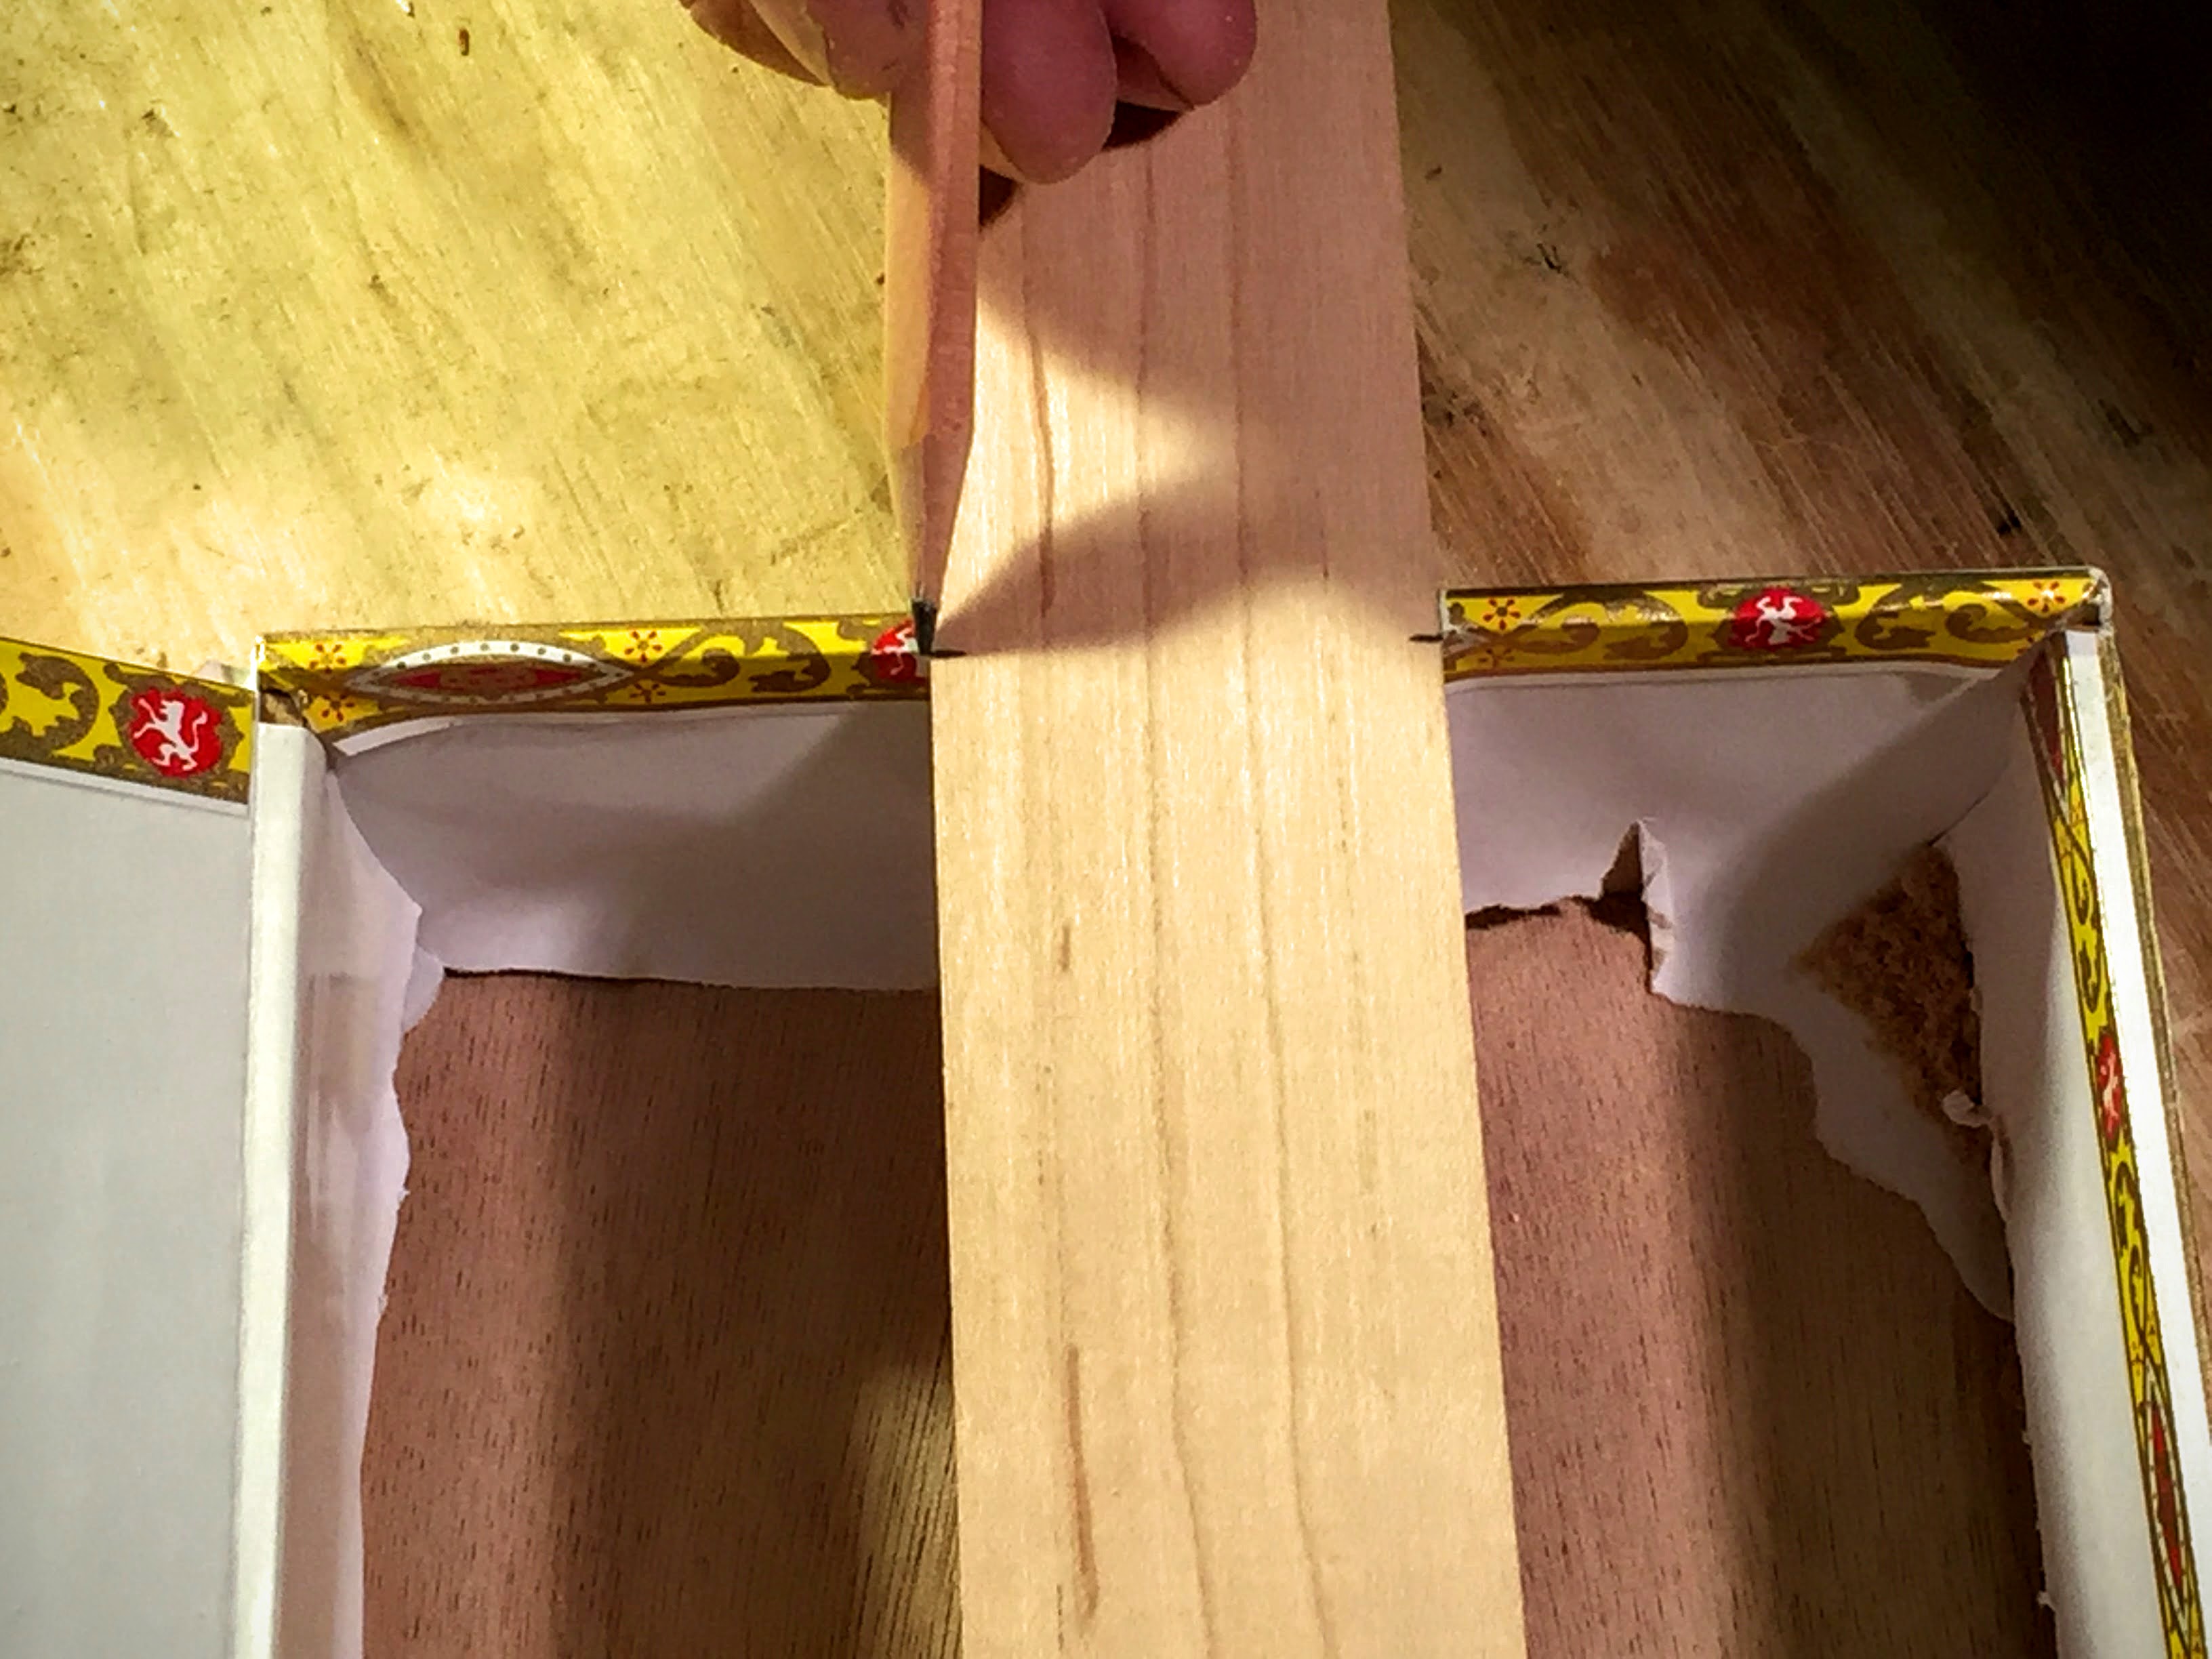
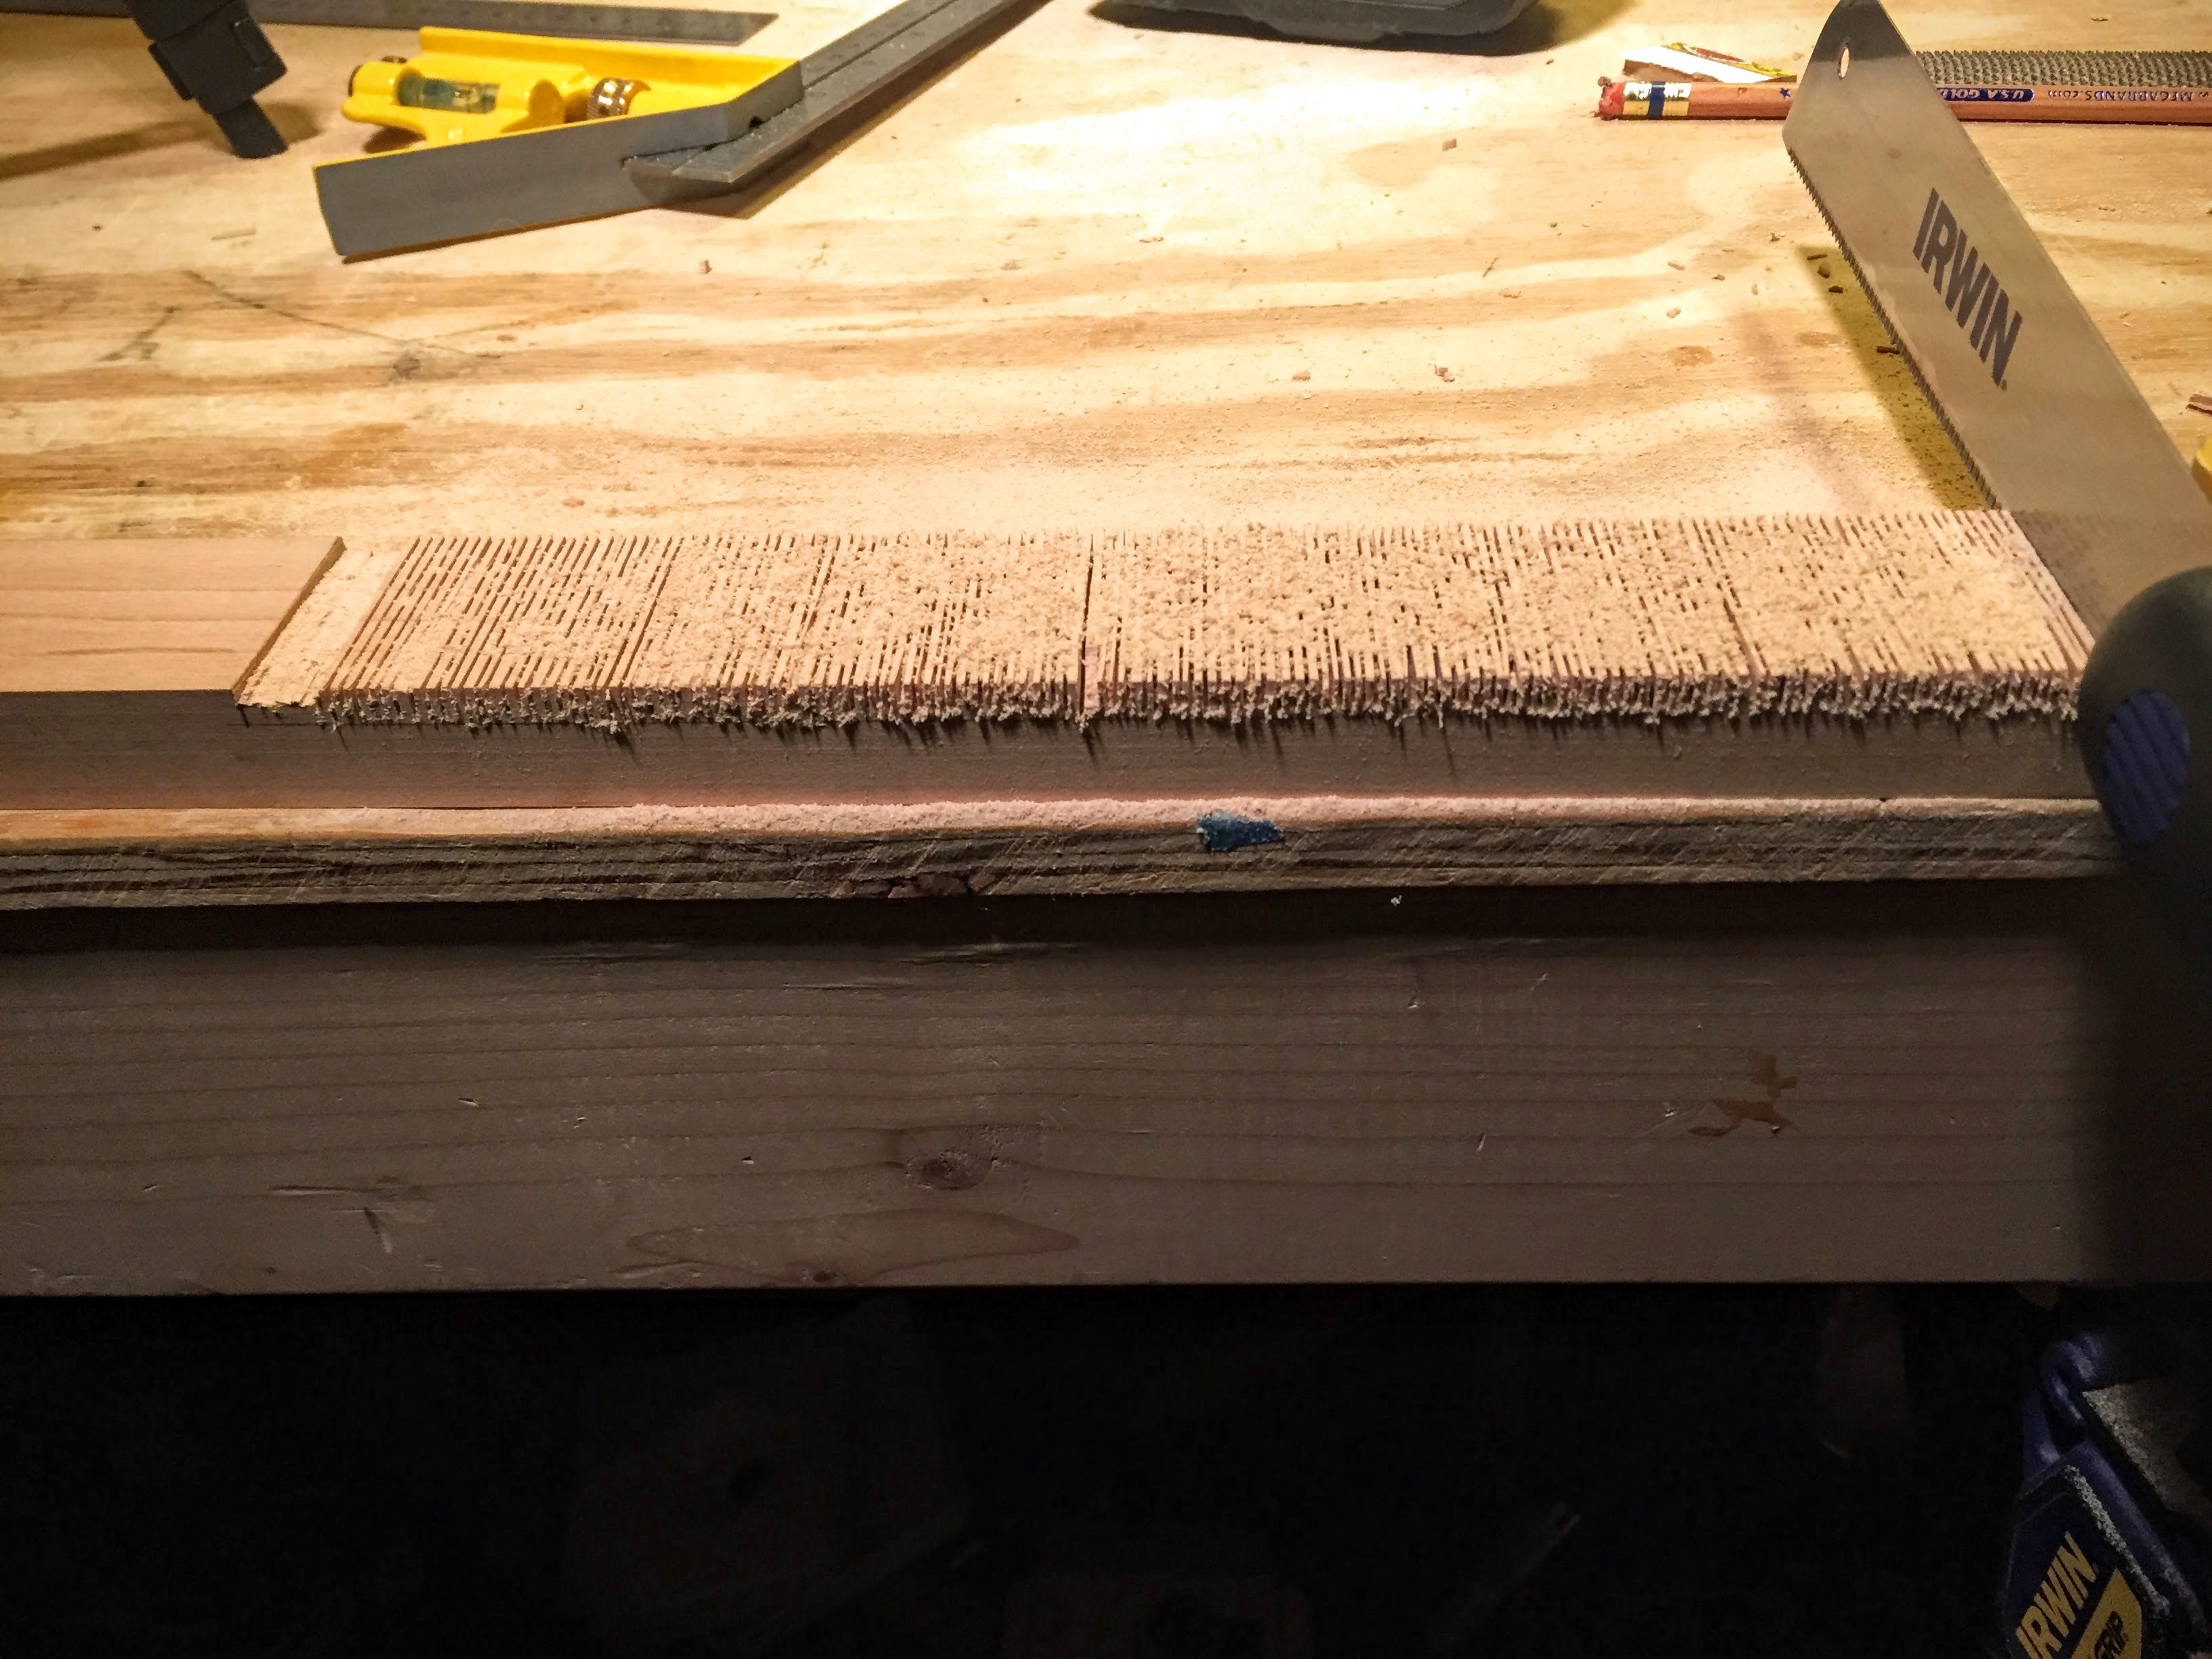
Use the razor knife to score the lines you’ve drawn on both ends of the box.
Keep the scoring lines inside the drawn lines of the rectangle.

Use your handsaw to cut down the two shorter lines you’ve scored.
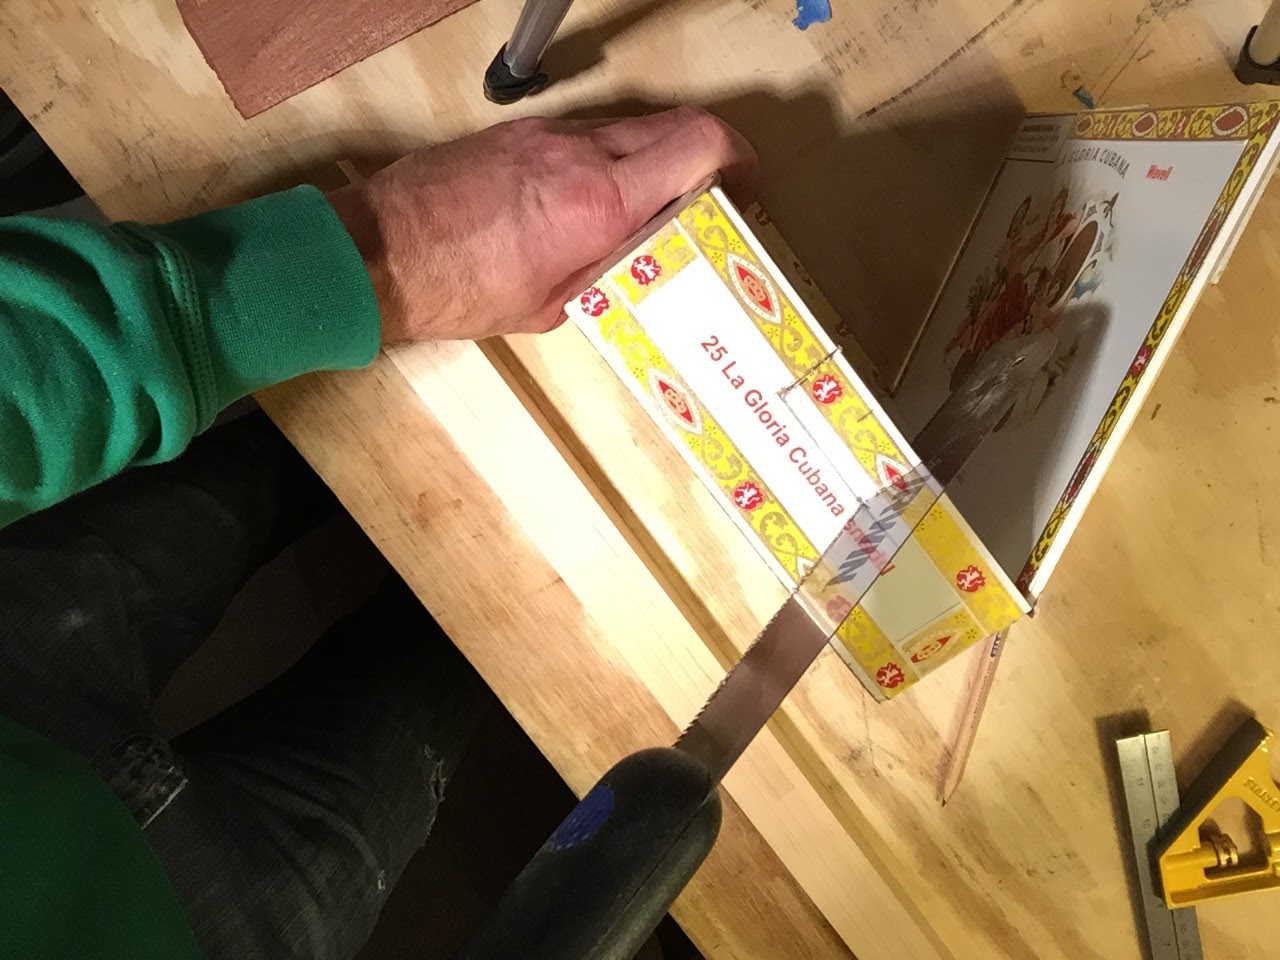
Use your razor knife to score the longer line, again keeping to the inside of the rectangle.
Continue to score that line, making deeper cuts with each pass, until you can break the rectangle free.
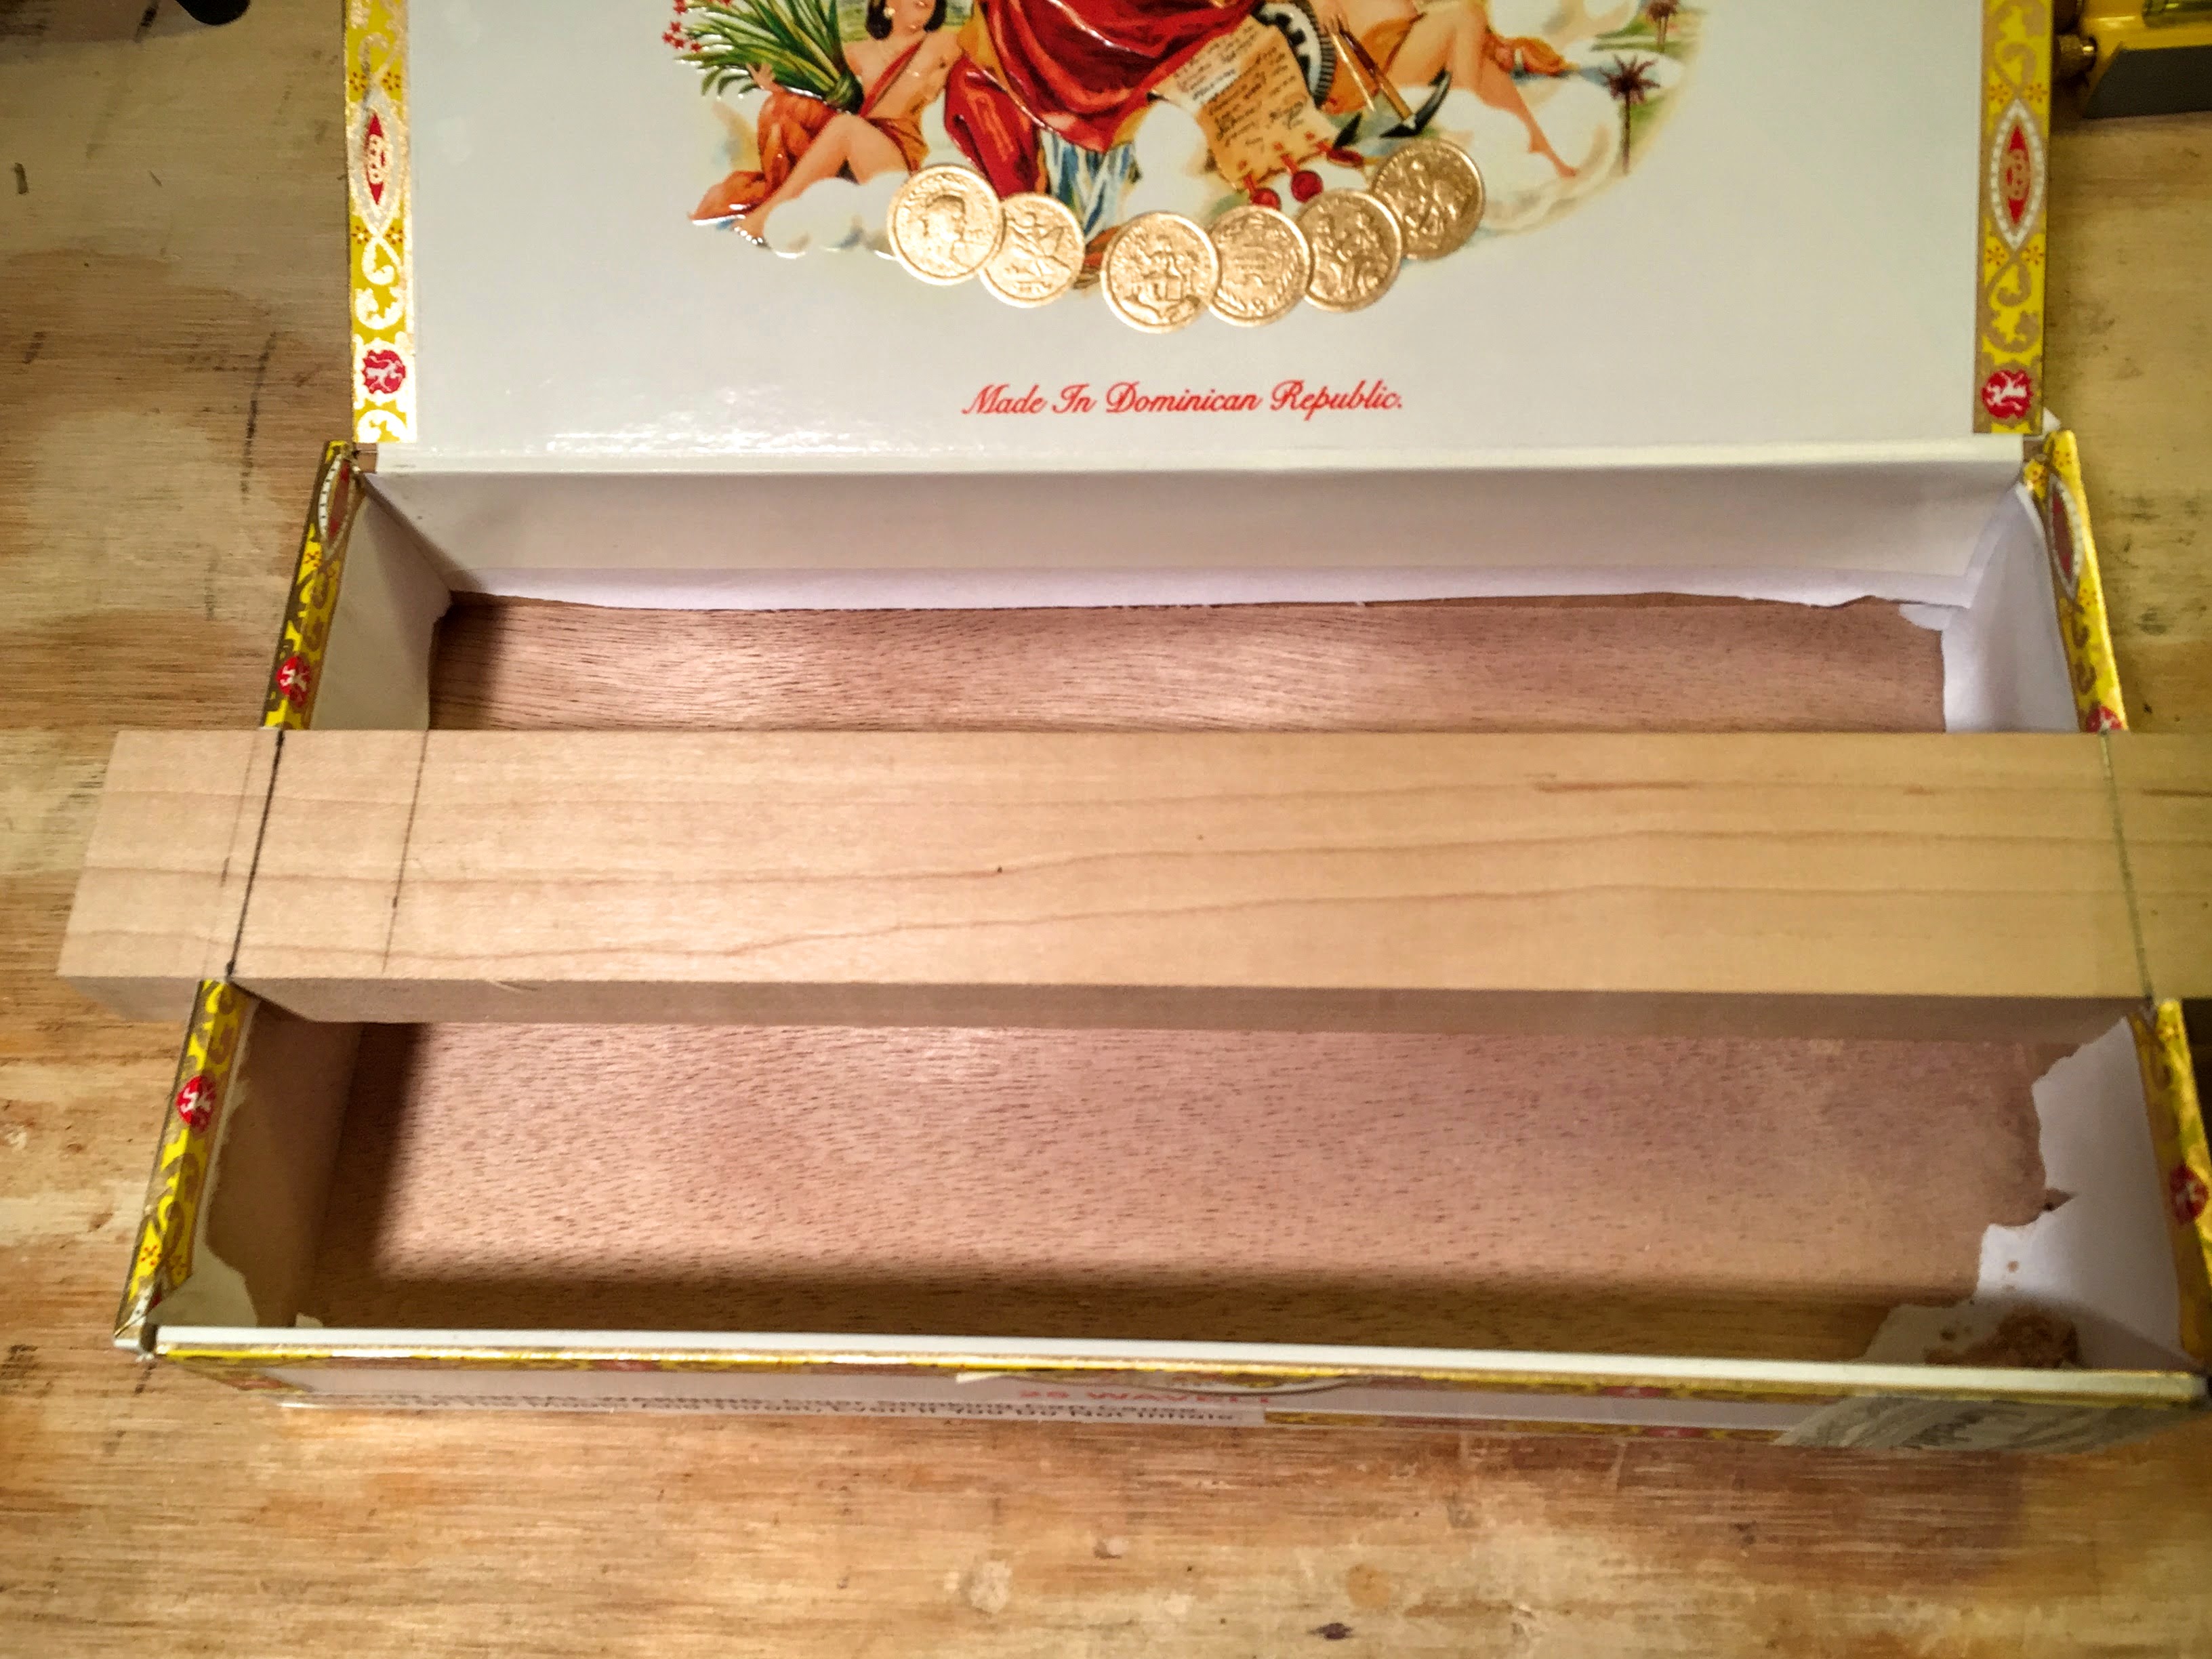
Use the file to smooth the edges of the rectangular space you’ve cut into the cigar box.
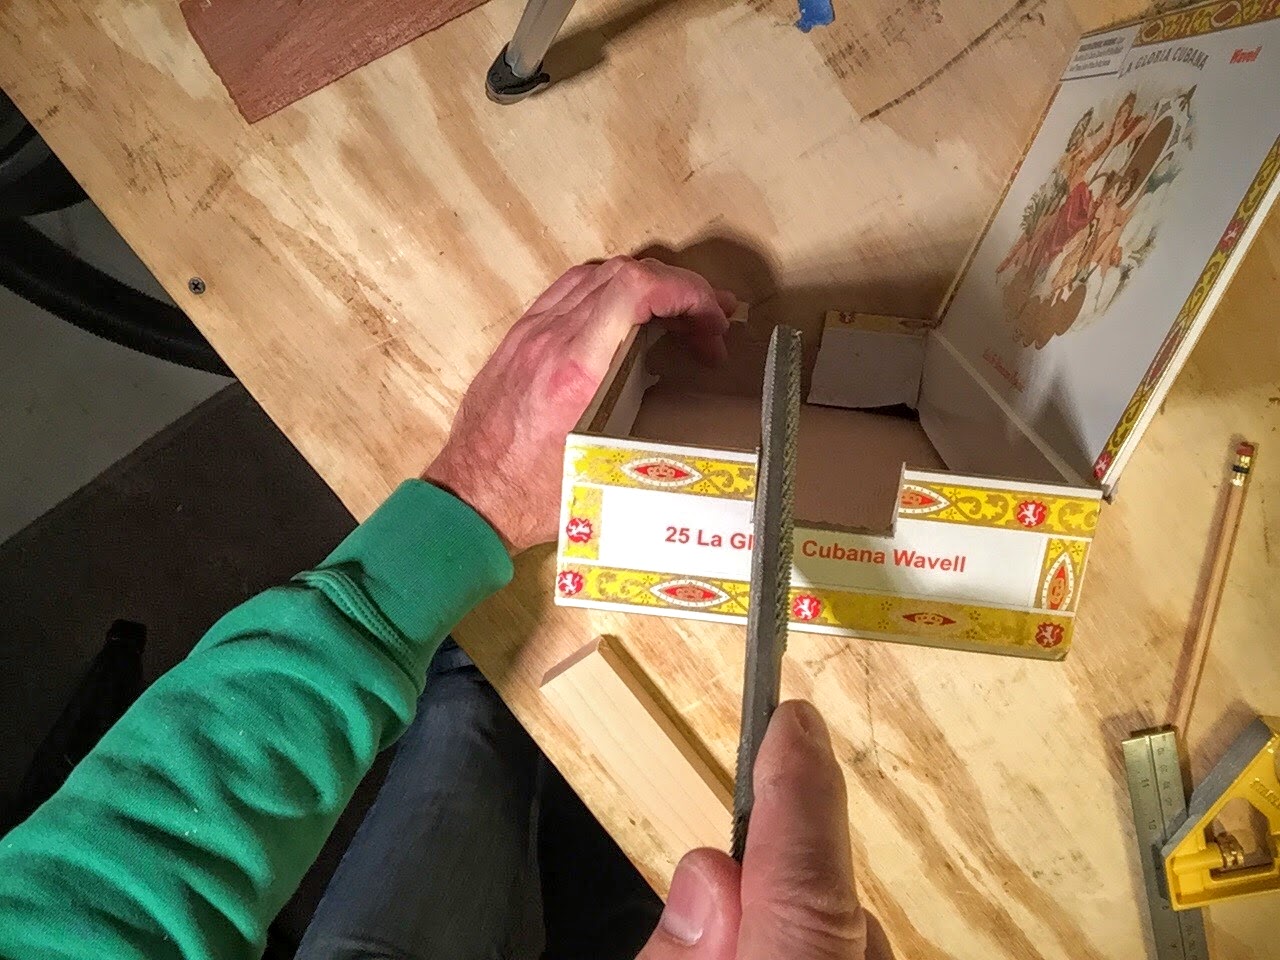
Use the length of hardwood/neck as a gauge.

Don’t file away too much of the box.
You want the neck to fit into the box without much room to wiggle.
You also want the neck to be even with the top of the box.
Map the headstock
Cut your length of hardwood down to 31” (785mm).
Choose one end of the neck to be the tail. The other end will be the headstock.
Choose one wider 1 1/2” (38mm) surface to be the top of the neck.
This is where your fingers and slide will be when playing.
The opposite surface will be the back of the neck where your thumb will be.
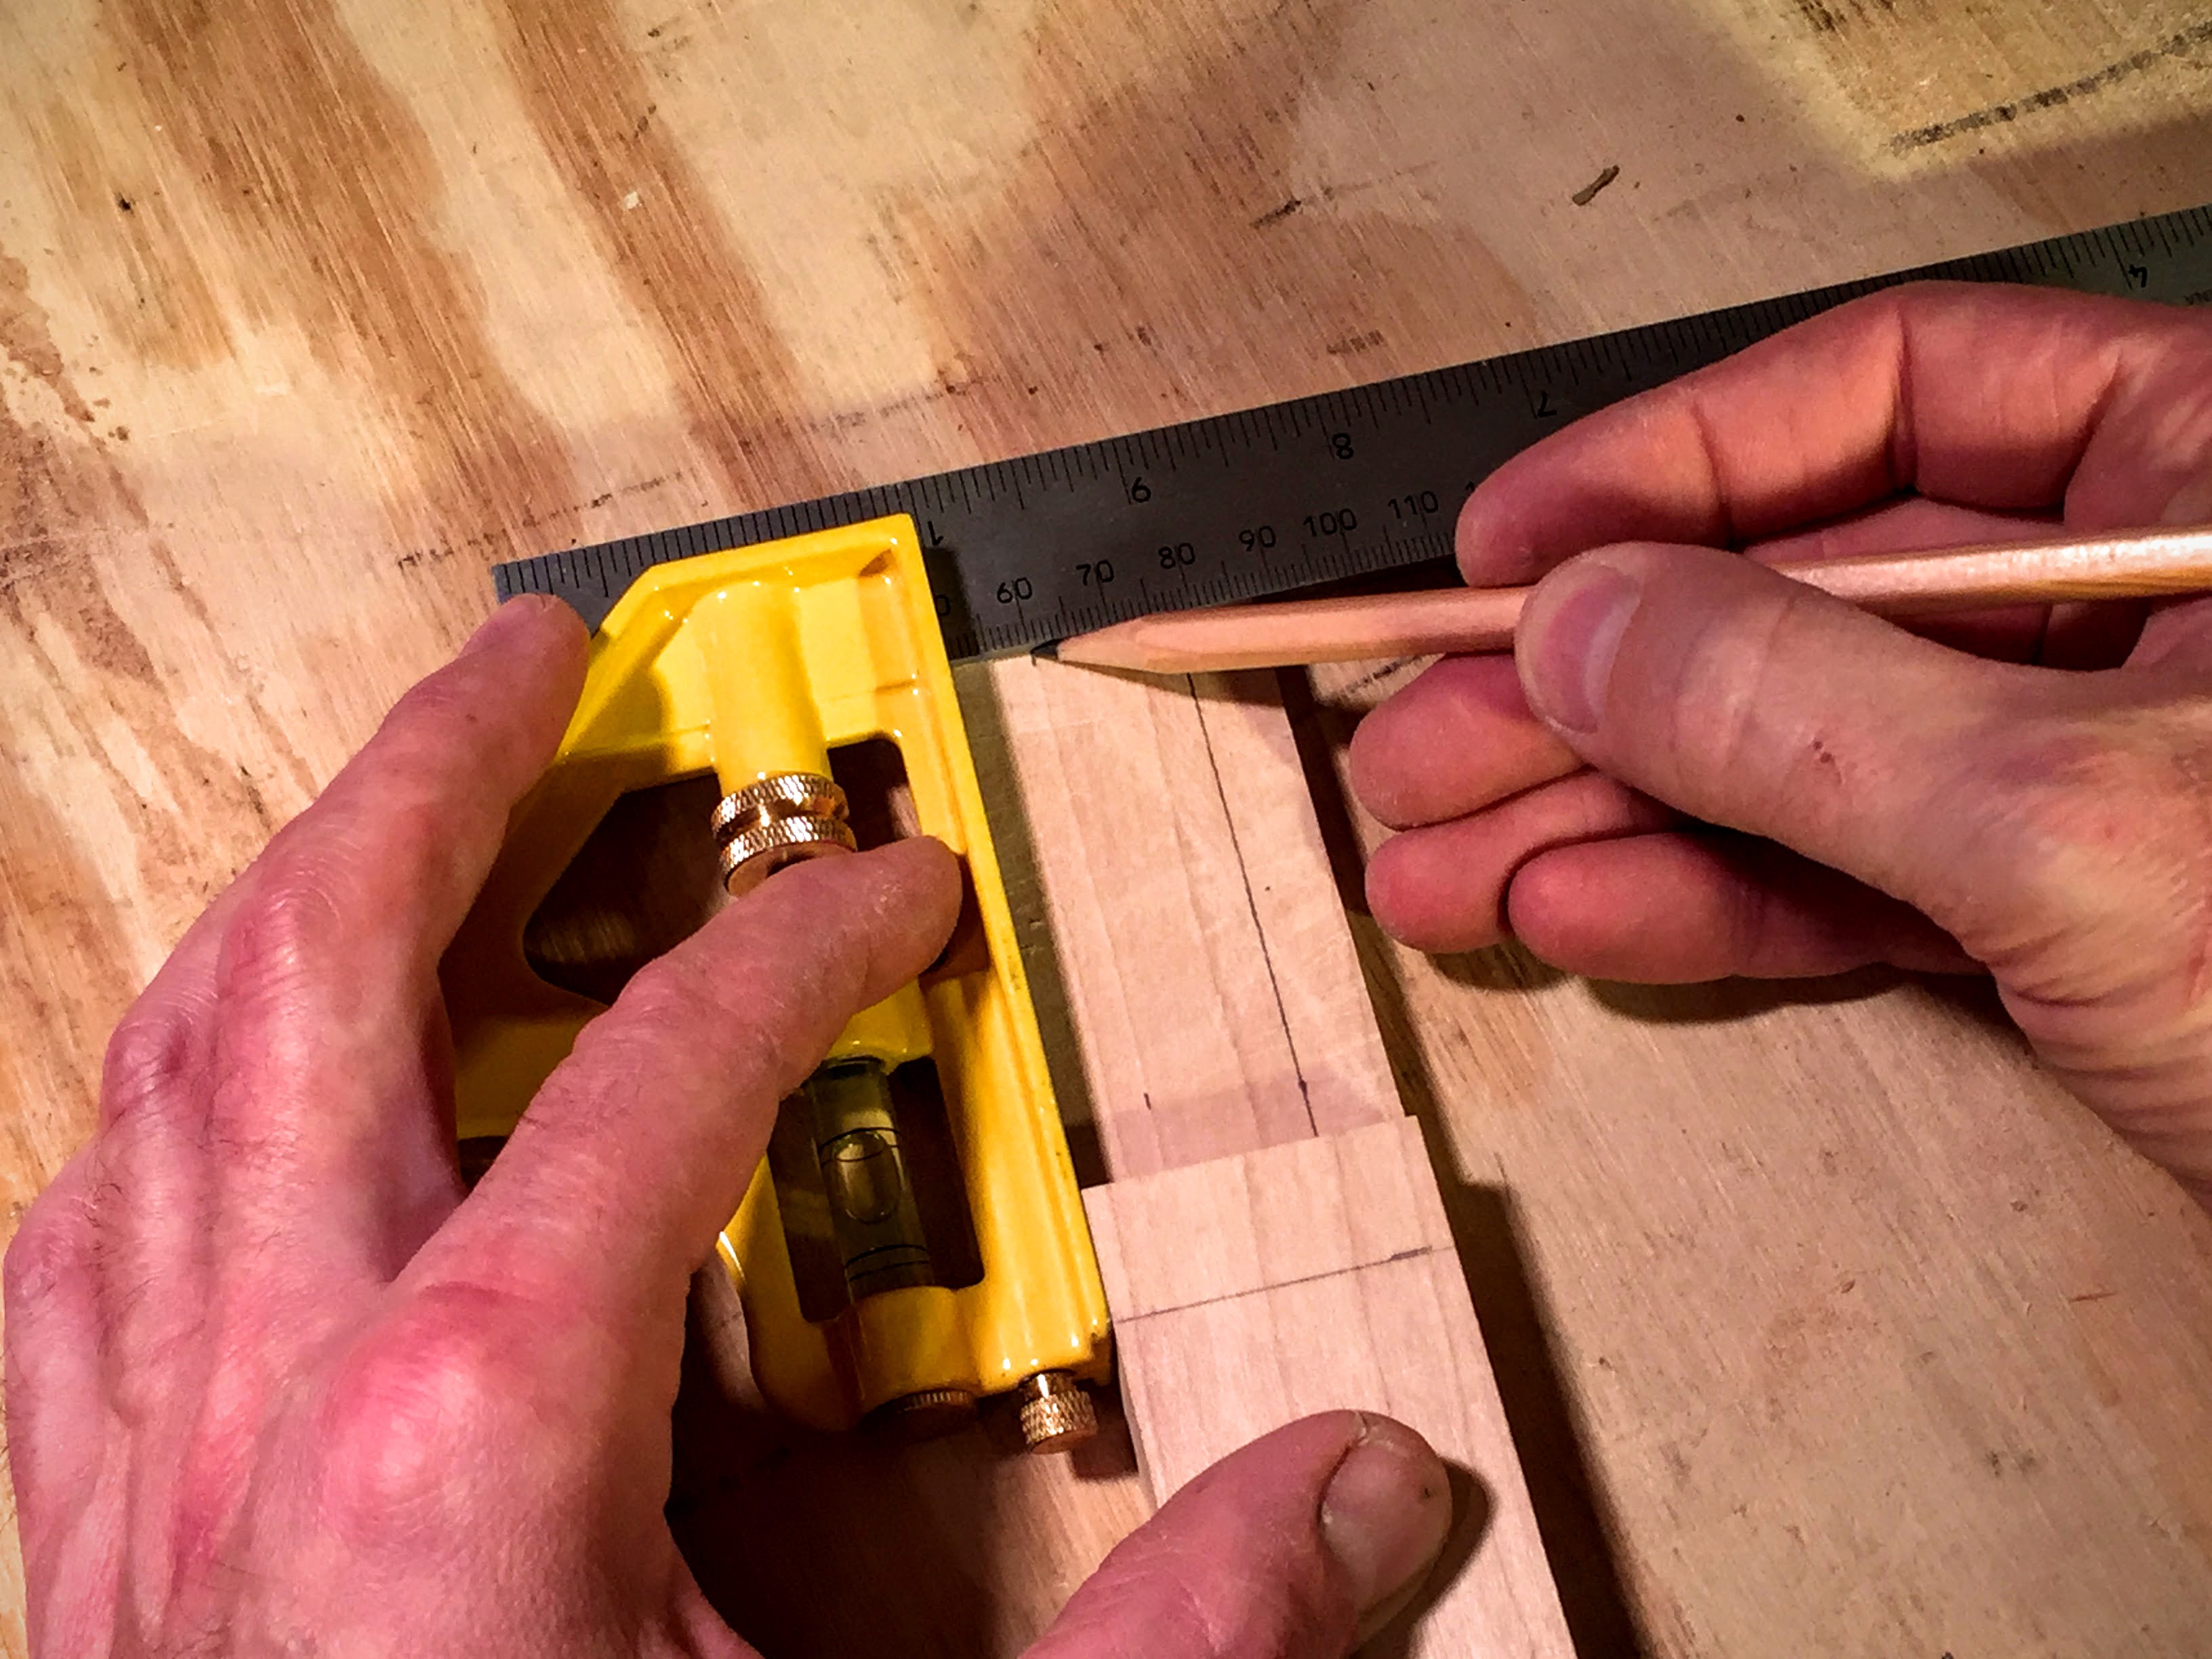
Measure up from the tail-end of the neck 3/4” (20mm) and draw a line on the top surface.
This will be where the back of the cigar box lines up.
Measure up from the tail end of the neck 1 3/4” (45mm) and draw a line on the top surface.
This is to help you see where the bridge bolt will be on the cigar box lid.
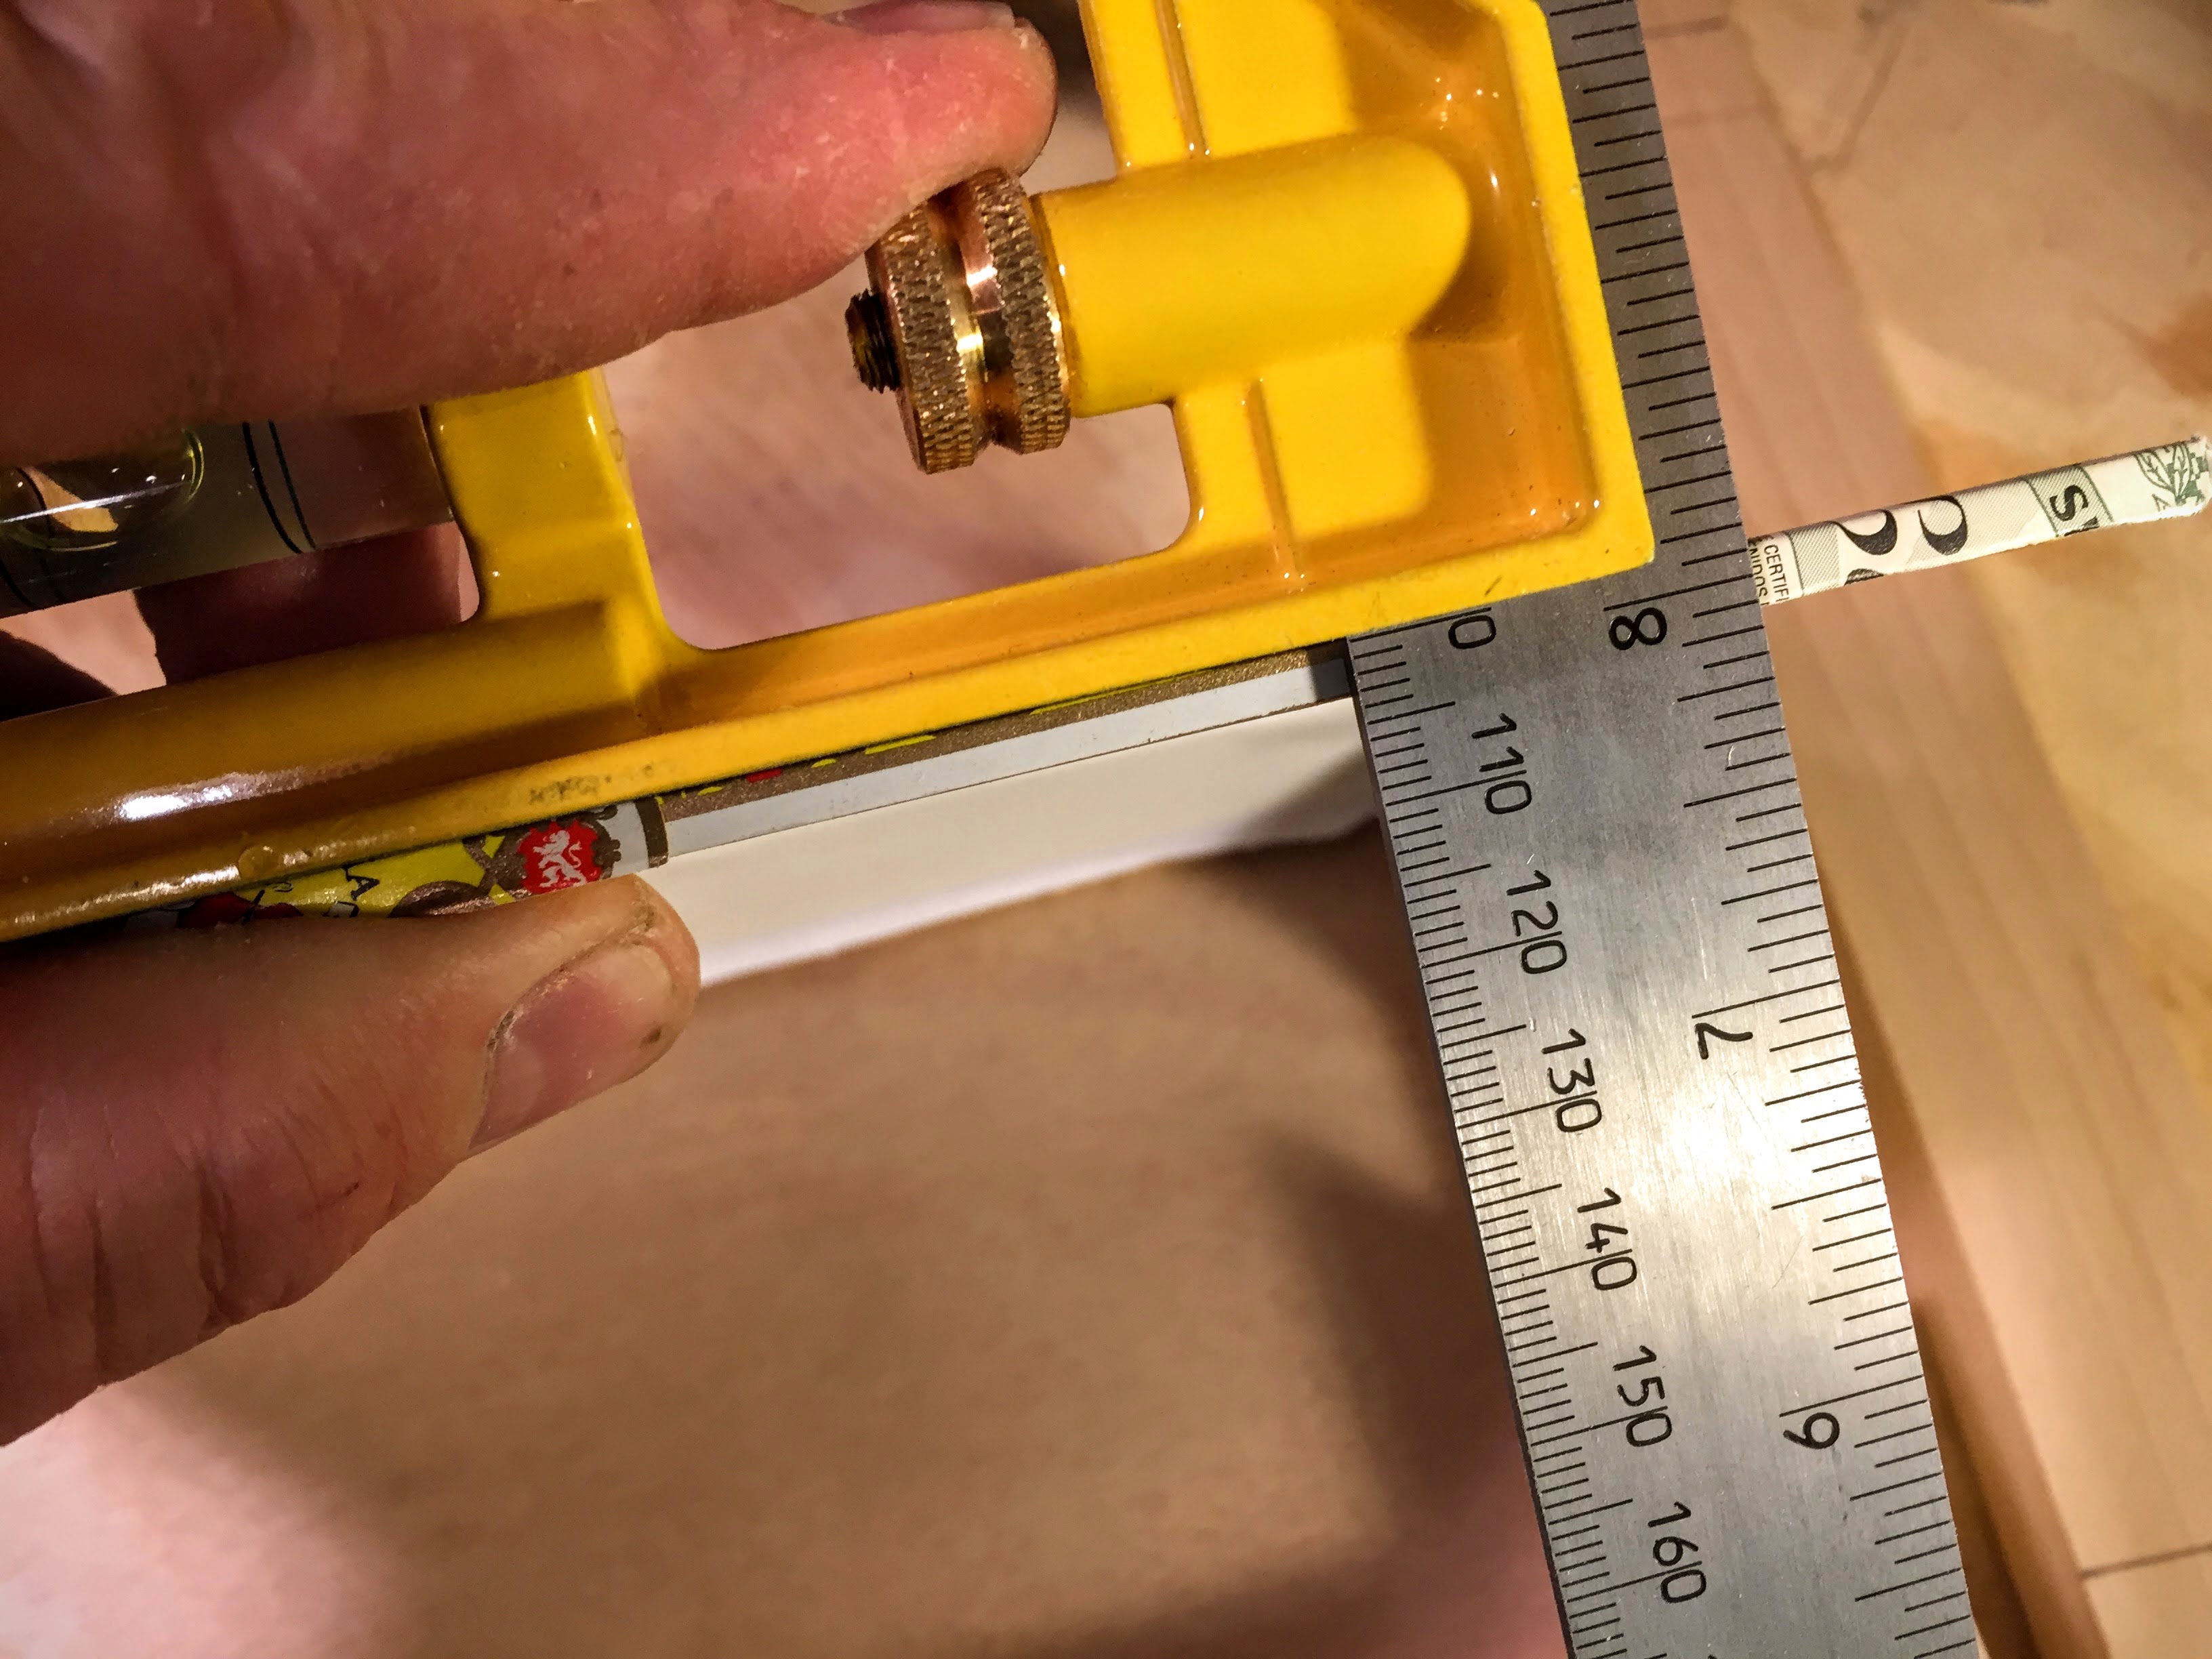
Measure up from the tail end 26 3/4” (680mm) and draw a line on the top surface of the neck.
This line will be where the nut-bolt will be placed.
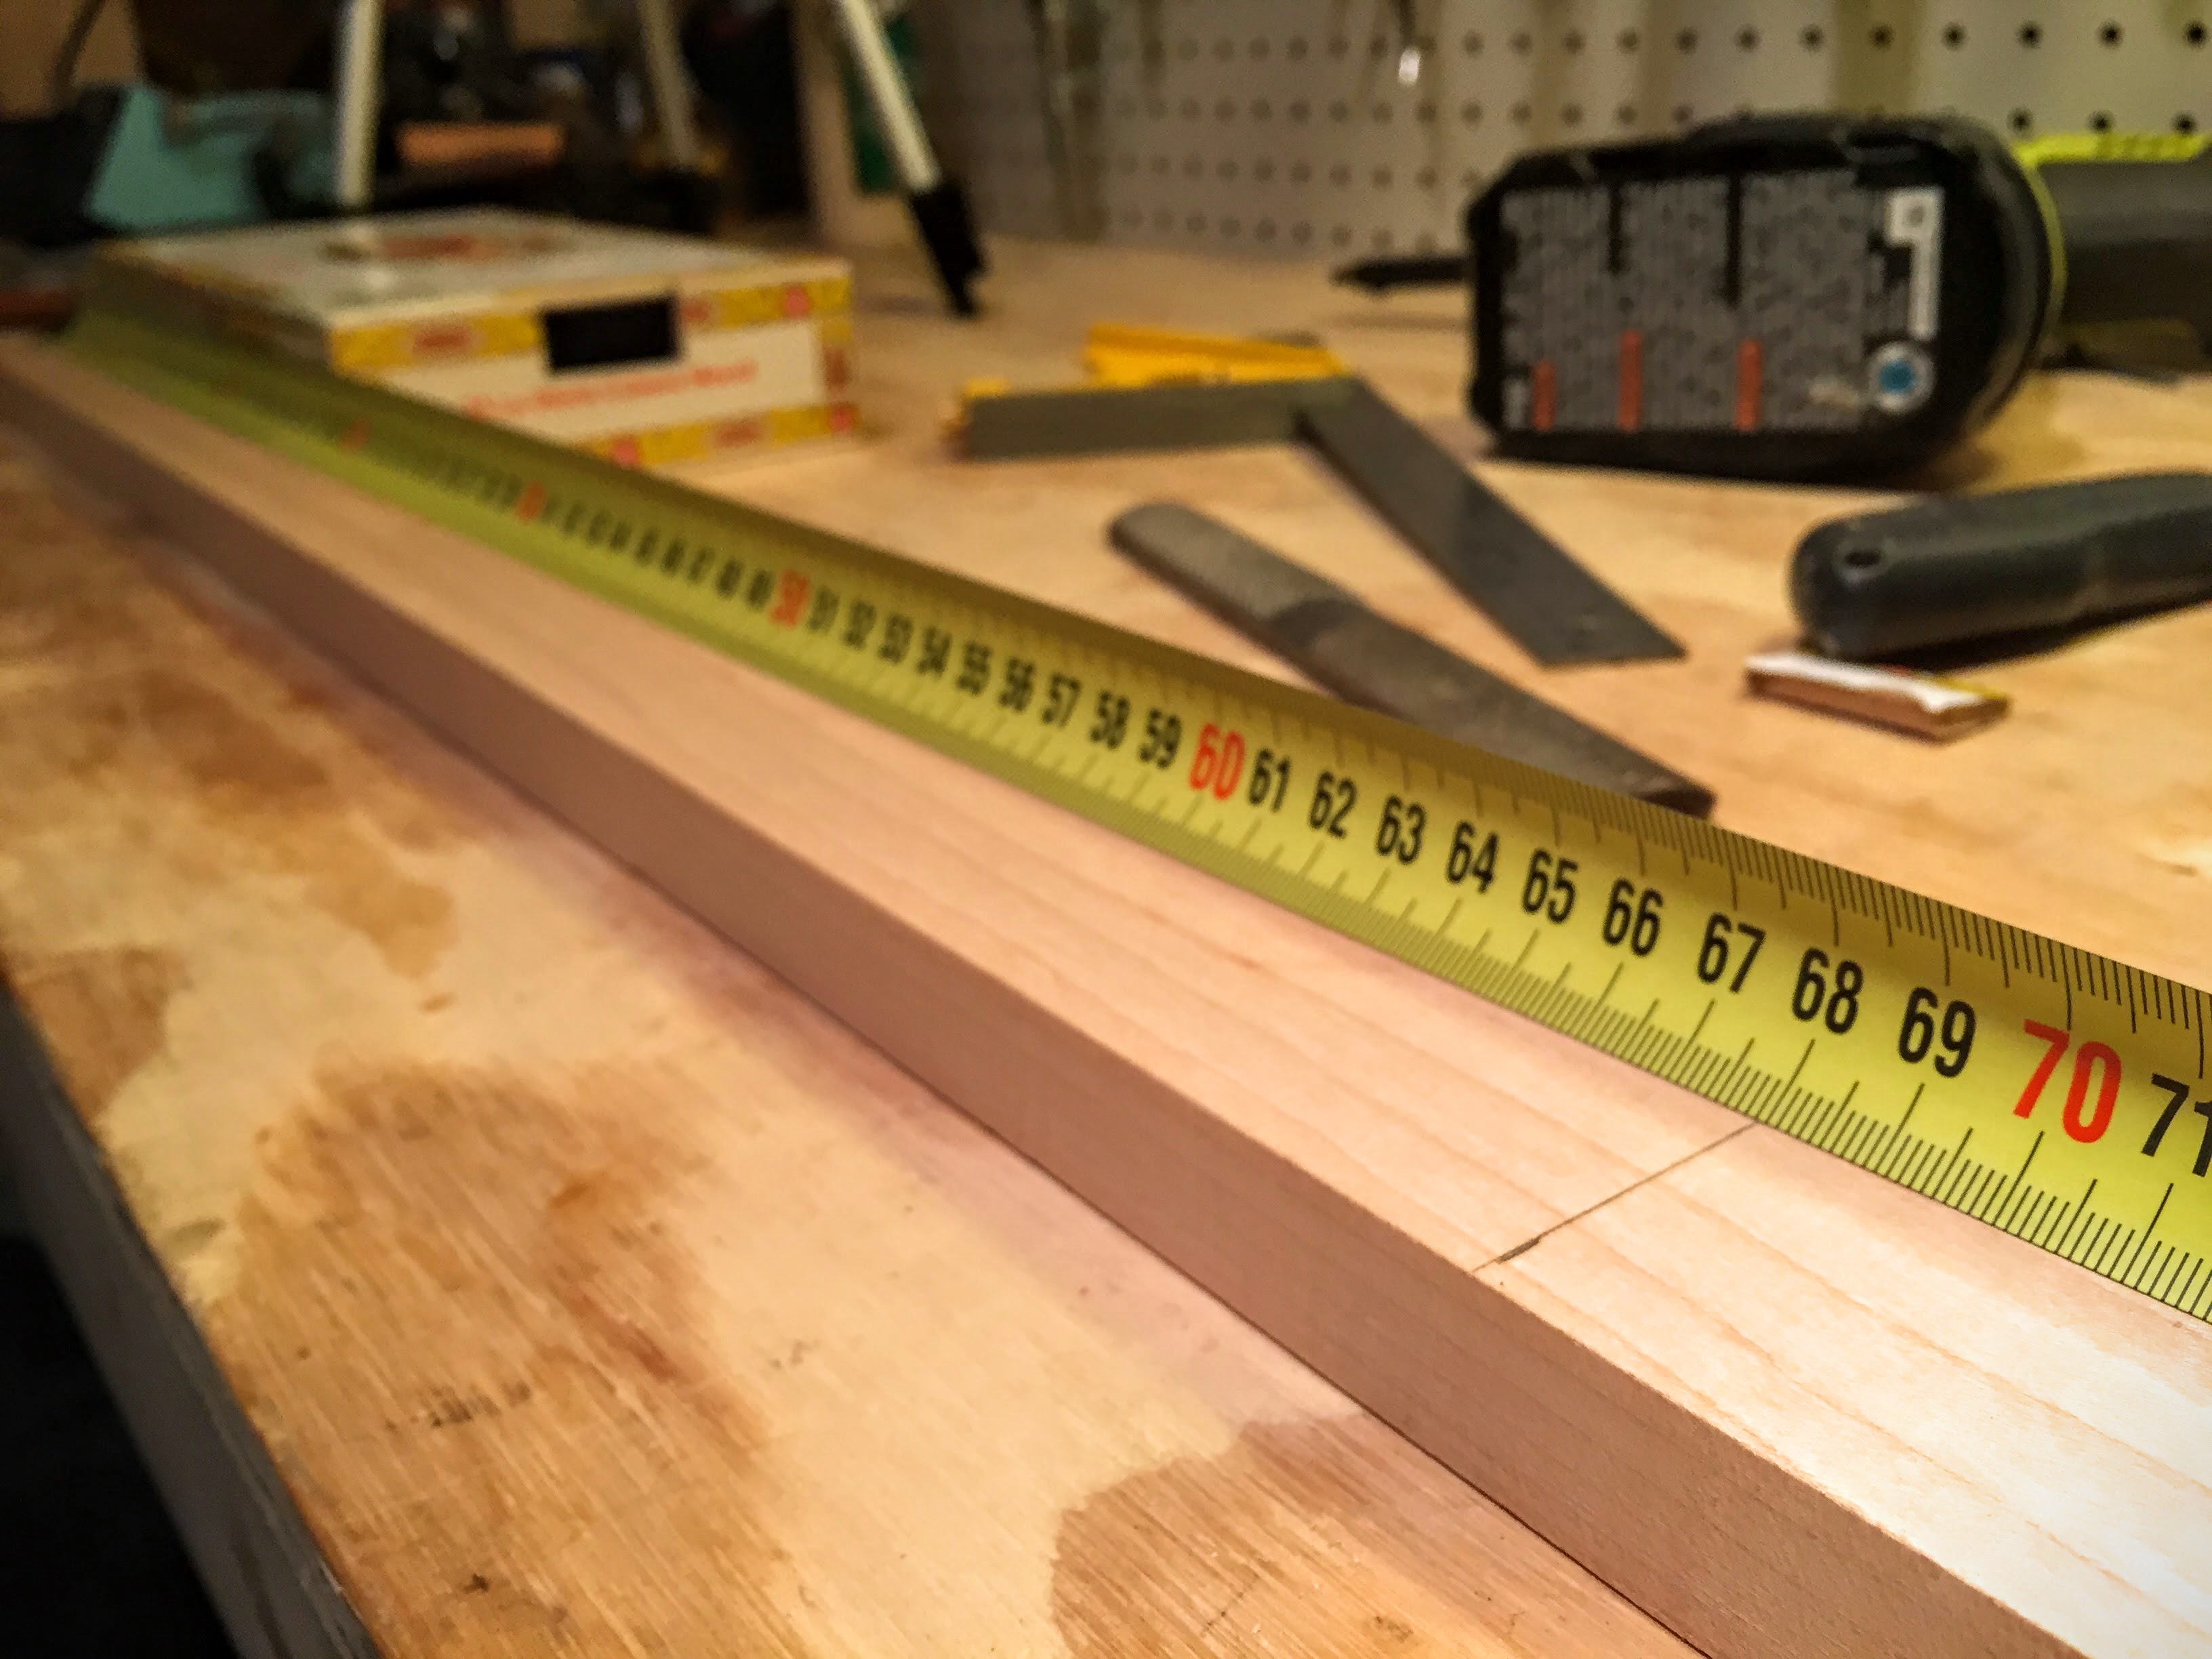
The distance between the bridge and the nut will be 25” (635mm).
That distance is known as the scale length of the guitar.
Measure down from the top of the headstock 3 9/16” (90mm) and draw a line on the top surface.
This will be part of the headstock cut-out.
Turn the neck on its side.
From the line you’ve just drawn, measure down from the top surface 5/16” (8mm) and draw a line to this spot.
From the end of the line you’ve just drawn, draw another line to the end of the headstock.
The end of this line is also 5/16” (8mm) from the top surface of the neck.
Repeat these lines on the other side of the neck.
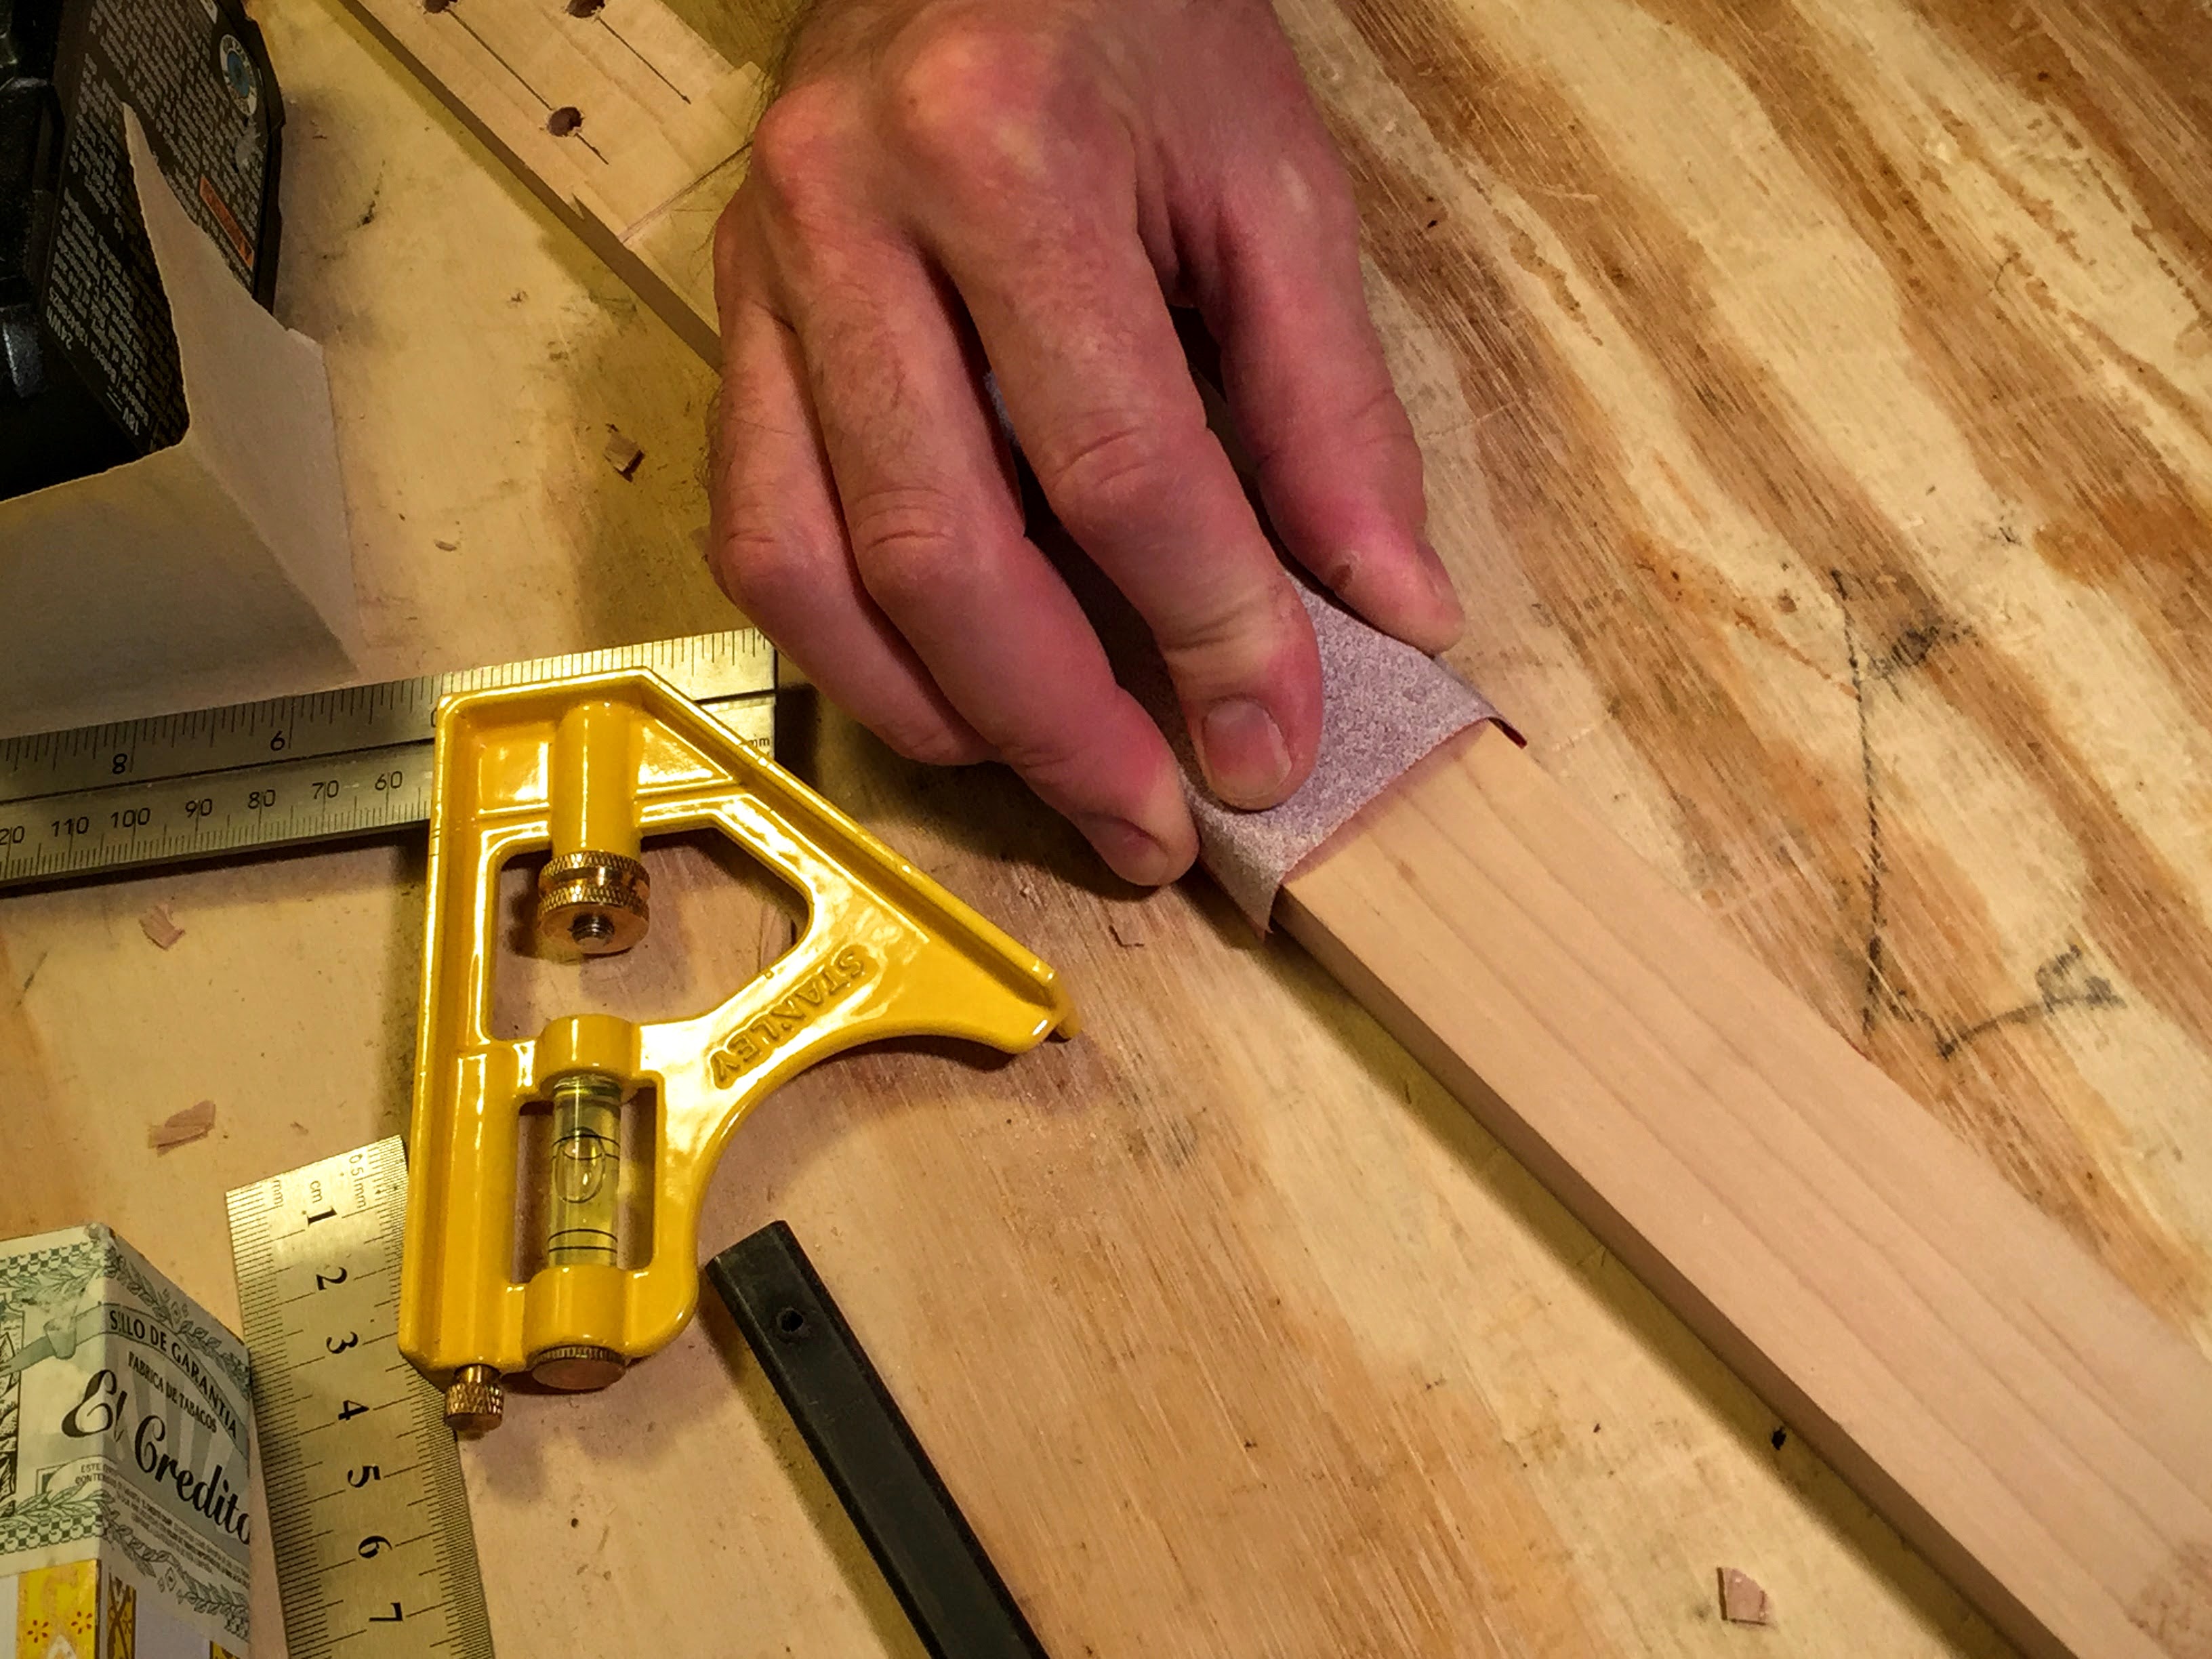
Cut the headstock
Use clamps to secure the neck to a solid surface.
Use your handsaw to cut the headstock along the lines you’ve just drawn.
Having lines on both sides of the neck allows you to stop and check the progress of your work.
Use a file/rasp to remove the roughest edges from the headstock.
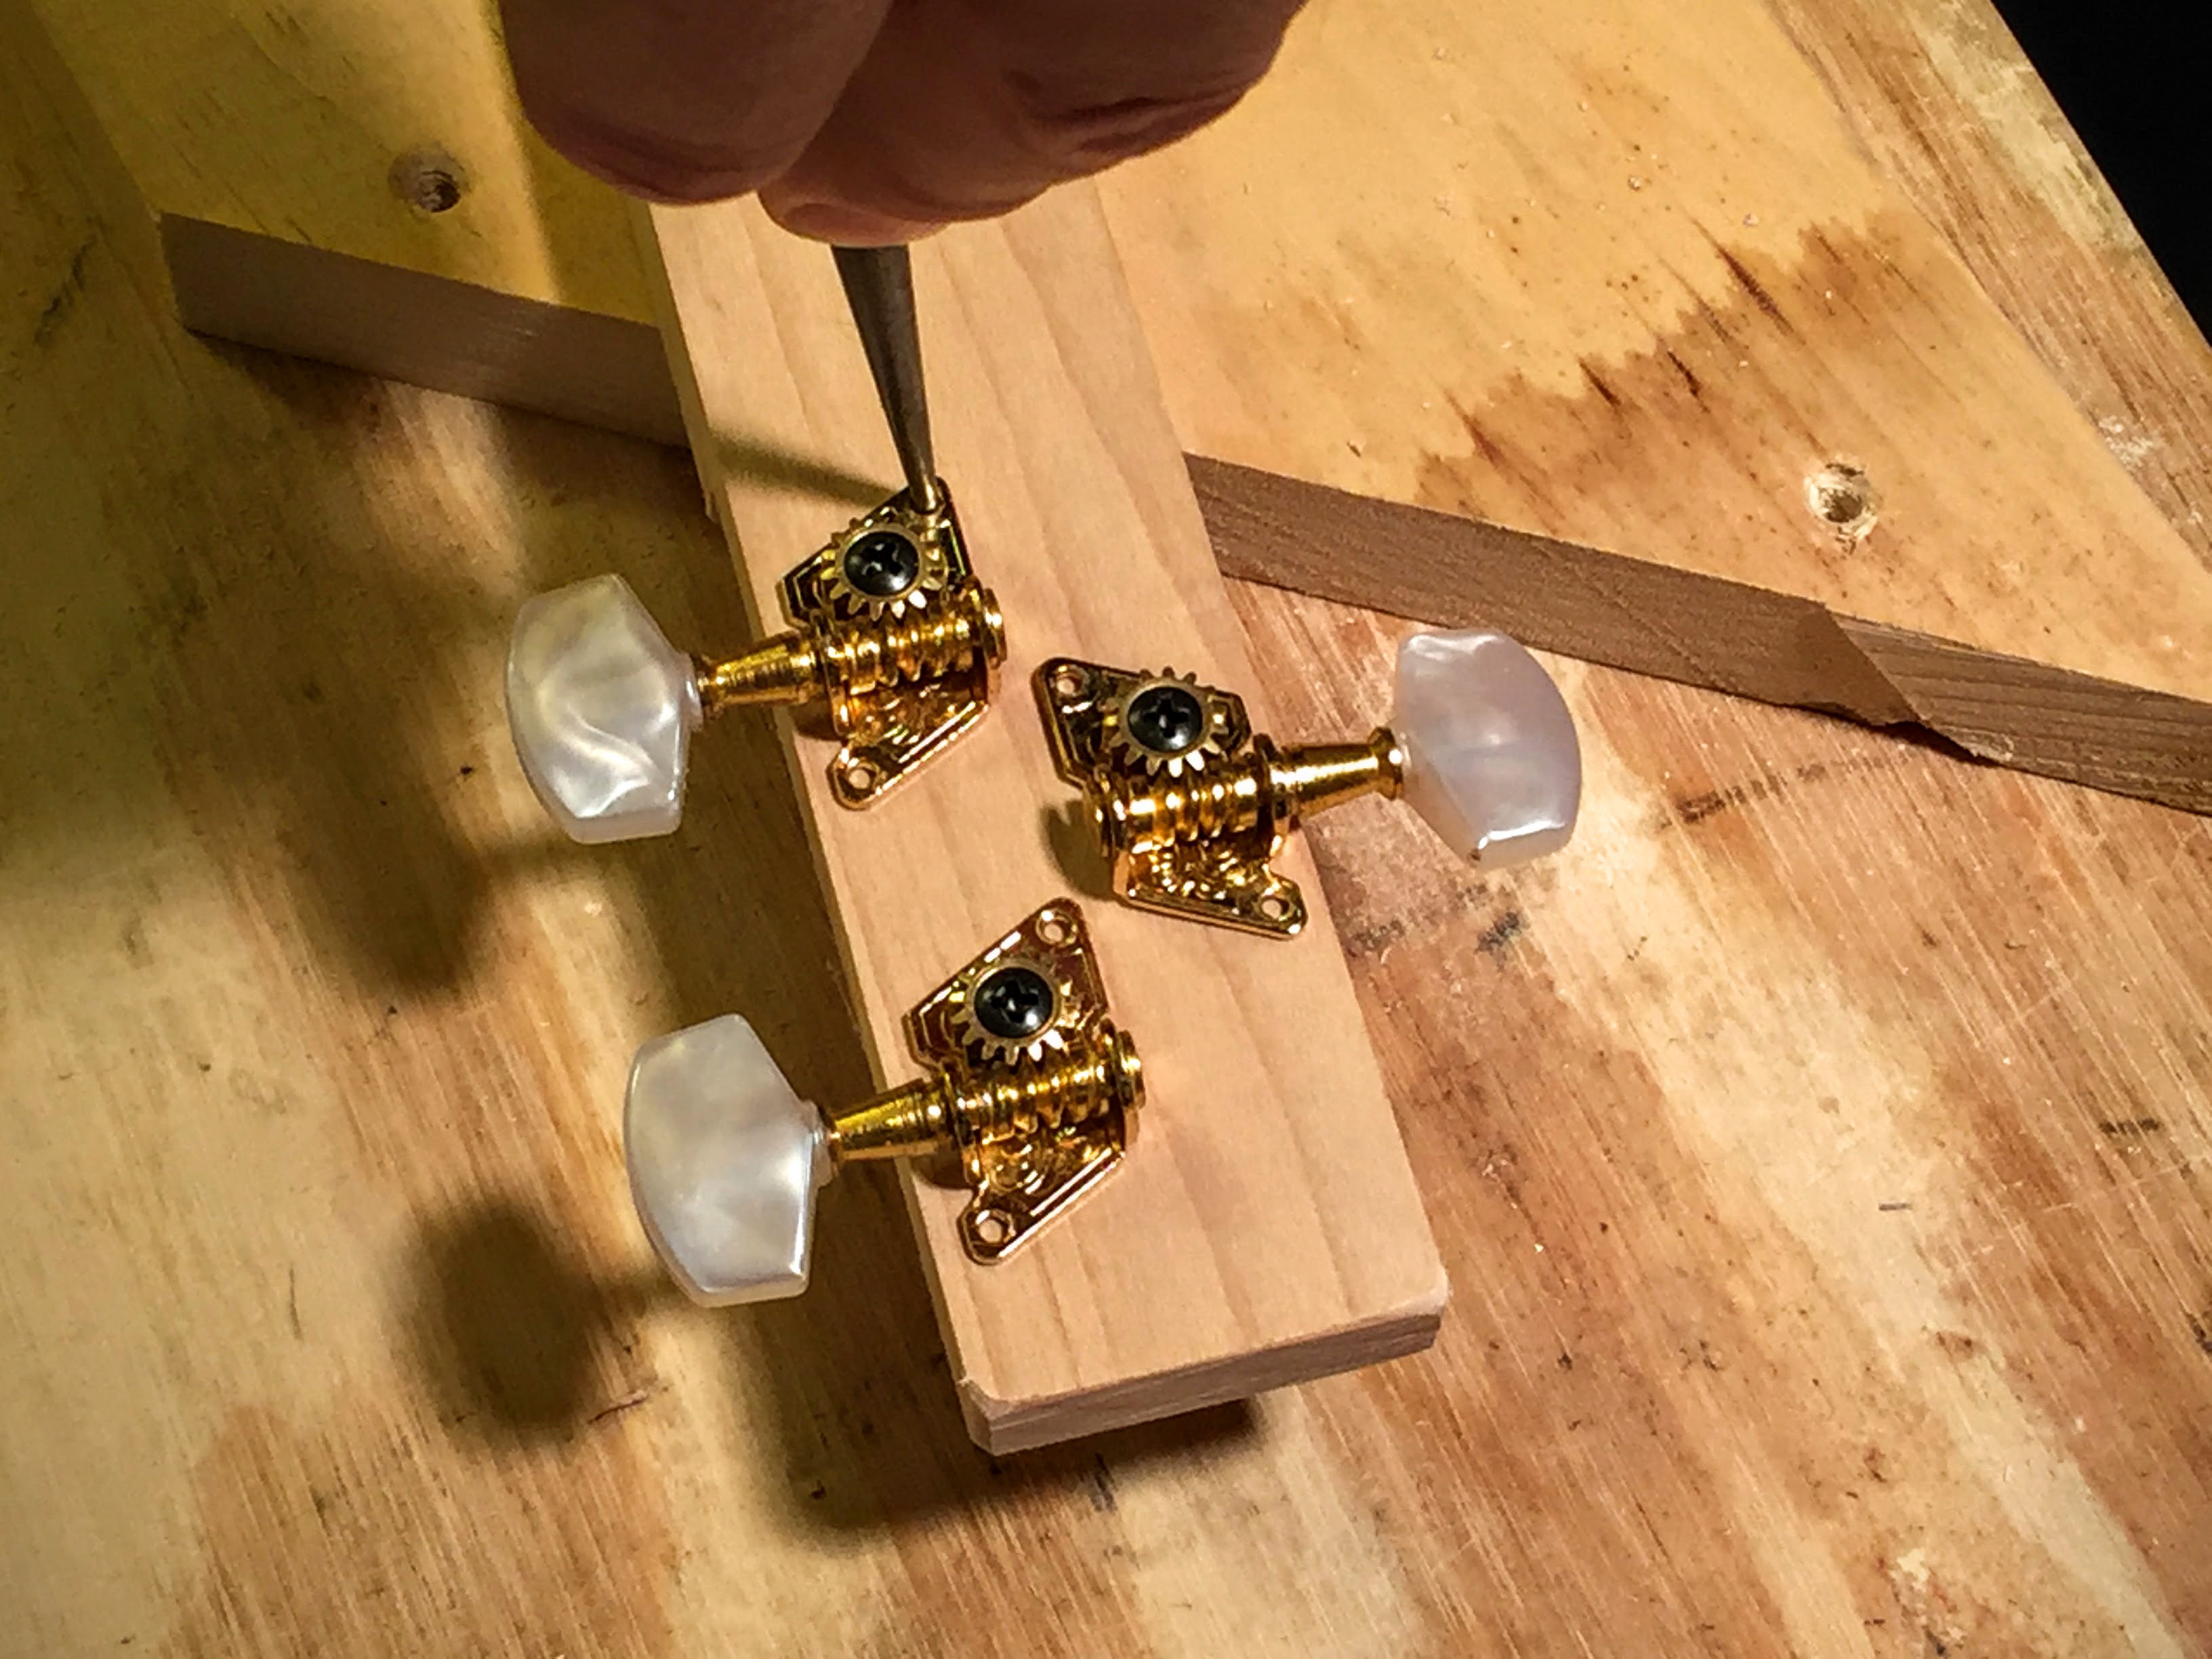
Determine the orientation of your tuners
With the tuner gear facing you, make sure the shaft of the tuning key is on top of the pinion gear.
If the tuning key is on the right of the pinion gear, it’s a right-hand tuner.
If the tuning key is on the left of the pinion gear, it’s a left-hand tuner.
When the tuners are installed, the pinion gear will be on the back of the headstock and below the shaft of the tuning key.
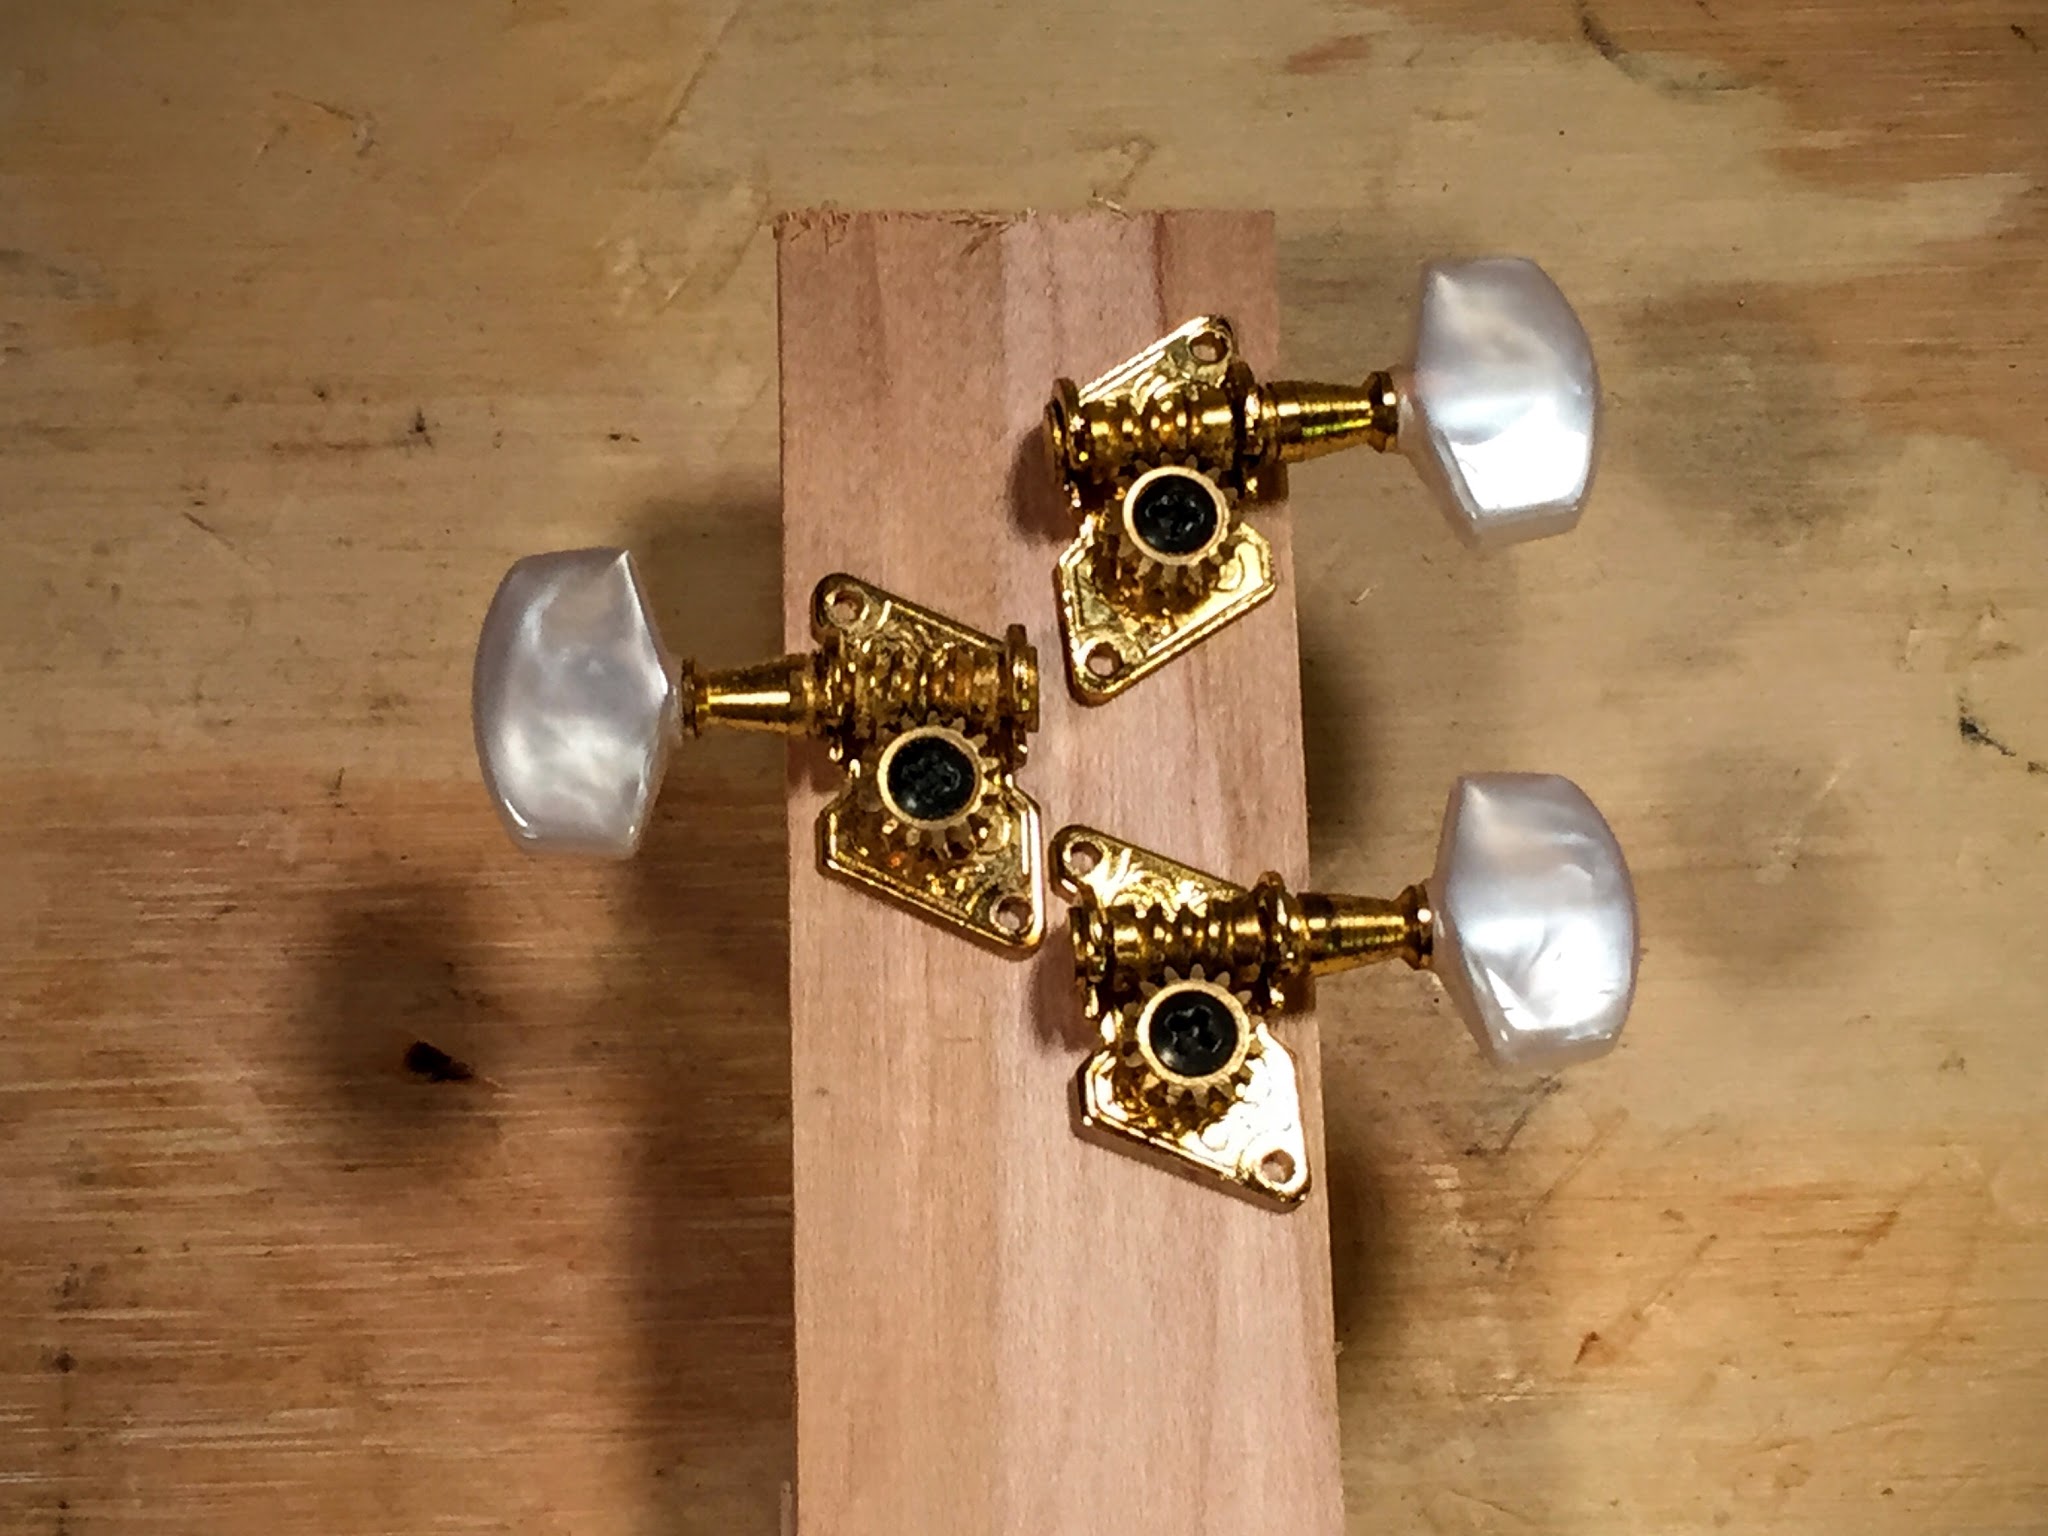
Thus, the right-hand tuner, when seen from the front face of the headstock, will be on the left.
Map the headstock for the tuners
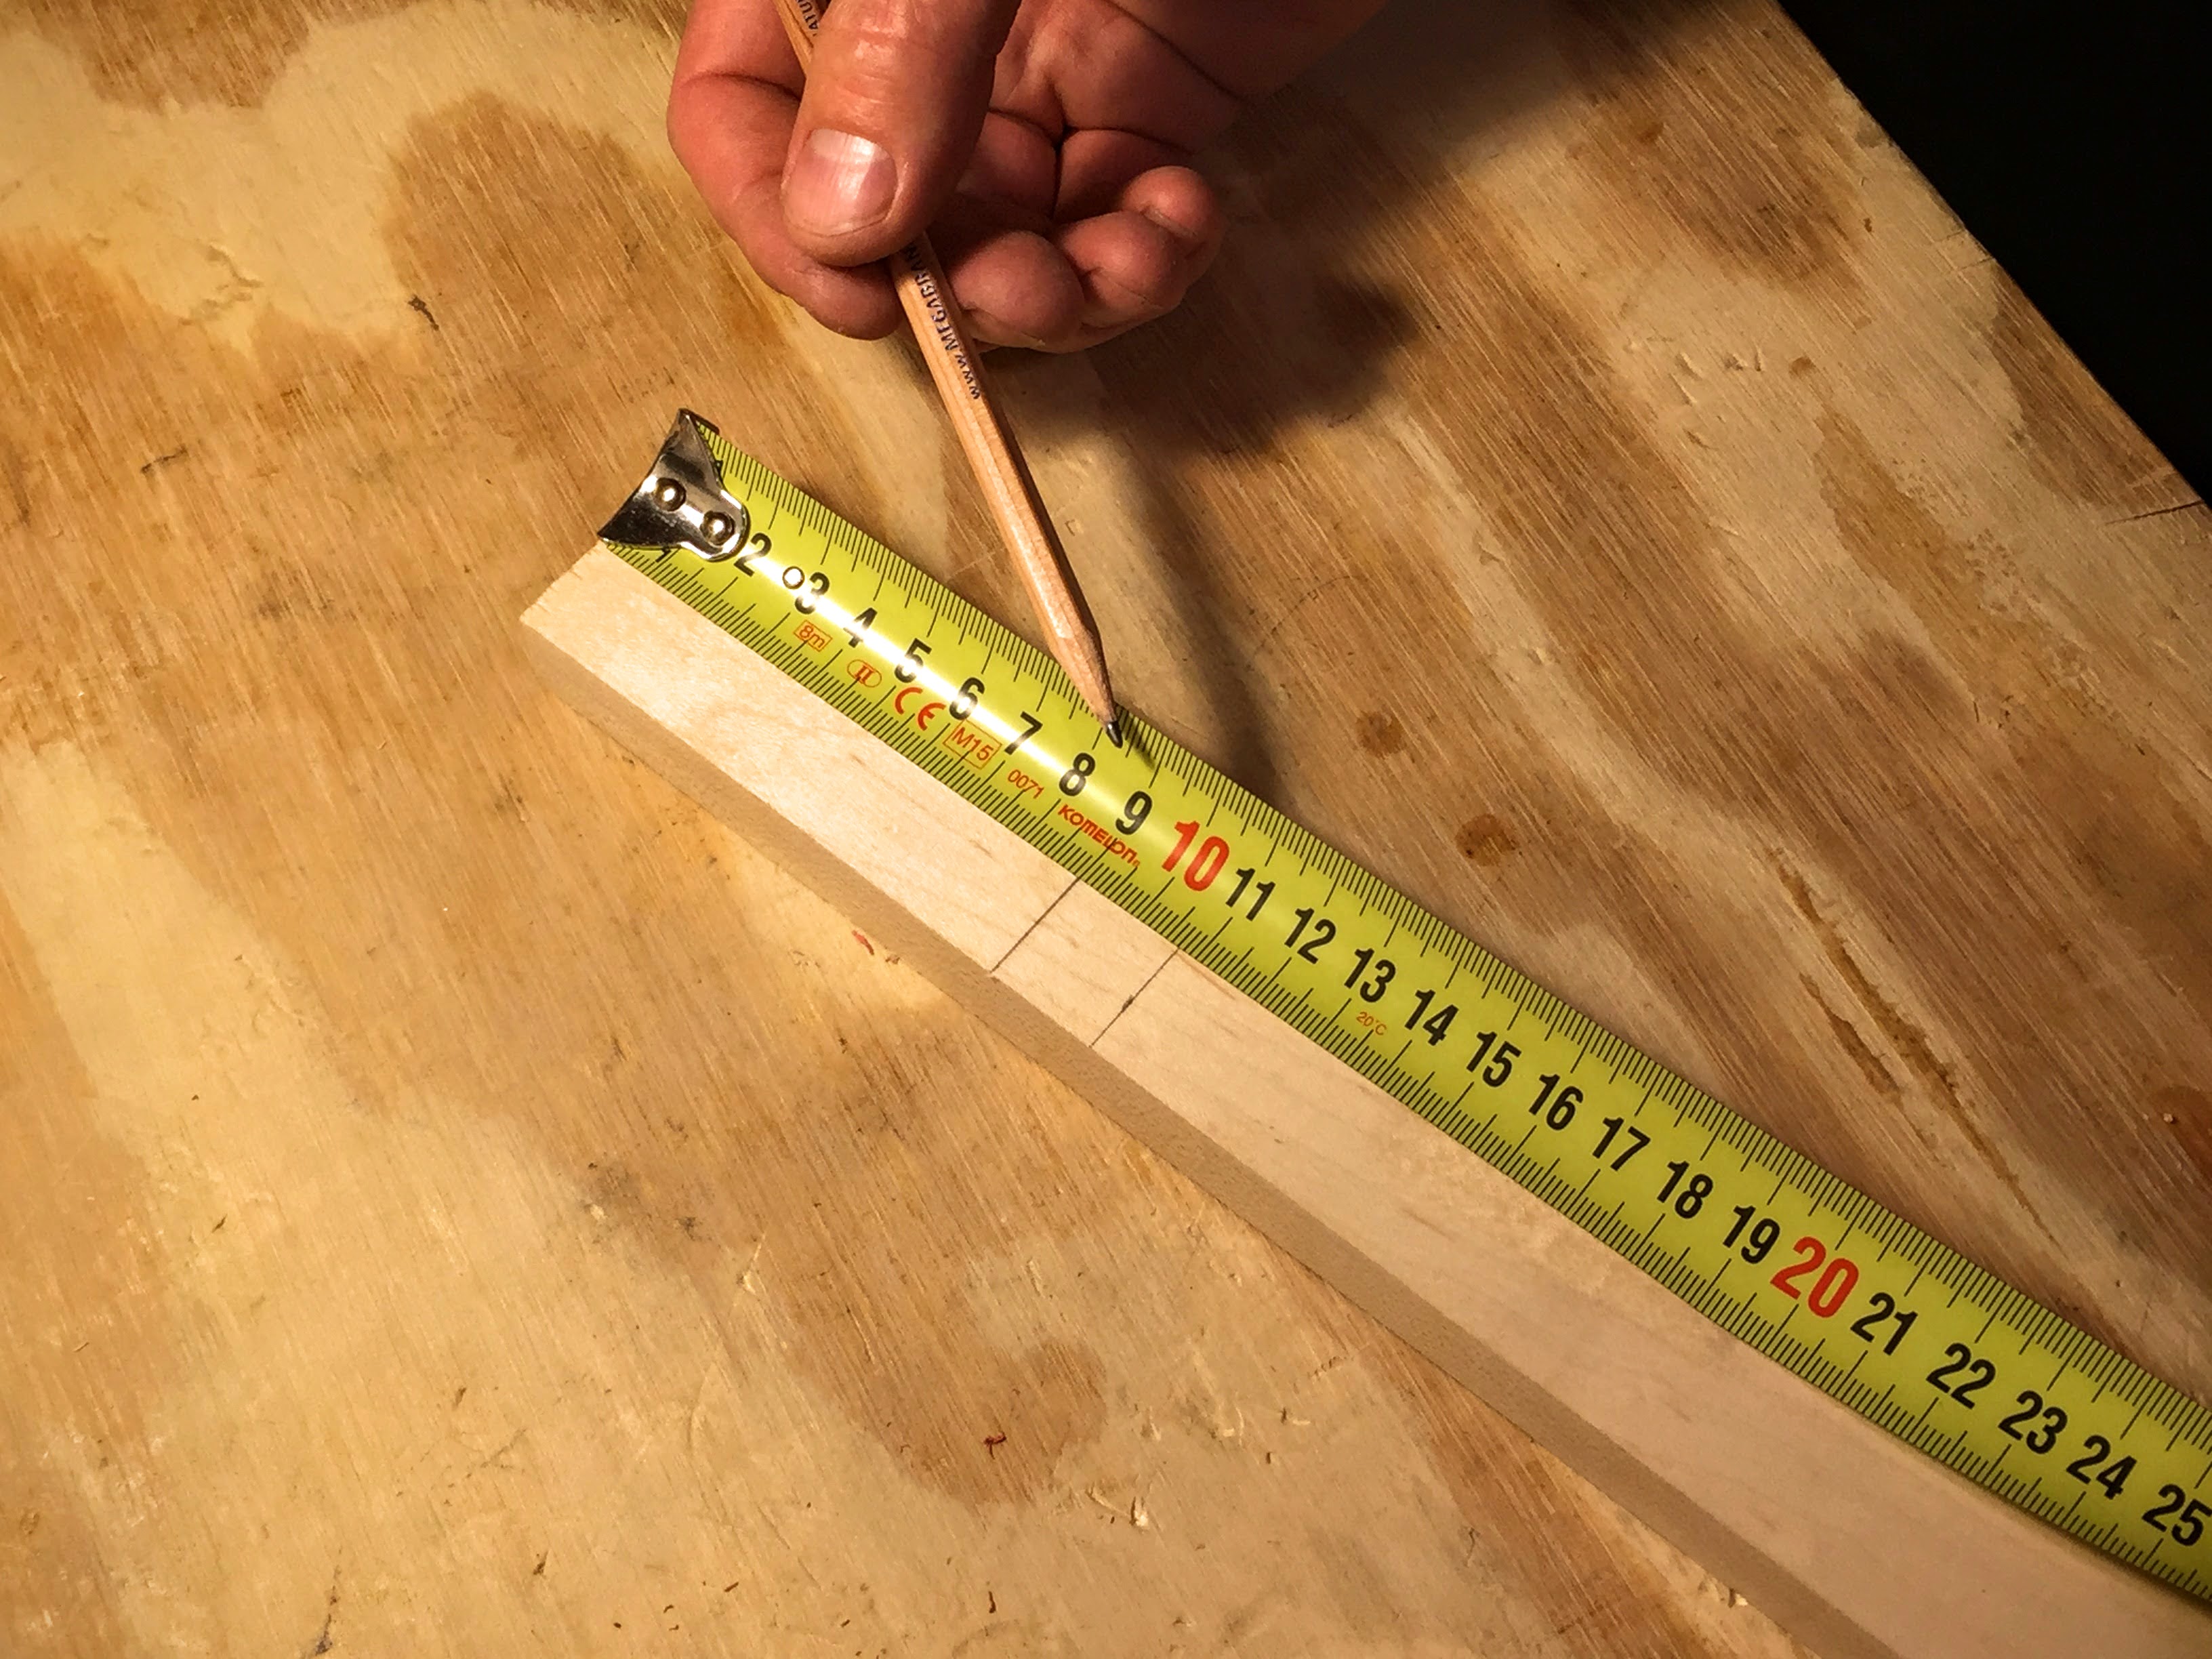
On the face of the headstock, measure in 3/8” (10mm) from both sides of the neck.
Draw lines up the face of the headstock, parallel to the sides of the neck, that follow those 3/8” (10mm) measurements.
If you’ve got two right-hand and one left-hand tuner…
Measure up from the bottom of the headstock and mark spots at 3/4” (20mm) and 2 3/8” (60mm), on the left line.
On the right line, measure up from the bottom of the headstock and mark a spot at 1 9/16” (40mm).
If you have two left and one right-hand tuner, simply switch the sides of the headstock for your measurements.
Drill holes for the tuners
The shafts of the open-gear tuners used here need a 1/4” (6mm) hole.
These tuners also have bushings that require a larger, countersunk hole.
You don’t have to use the bushings, as they aren’t absolutely necessary.
For the sake of ease, the bushings are not part of this plan.
Use your drill and 1/4” (6mm) bit to drill holes for the tuners where you’ve marked spots on the headstock.
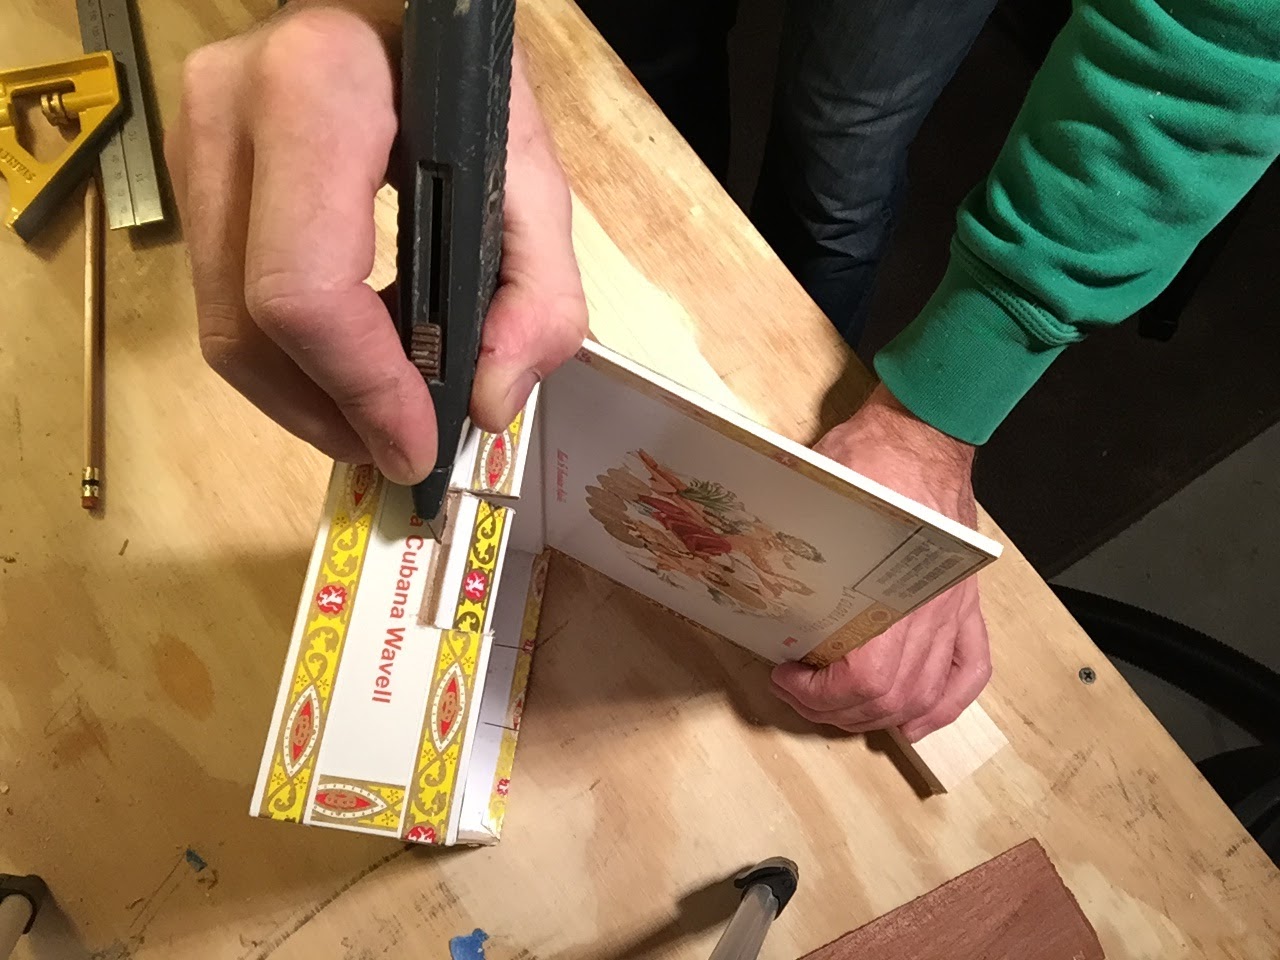
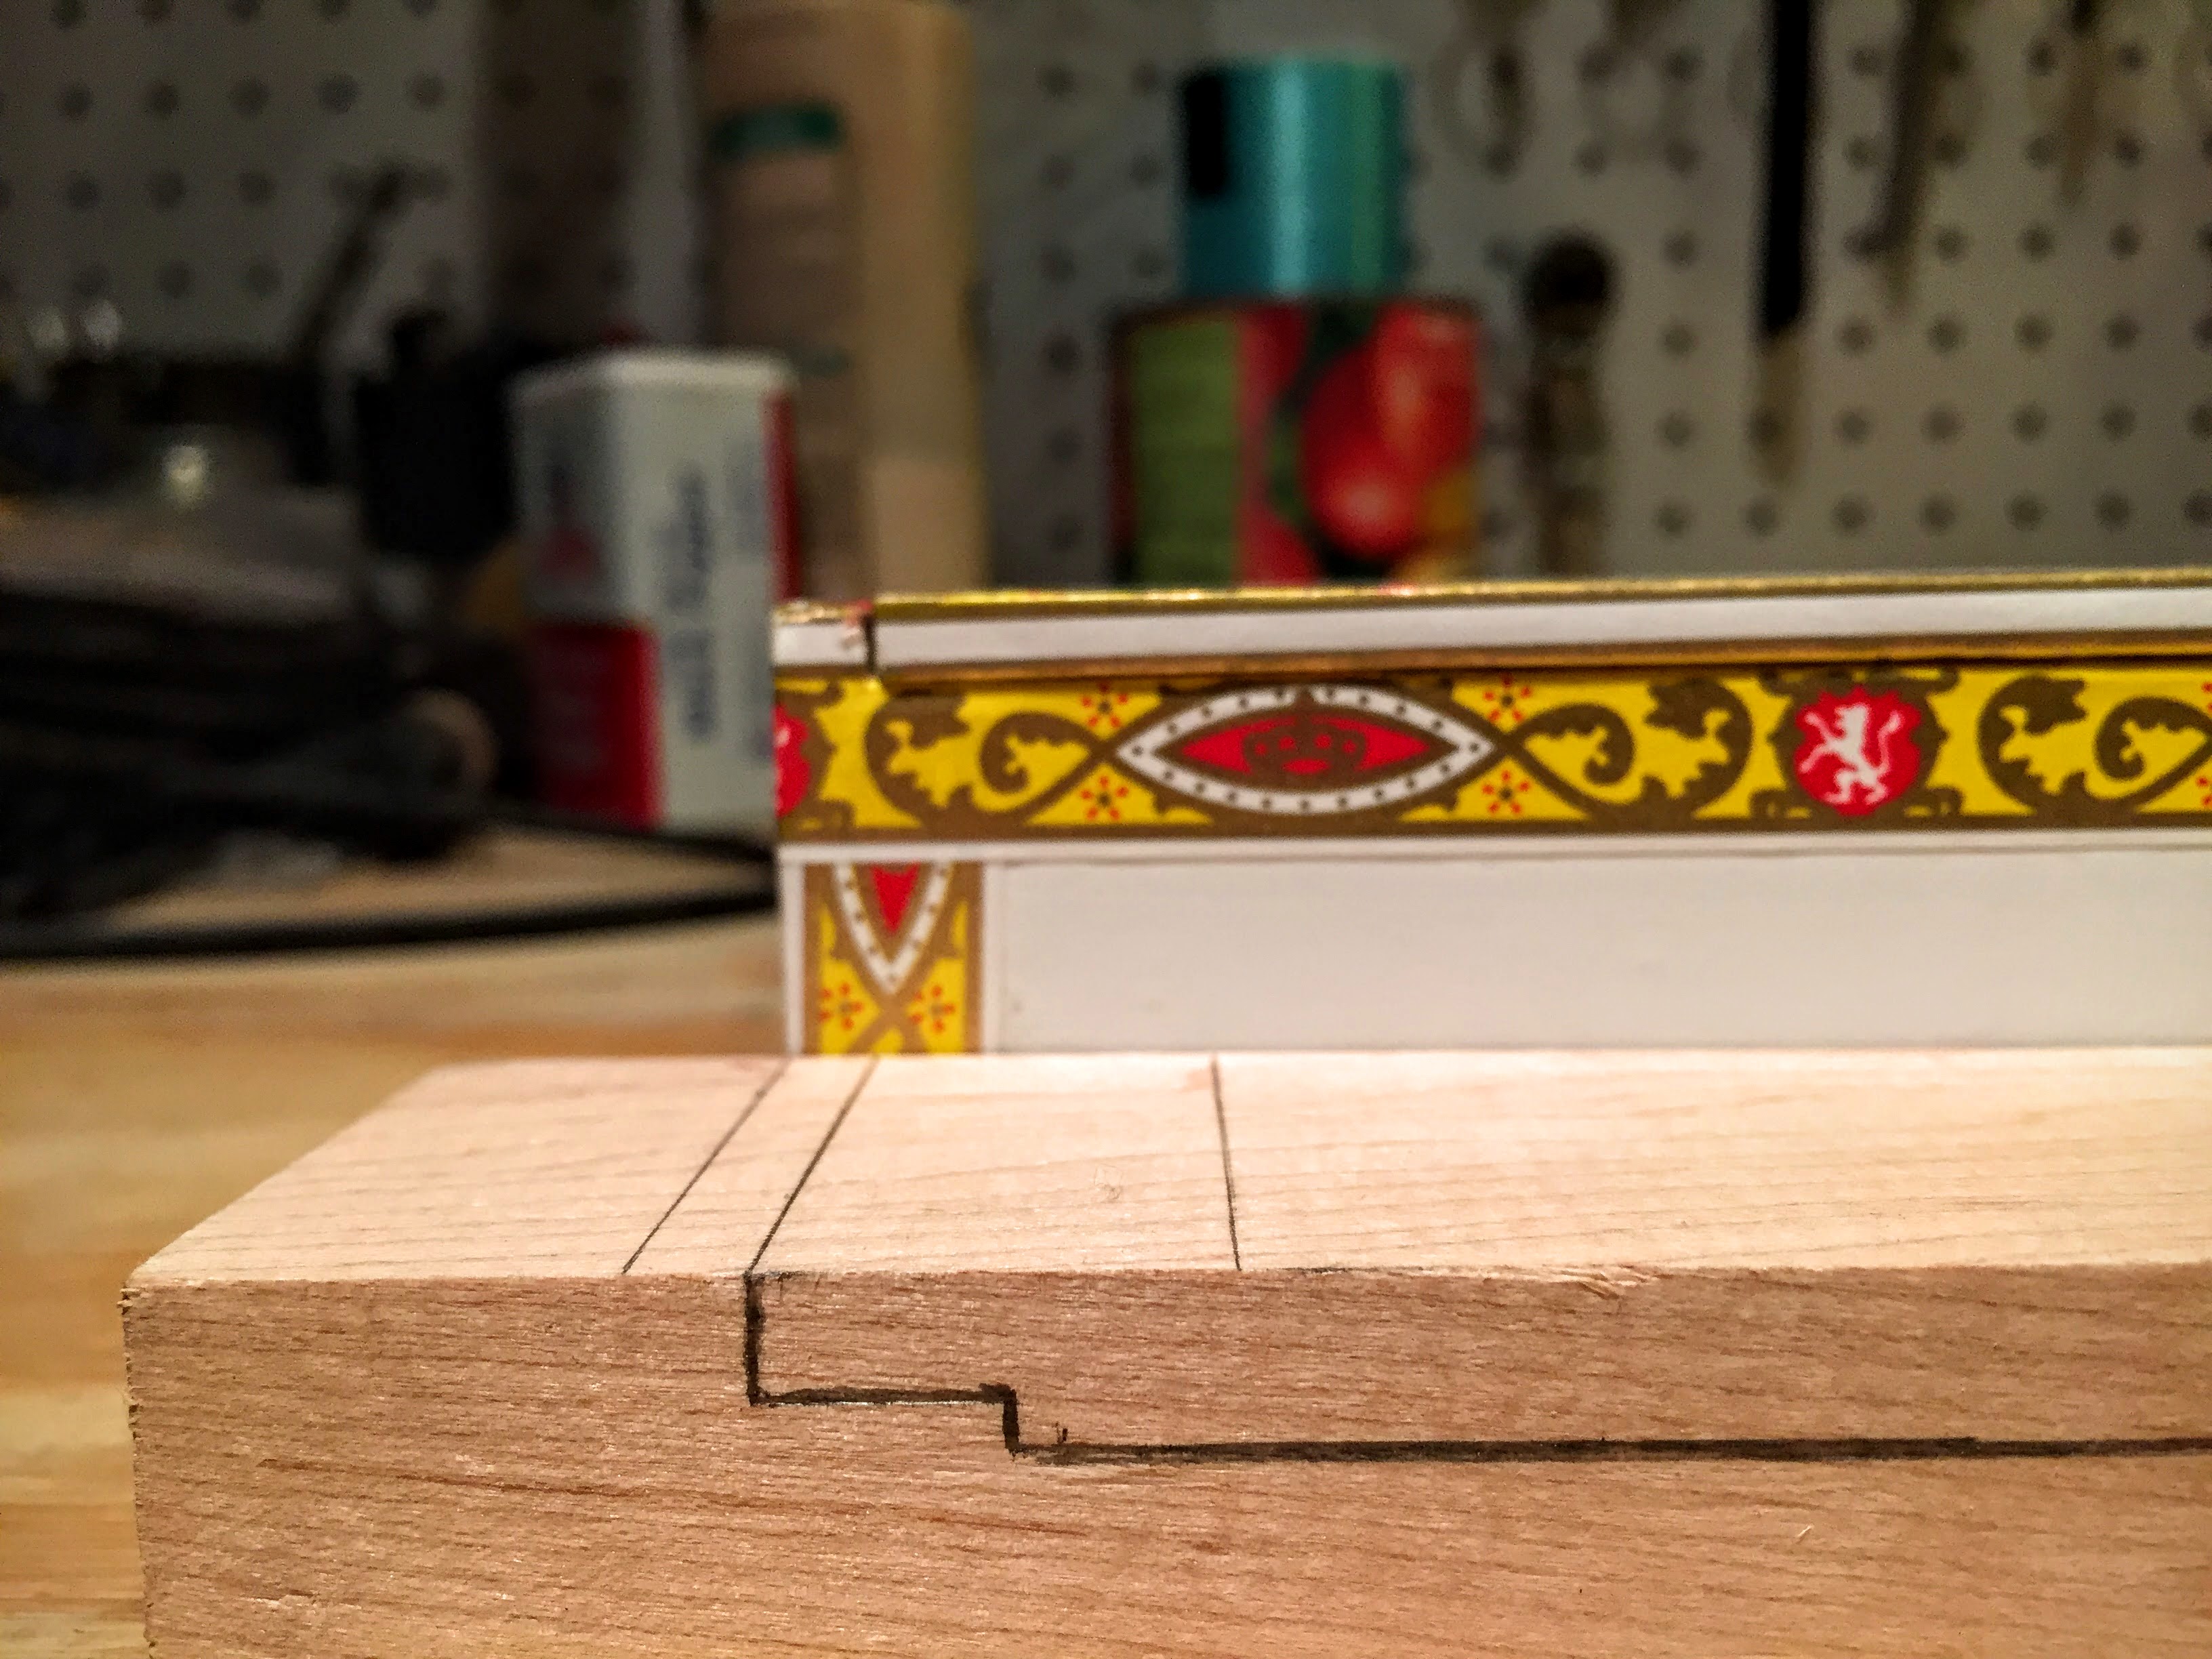
Cut a notch for the nut
Use your handsaw to make a few shallow cuts on the line you’ve drawn for the nut.

Map the notch on the neck
Place the neck in the spaces you cut into the cigar box earlier.
Even the back edge of the cigar box up with the line 3/4″ (20mm) up from the tail-end of the neck.
Mark a spot on the neck at the inside edge of the box.
Draw a line across the neck at this spot.
Do this for both ends where the neck exits the cigar box.
Measure the thickness of the cigar box lid.
Turn the neck on its side.
From both lines you’ve drawn indicating the inside edges of the box, measure down the side of the neck the distance equal to the thickness of the box lid.
Using the points you’ve measured for the depth of the cigar box lid, measure in towards the other inside edge 1/2” (13mm).
Do this on both ends.
These lines are where the box lid will be secured to the neck.
The top of the lid will be even with the top surface of the neck.
From the ends of those 1/2” (13mm) lines, measure down 1/16” to 3/32” (2mm).
Draw a line to connect those last two points.
Repeat these steps on the other side of the neck.

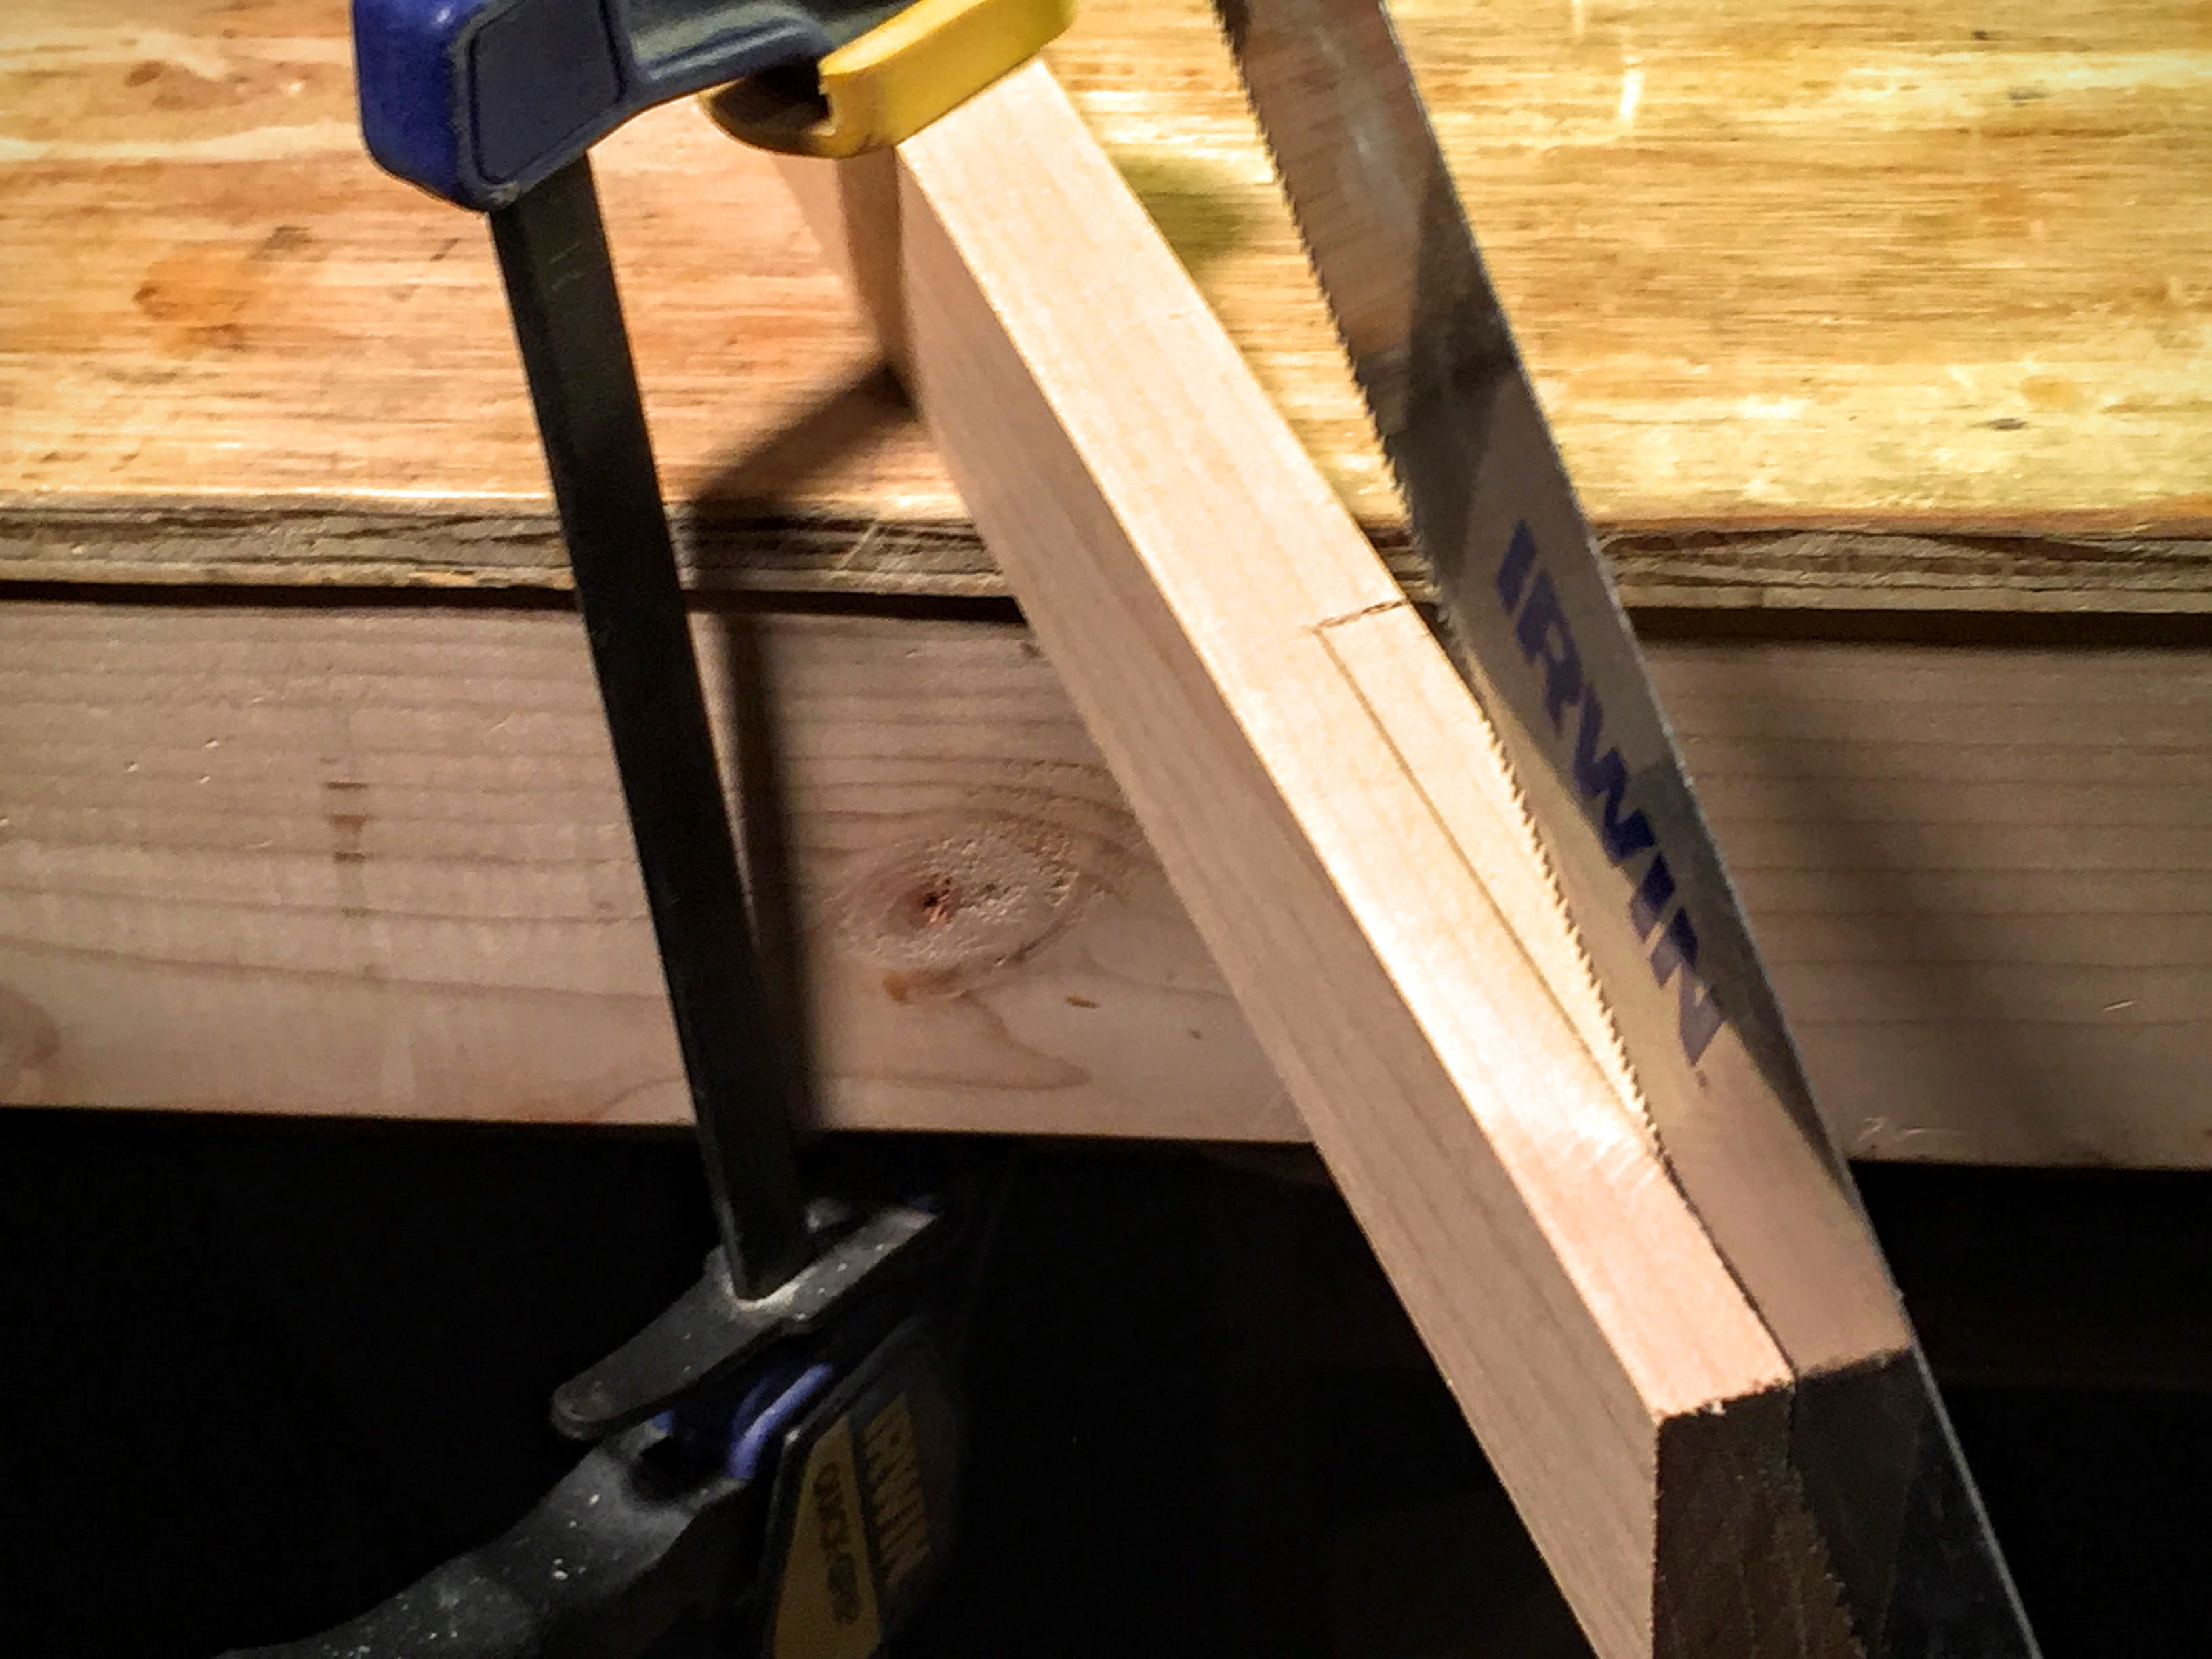
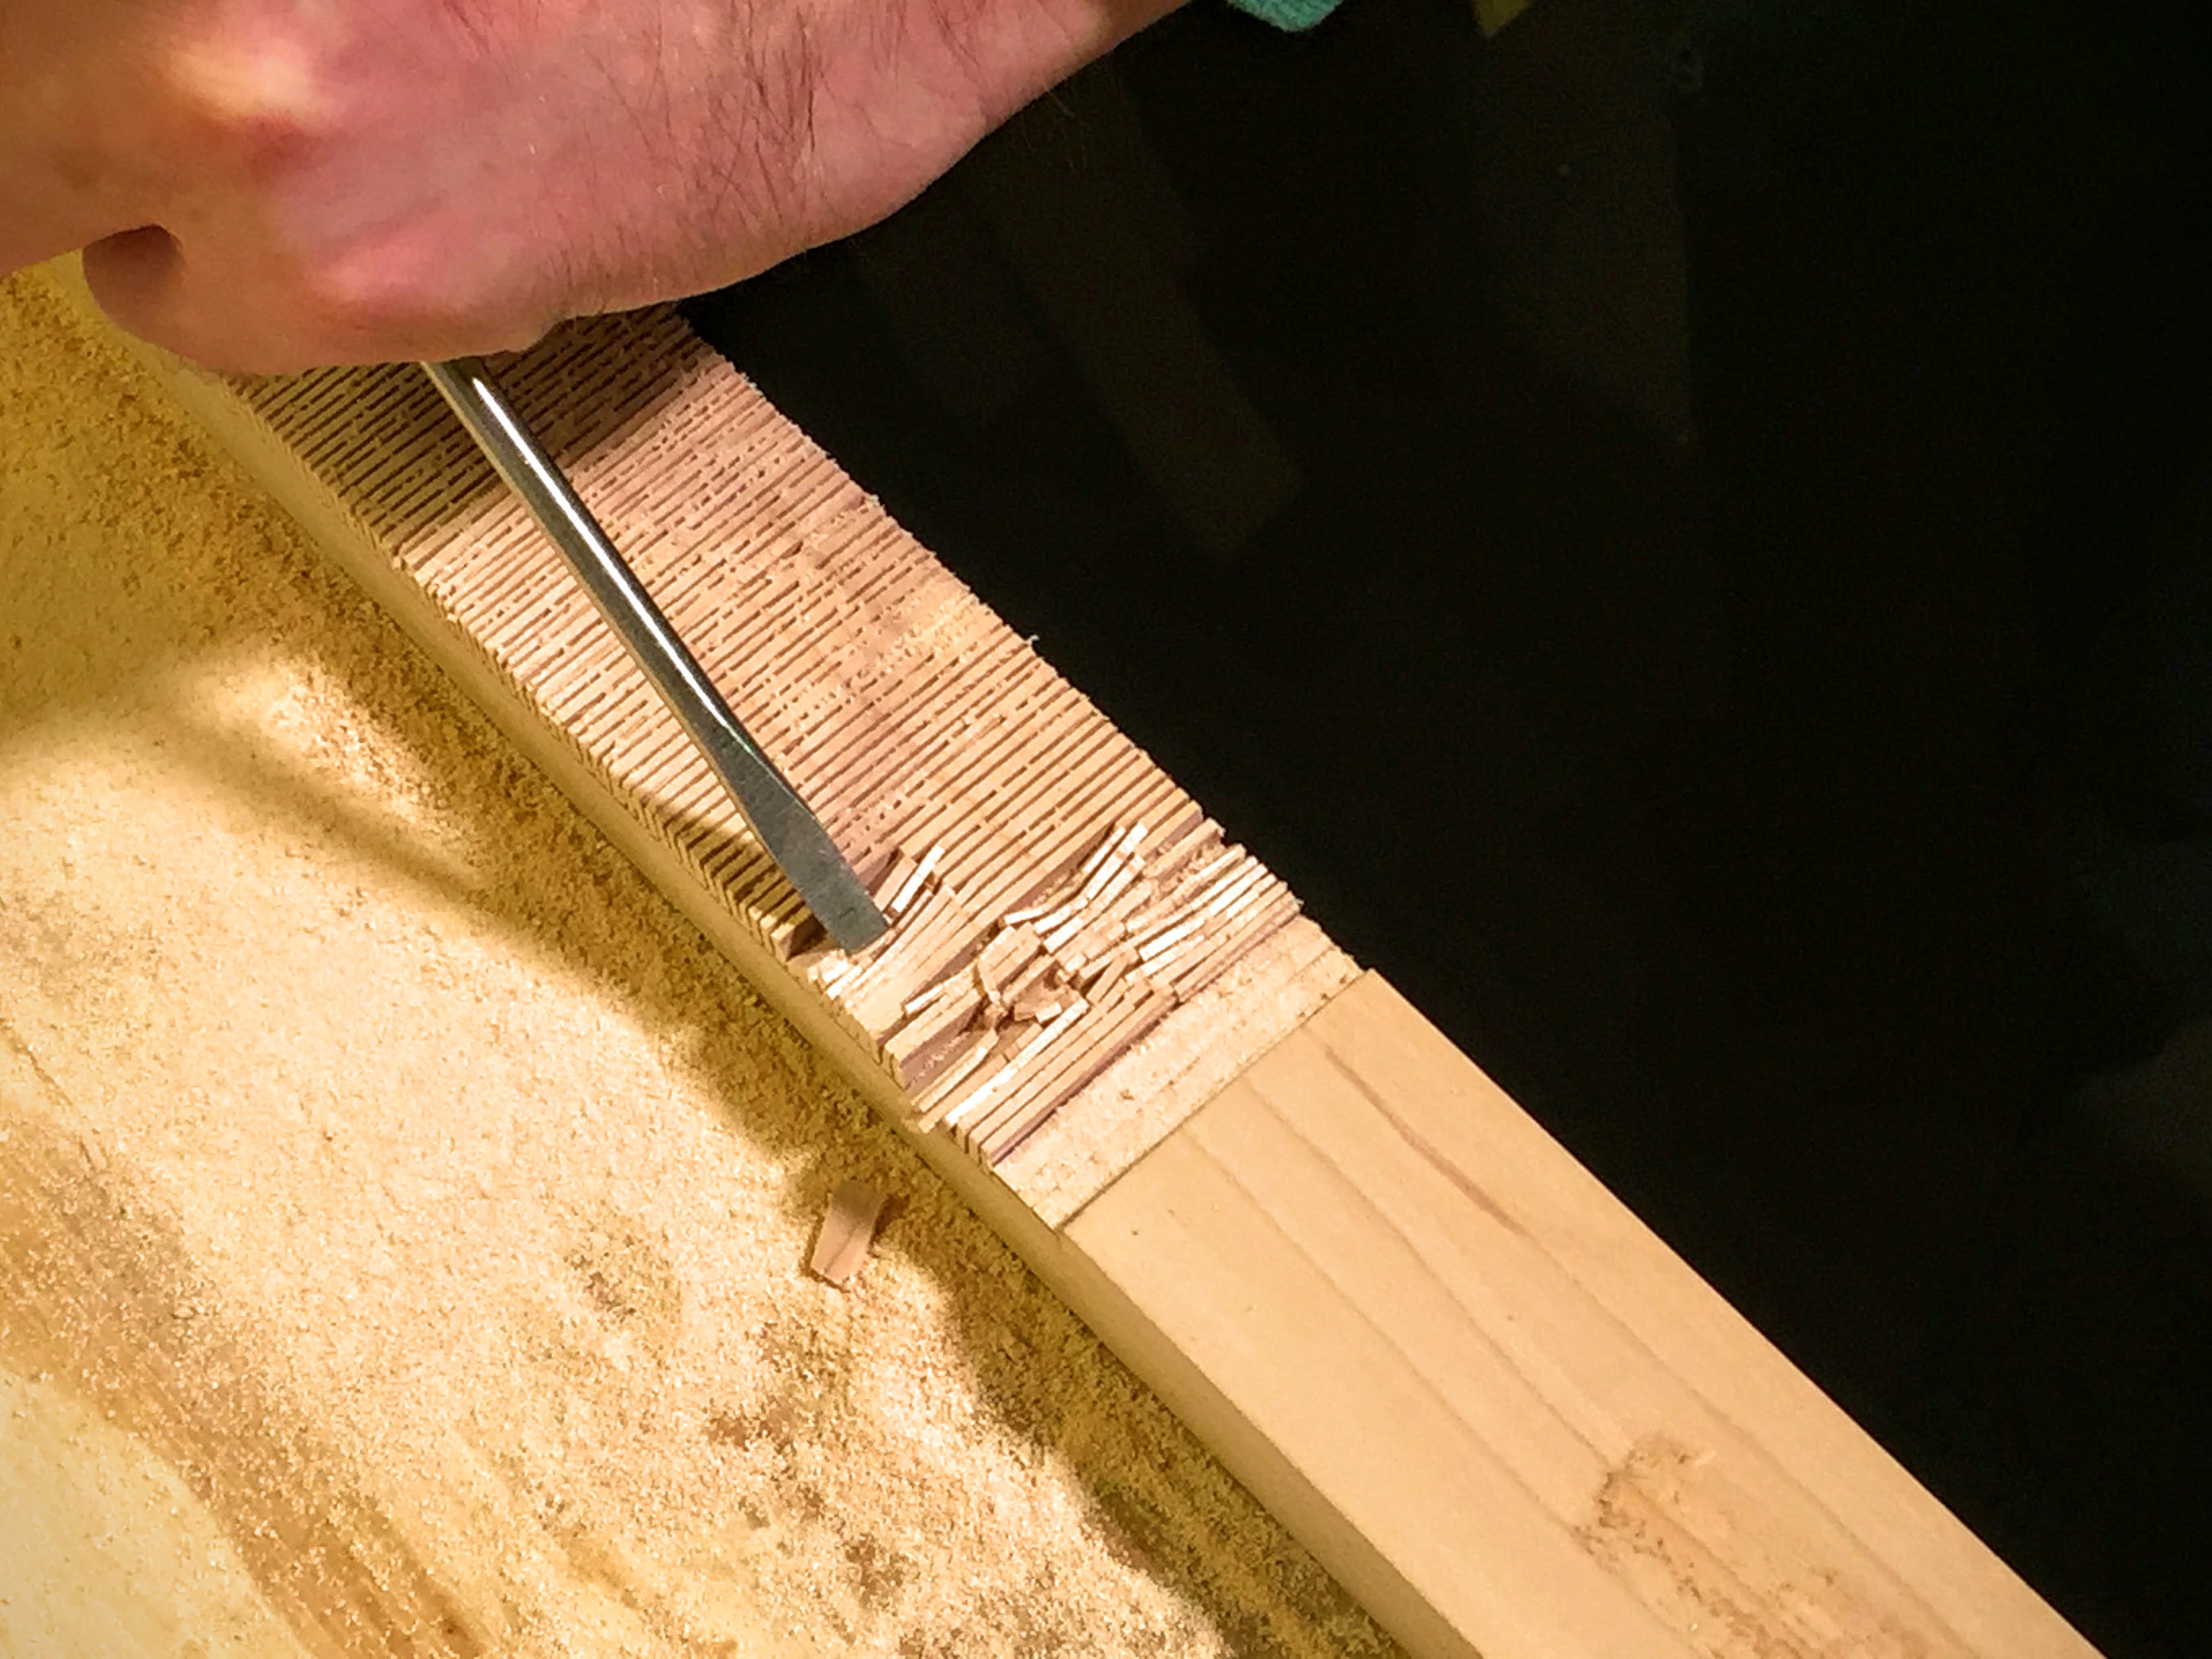
Cut the notch in the neck
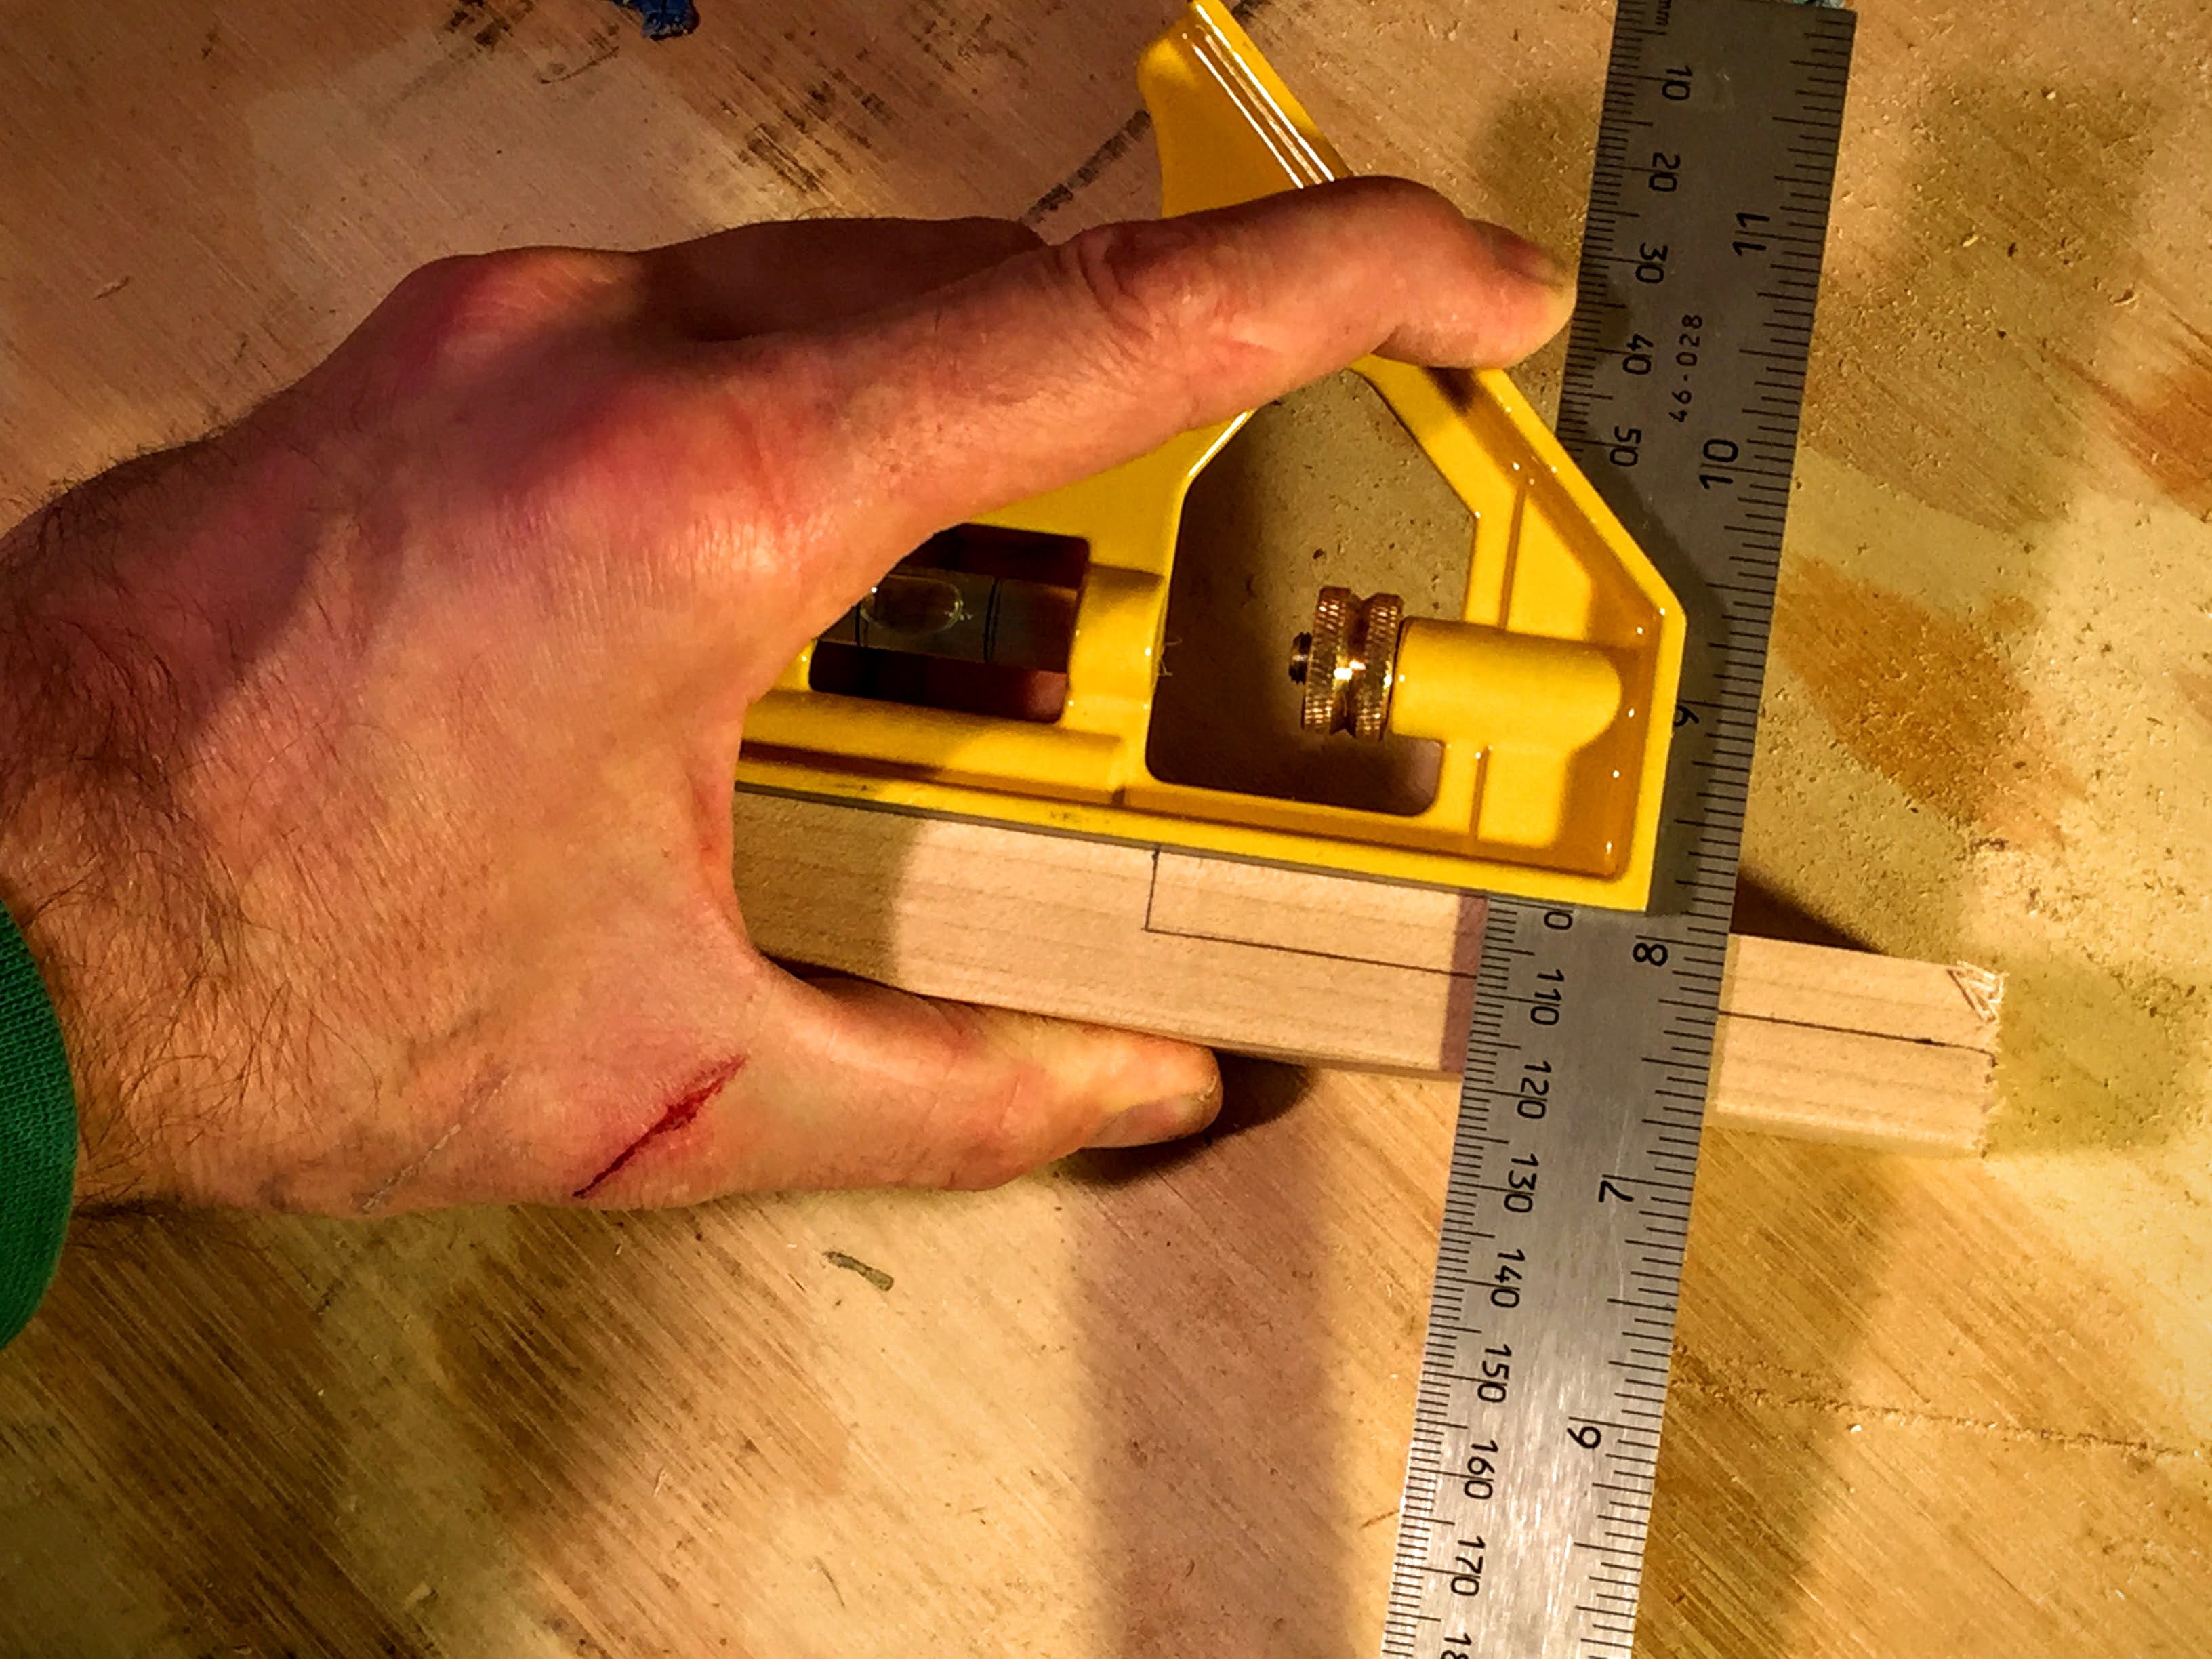
Clamp the neck to your work surface.
Use your handsaw to make cuts inside the space you’ve drawn on the neck.
Make each cut down to the lines you drew onto the side of the neck.
A square can come in handy here.
Use it to line up your saw for each cut.
Cut only to the depth of the lines you’ve drawn.
Having that space drawn on both sides of the neck helps you to keep the cuts even in depth.
Make each cut as close as you can to the last.
The less you leave, the easier the wood is to remove.
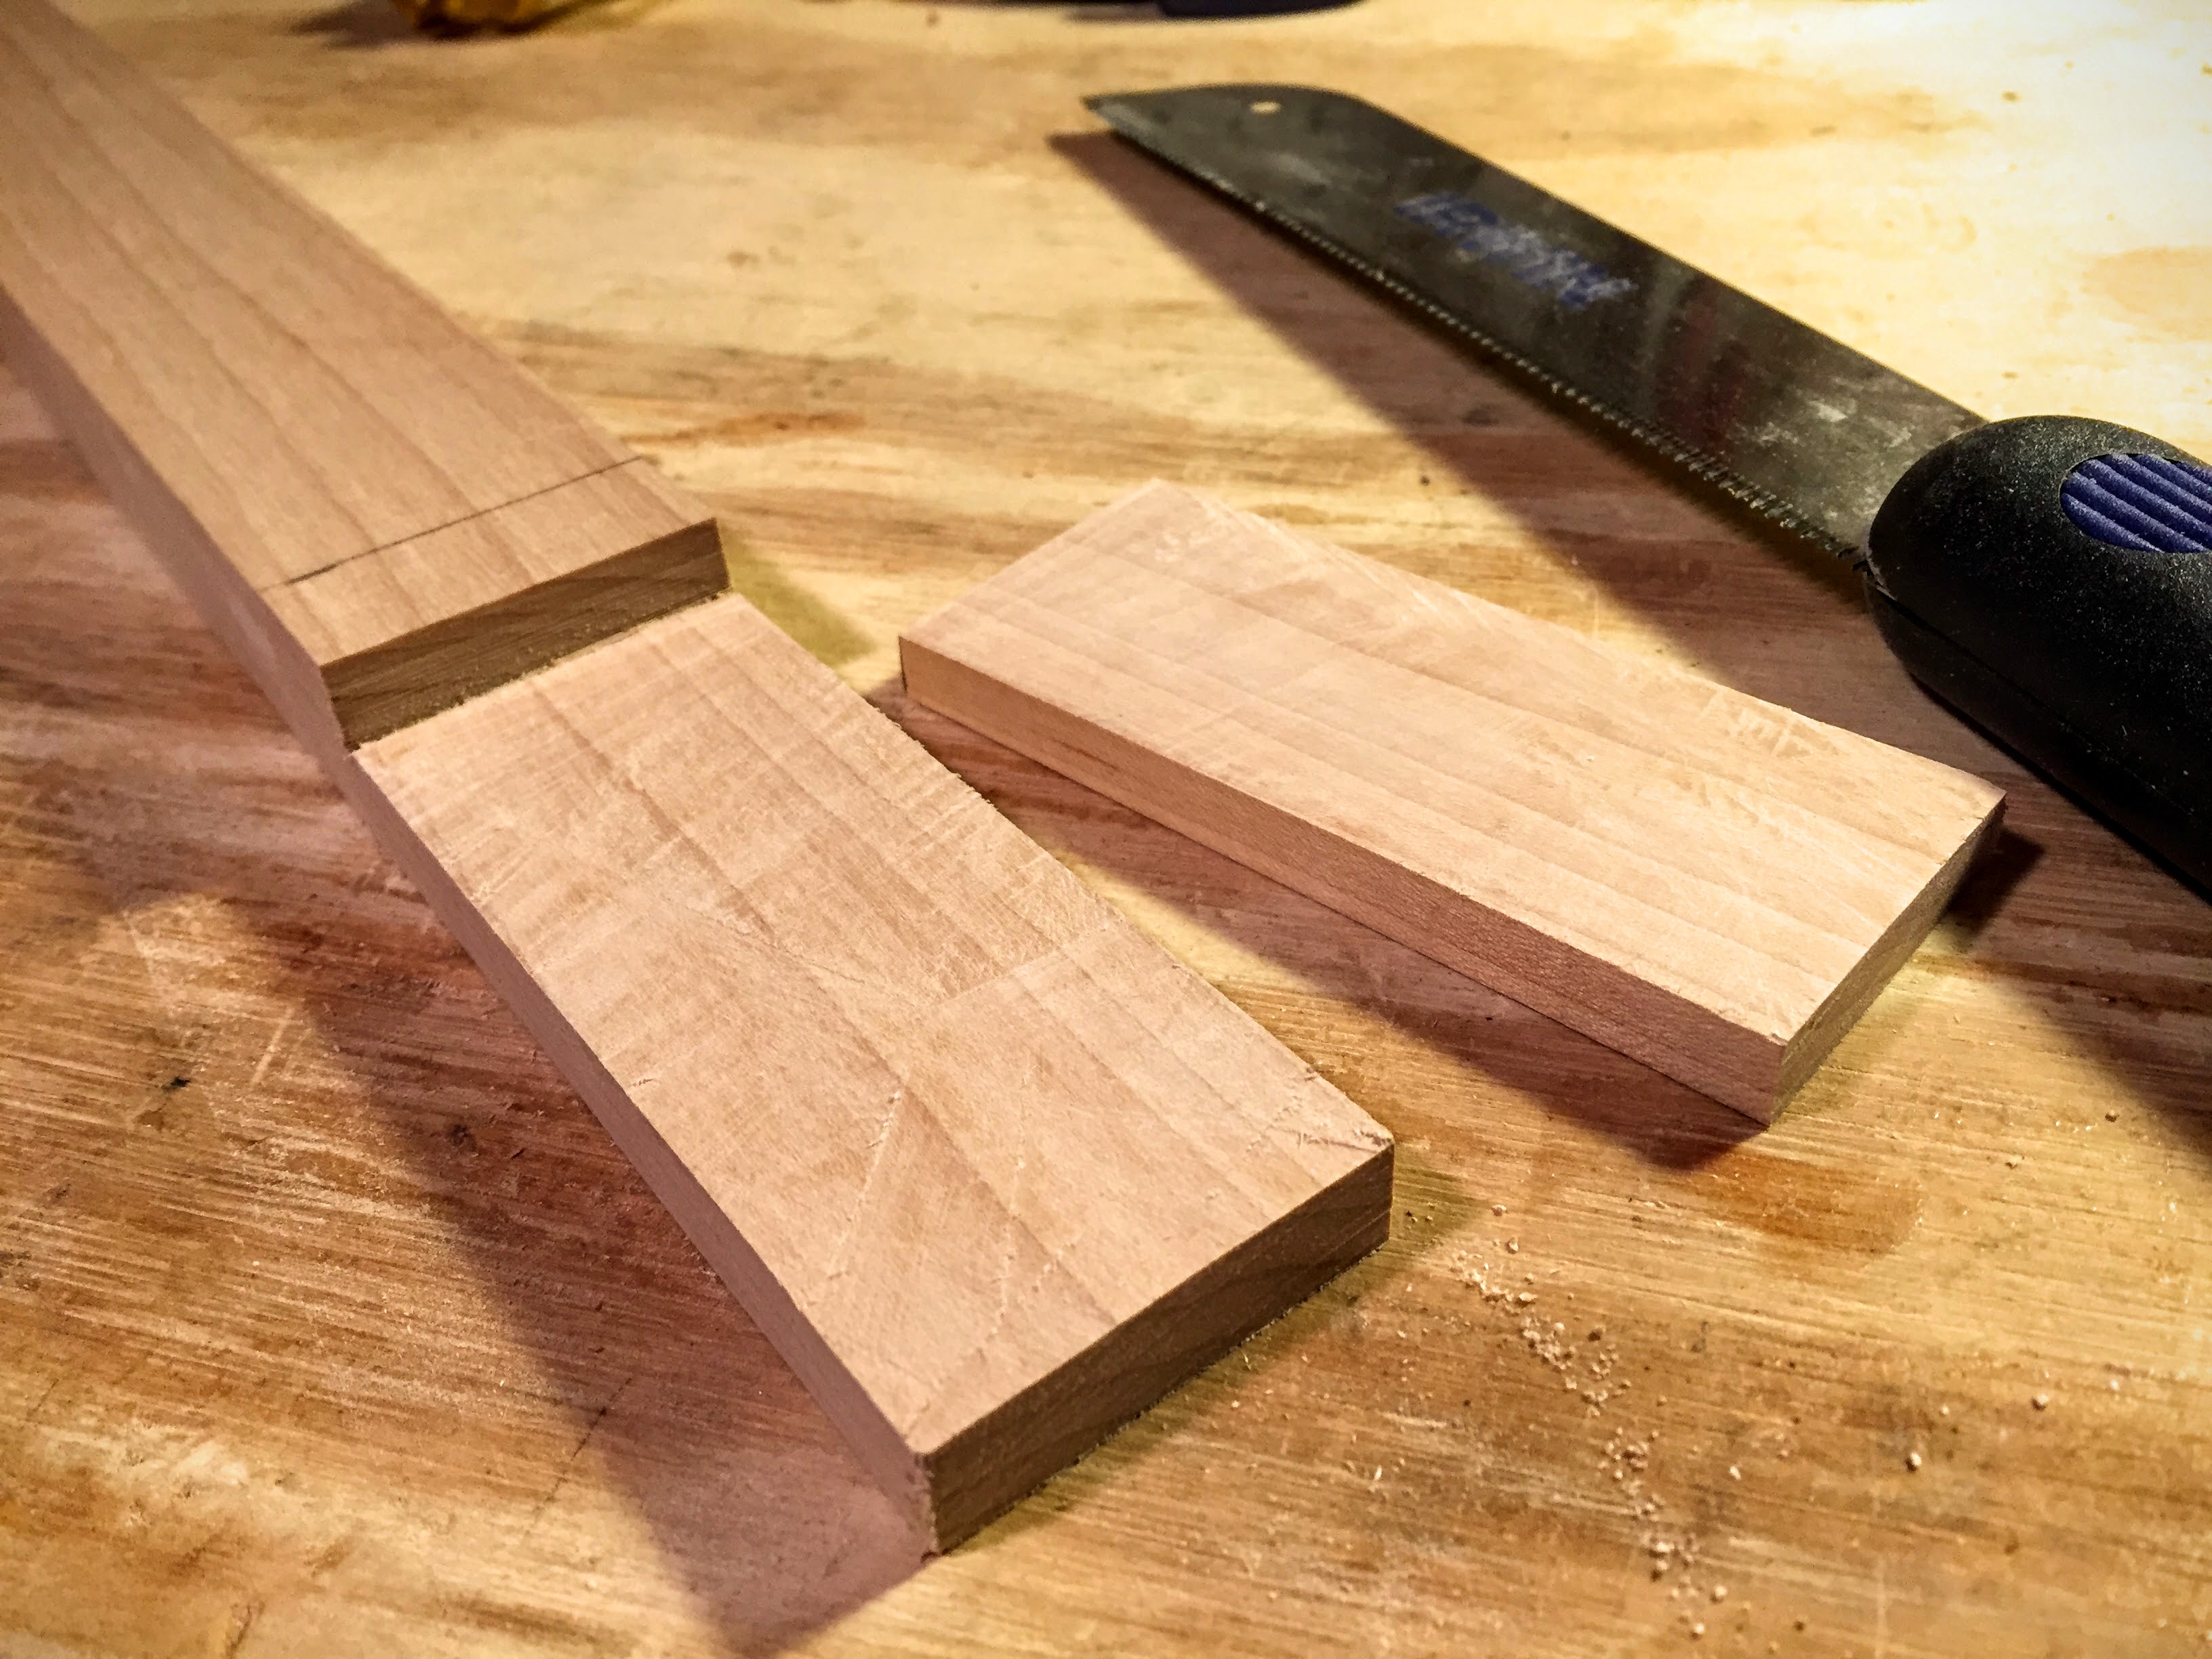
Chisel out the notch
When done making the cuts, use your screwdriver and hammer to tap the remaining wood out of the space.
What’s left will be rough.
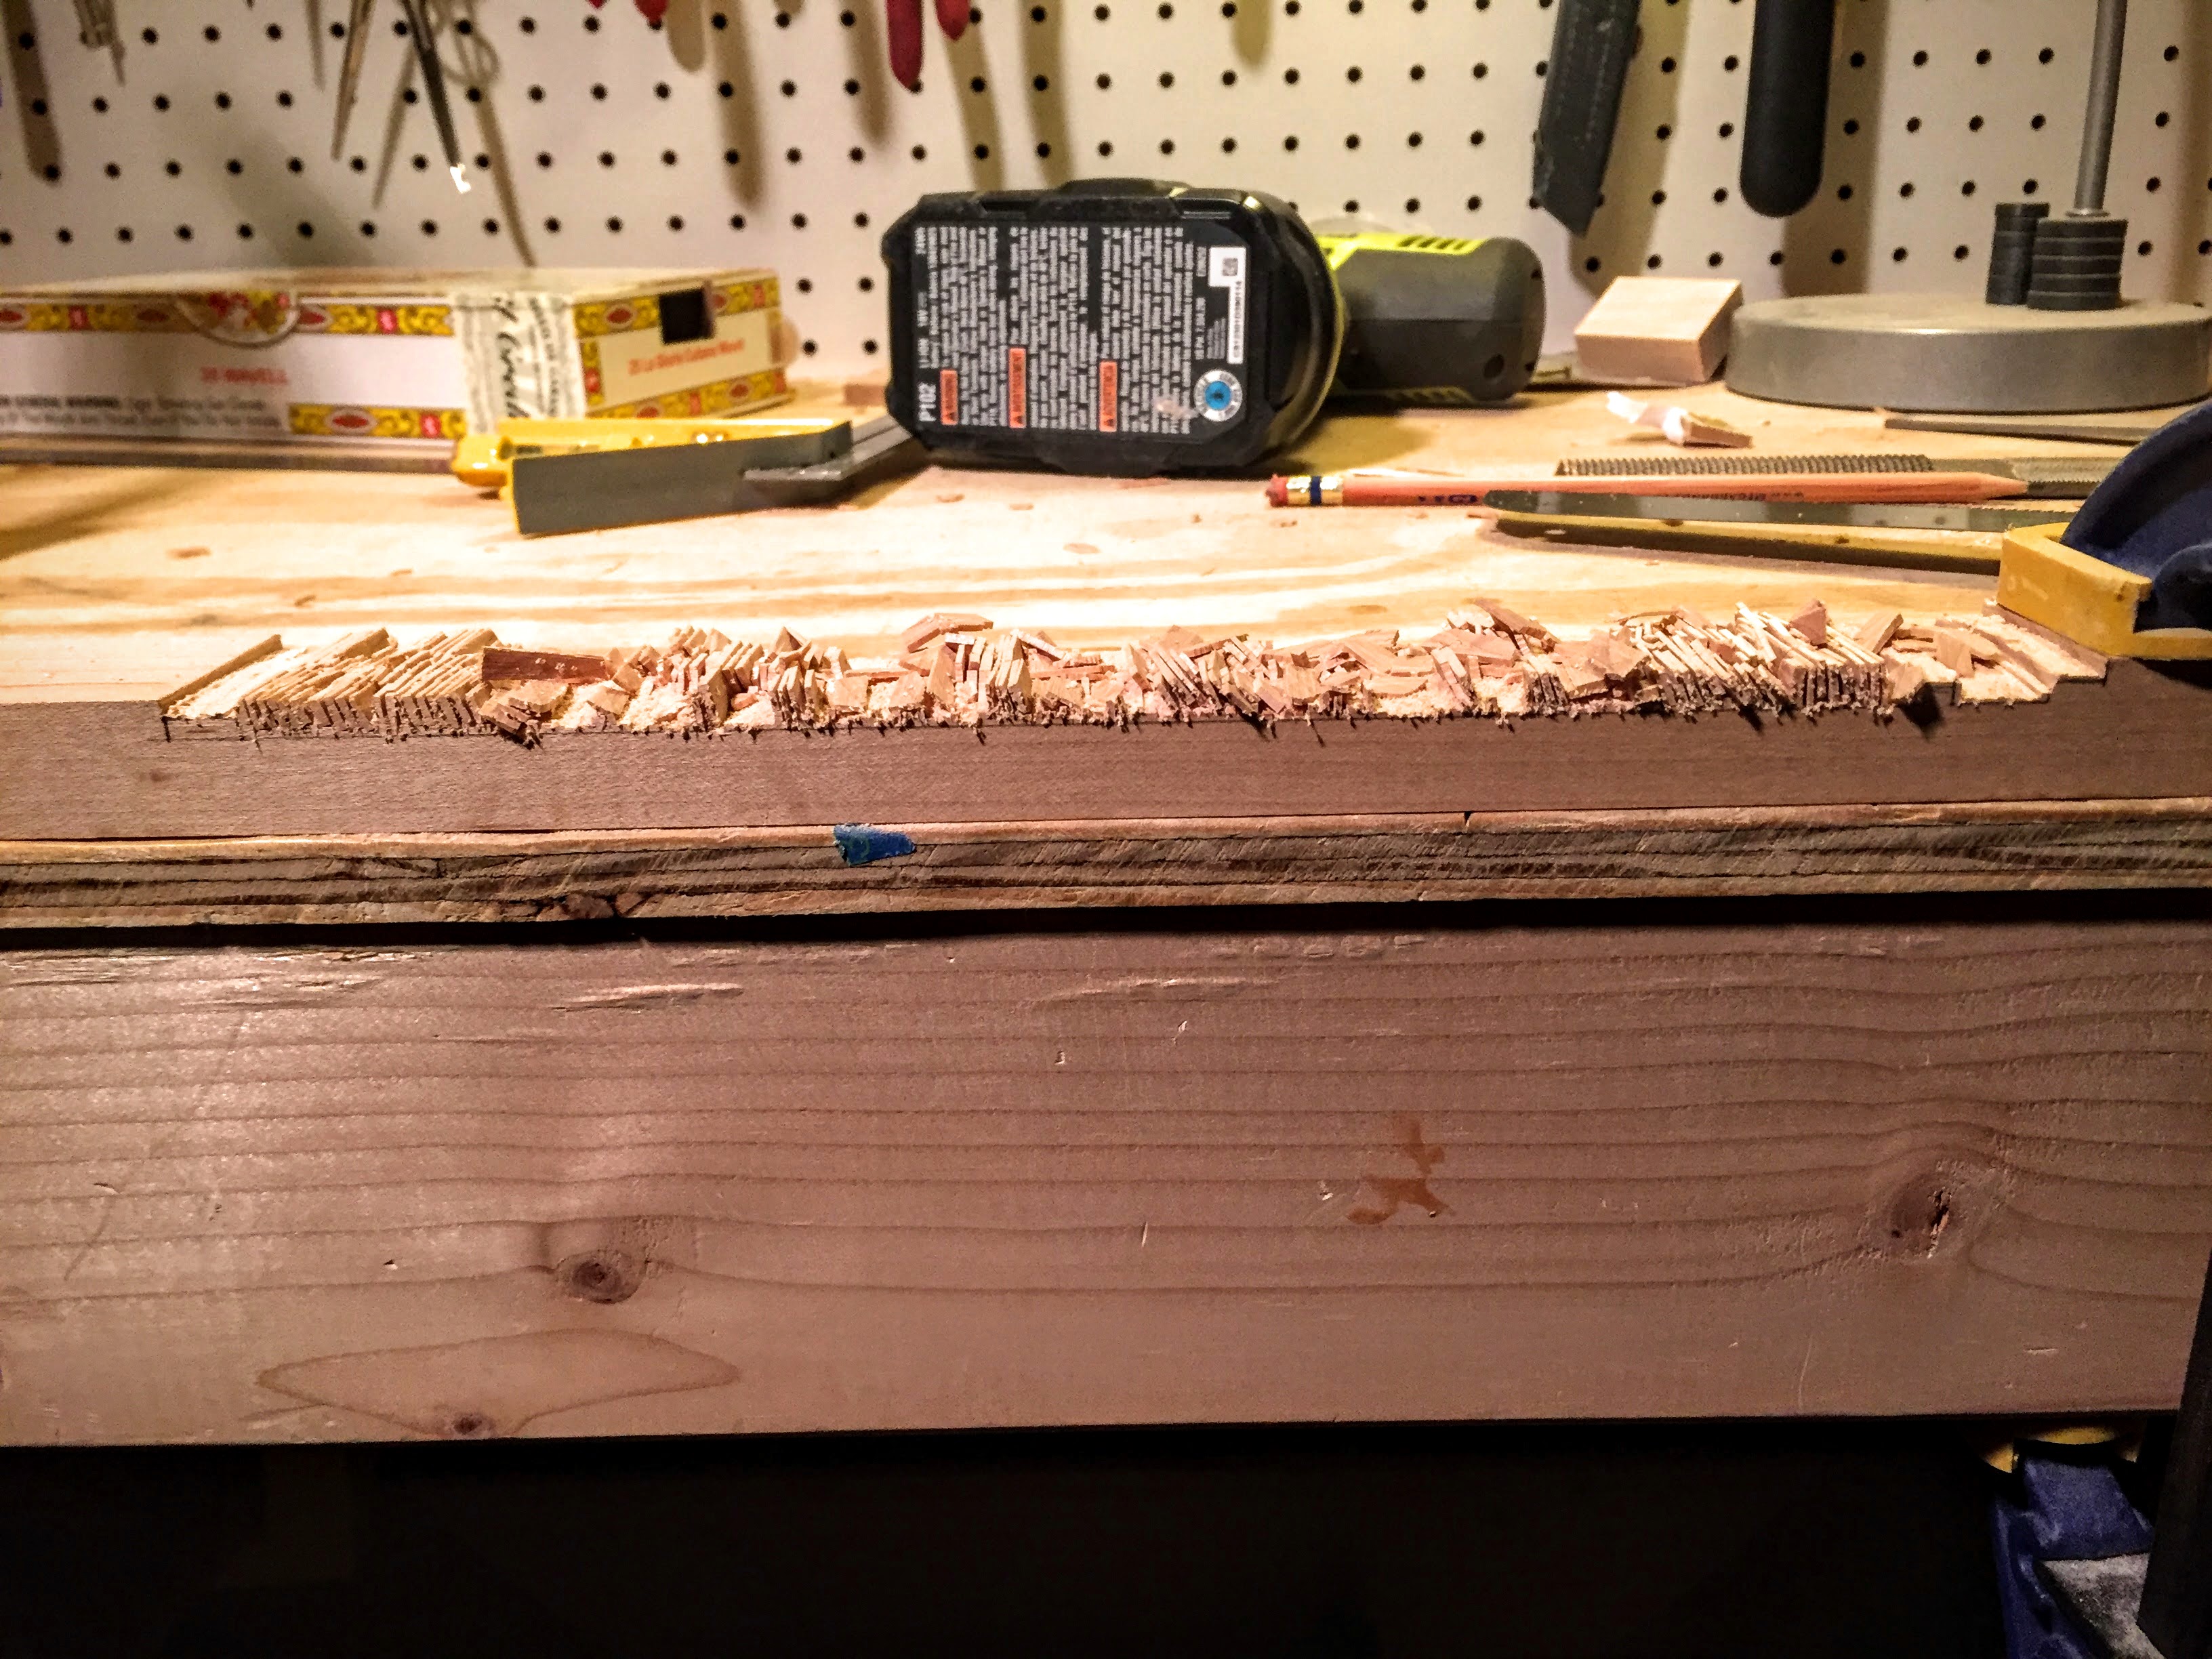
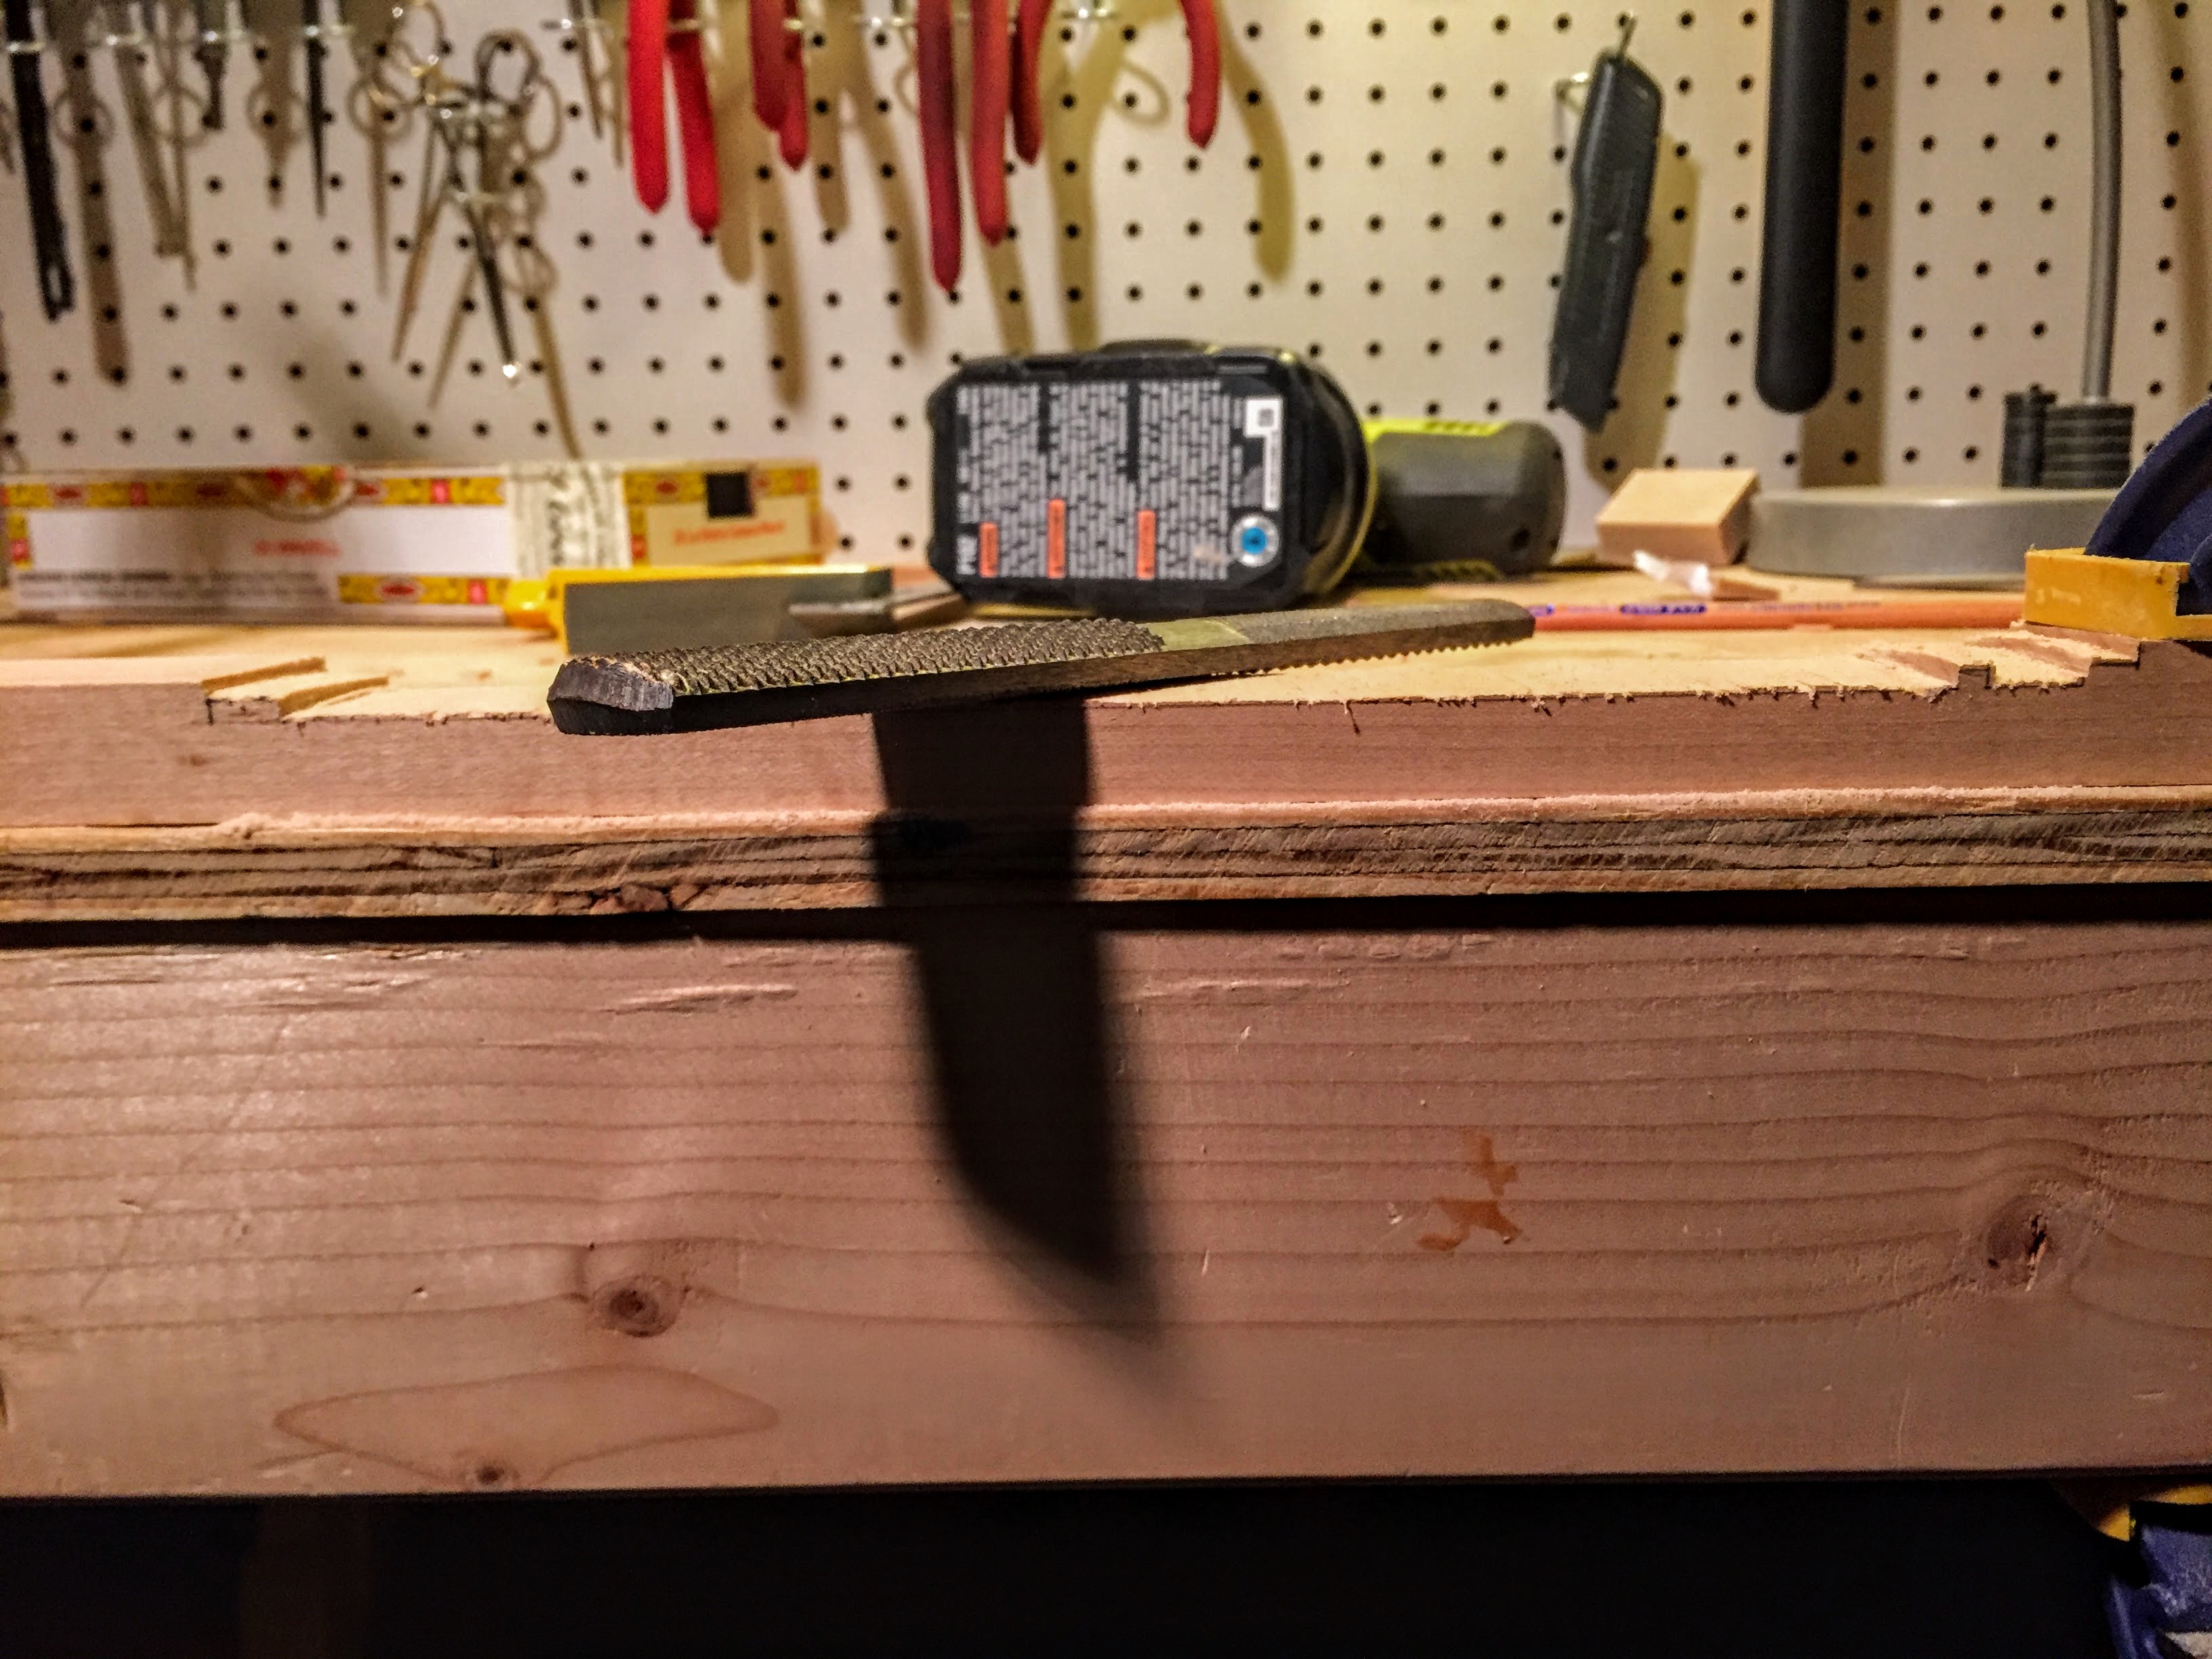
File the notch
Use your file/rasp to remove the remaining wood.
Clean up the area enough to achieve the desired depth.
Don’t worry about it looking pretty; this part will be inside the cigar box.
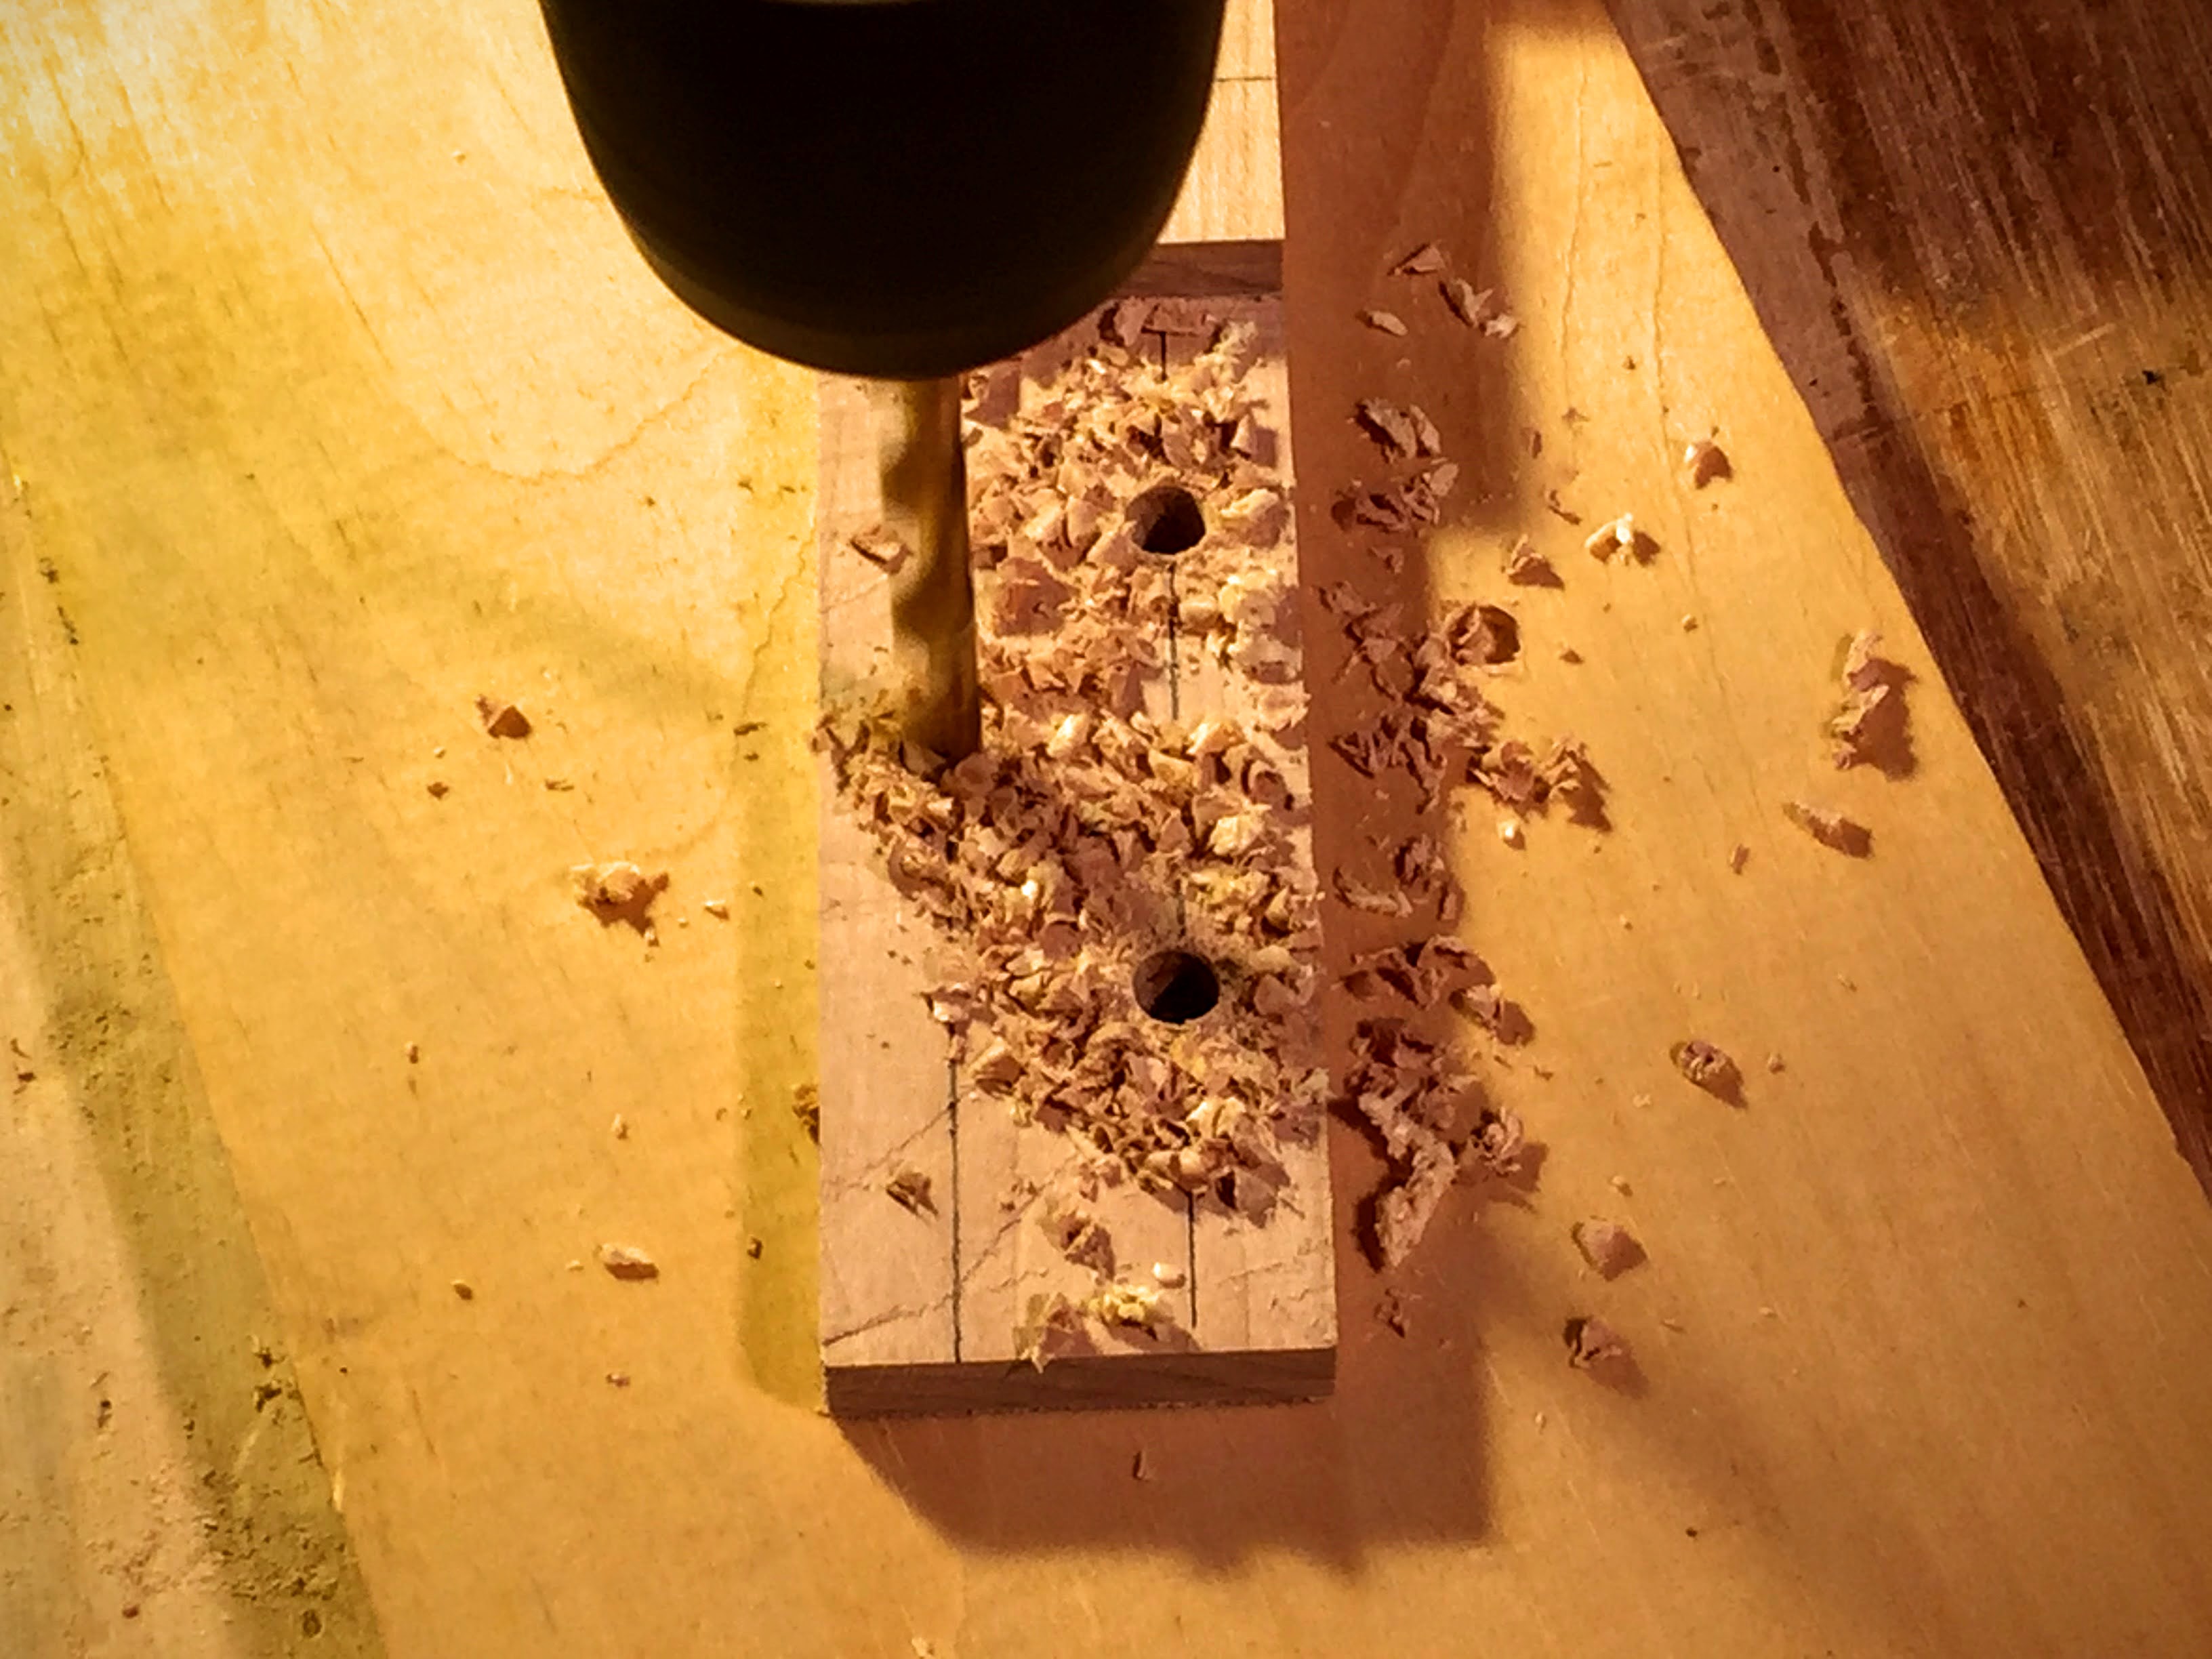
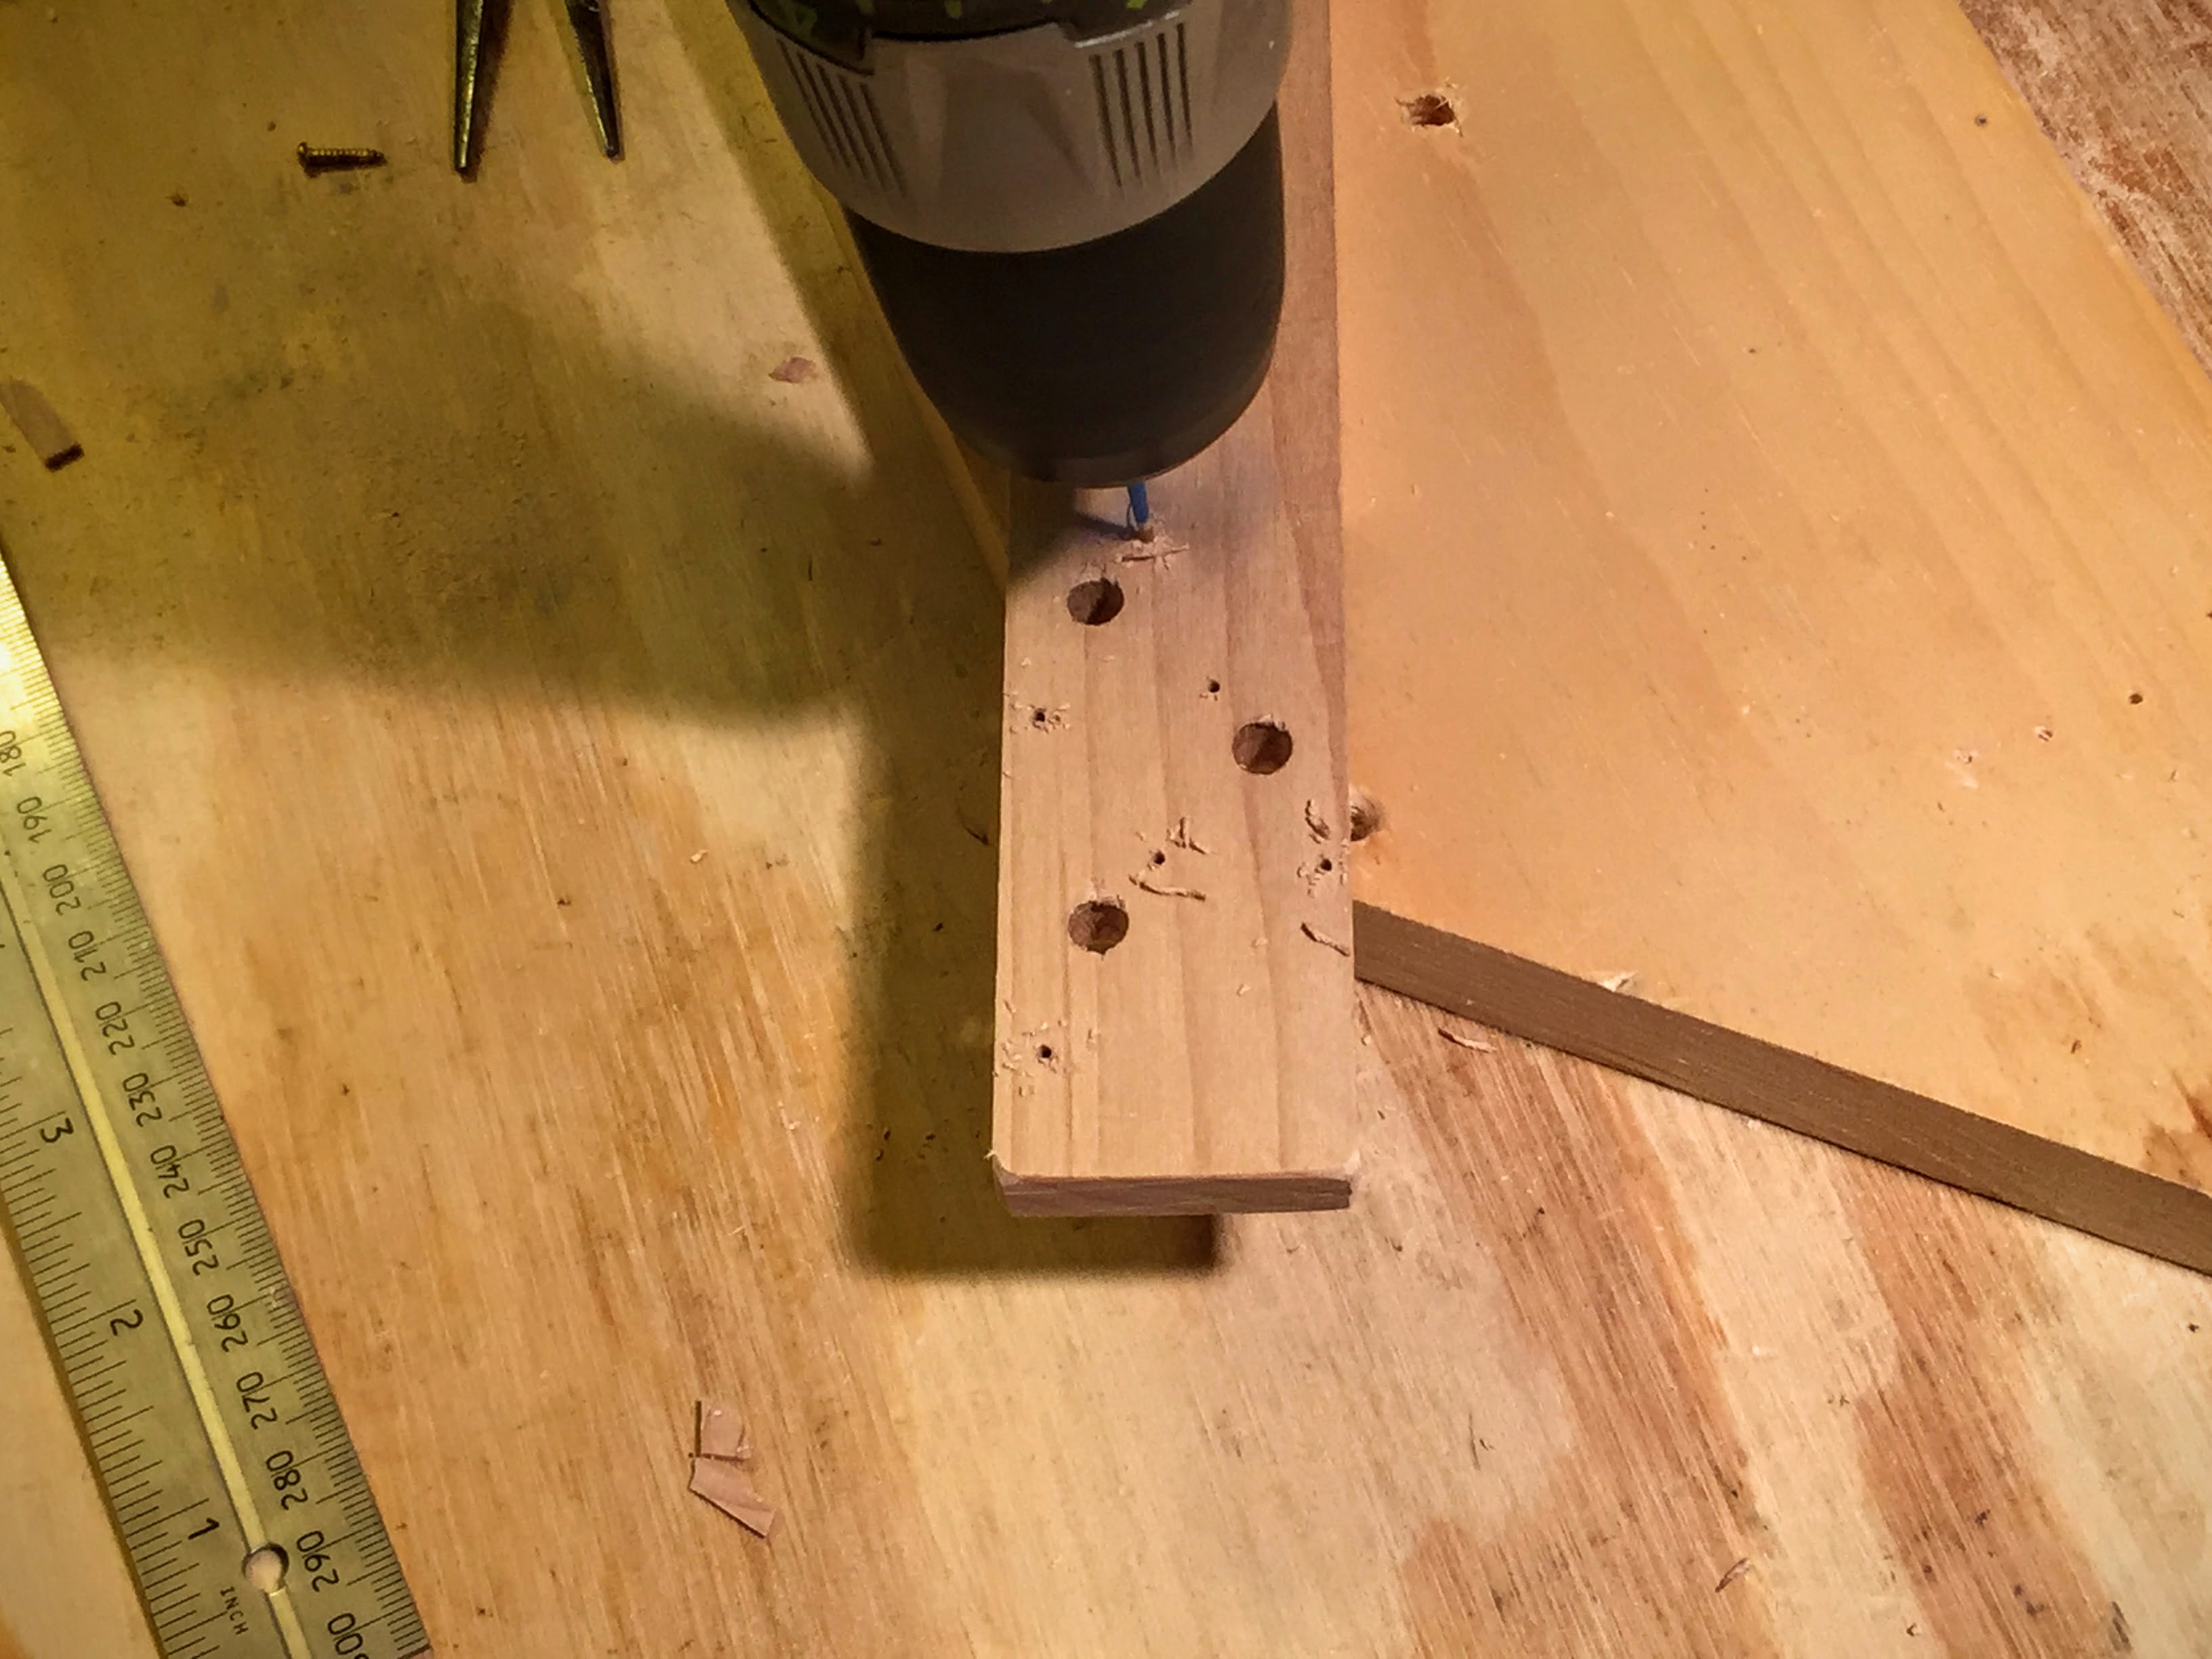
Drill the tail
From the tail of the neck, measure up 3/8″ (10mm) and mark the spot.
Draw a line on the tail, from side to side, at the spot you’ve just marked.
Find the center of that line and mark that spot.
From each side of the neck, and on that line, measure in 5/16″ (8mm). Mark those spots.
Use something with a point, like an awl, to push a small hole into each of the three spots you’ve just marked.
Use your drill and 1/16″ (2mm) bit to drill holes through the tail of the neck at each of those spots.
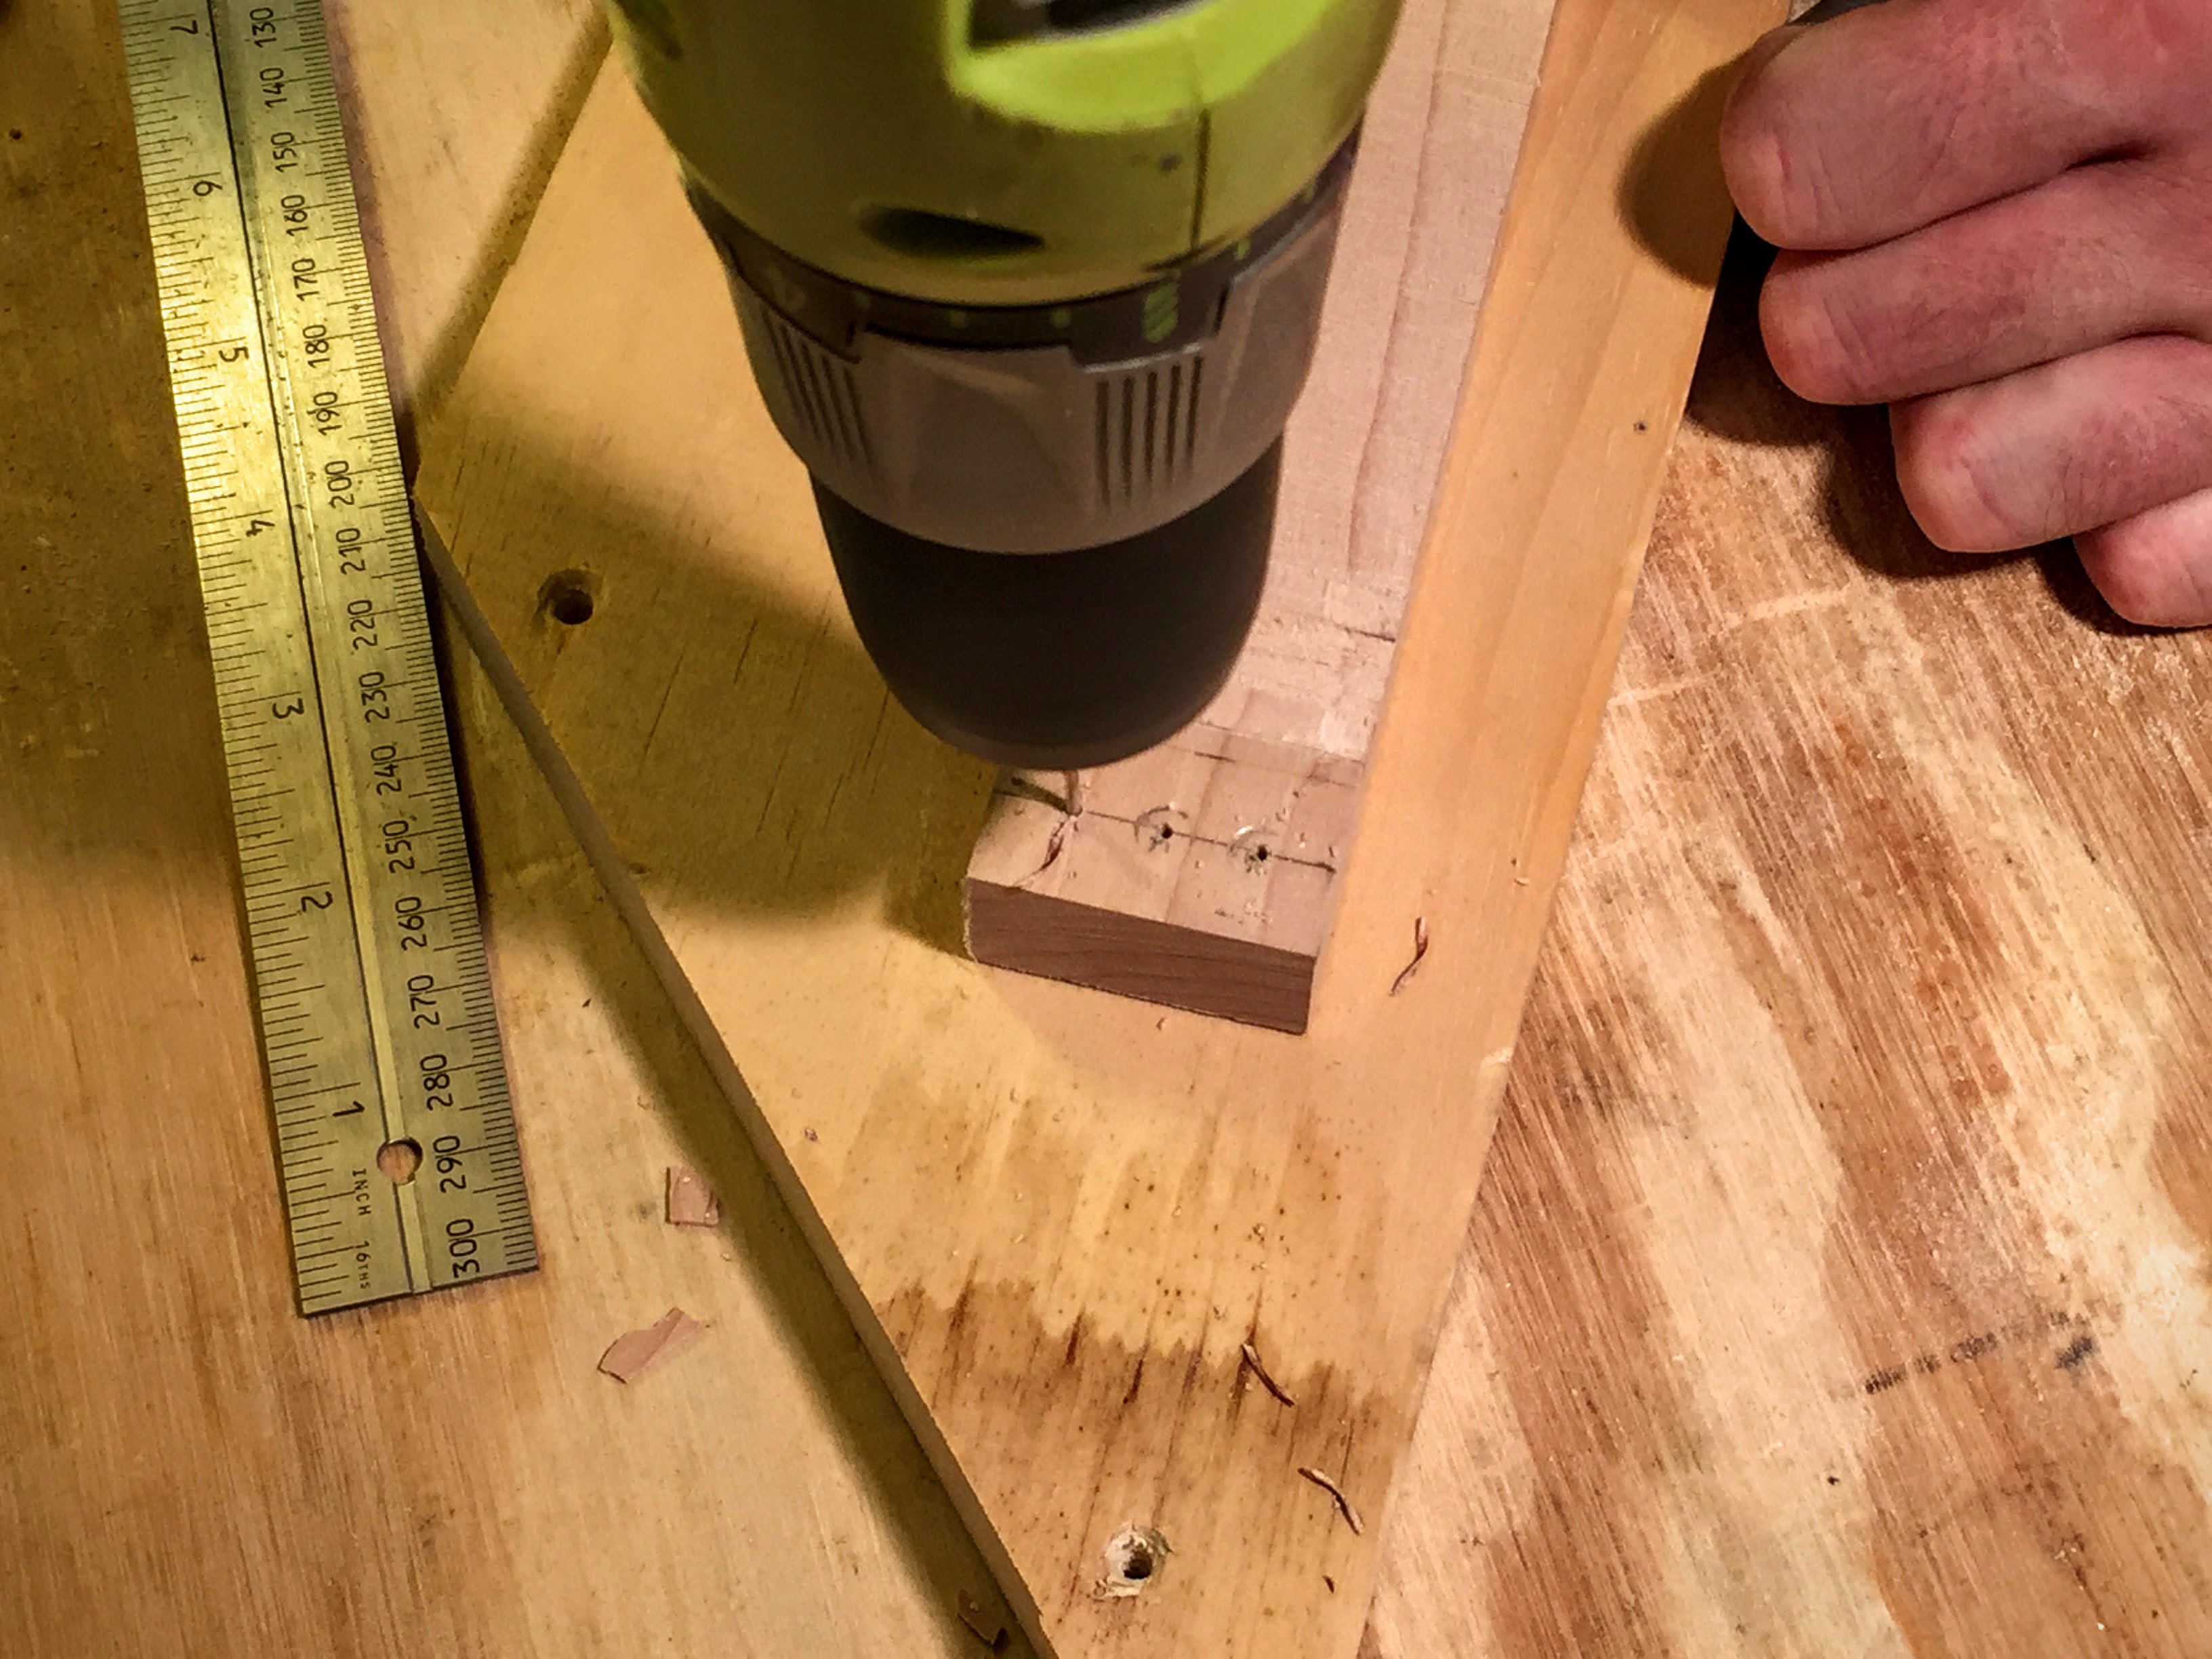
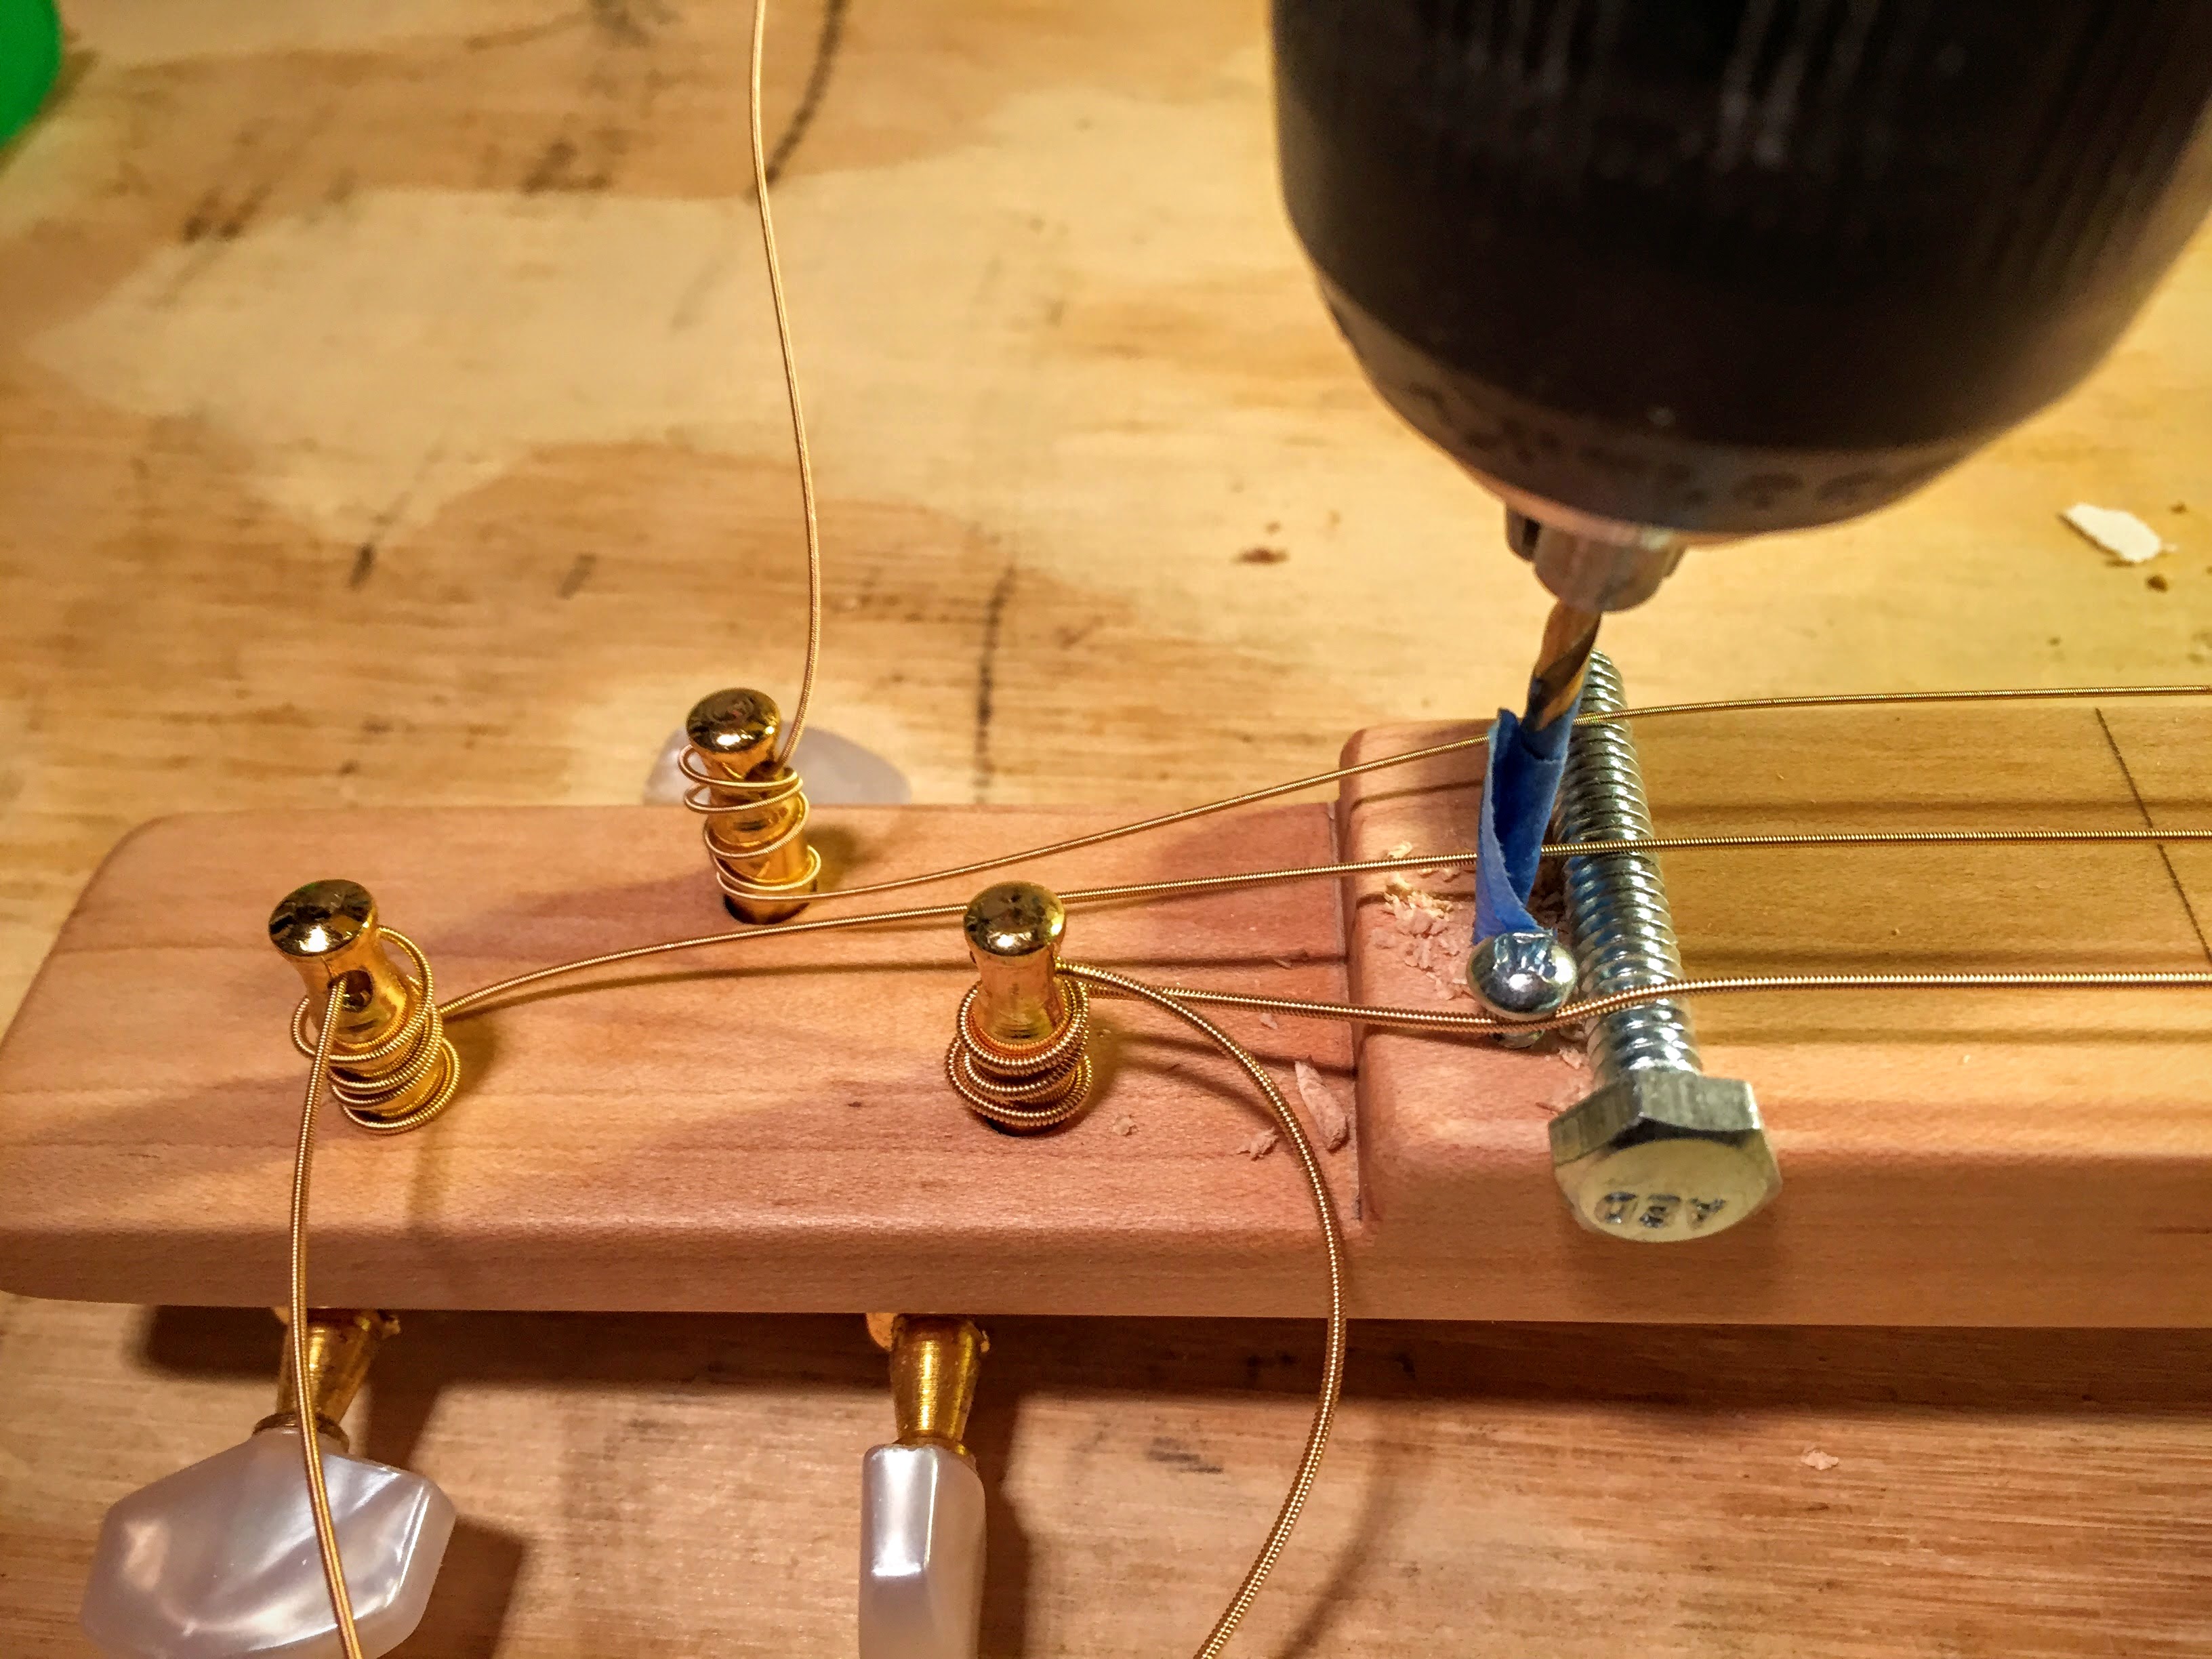
Drill holes for the tuner mounting screws
From the back of the headstock, insert the tuners into the holes.
Make certain that the pinion gears are beneath the tuning key shafts.
Mark spots through each hole in the mounting plates.
This is where the mounting screws fasten the tuners to the headstock.
Remove the tuners from the headstock.
Use the painter’s tape to create a depth guide for your drill bit.
Use a mounting screw as a reference for where you put tape on the bit.
Leave the same length of bit exposed as the screw length.
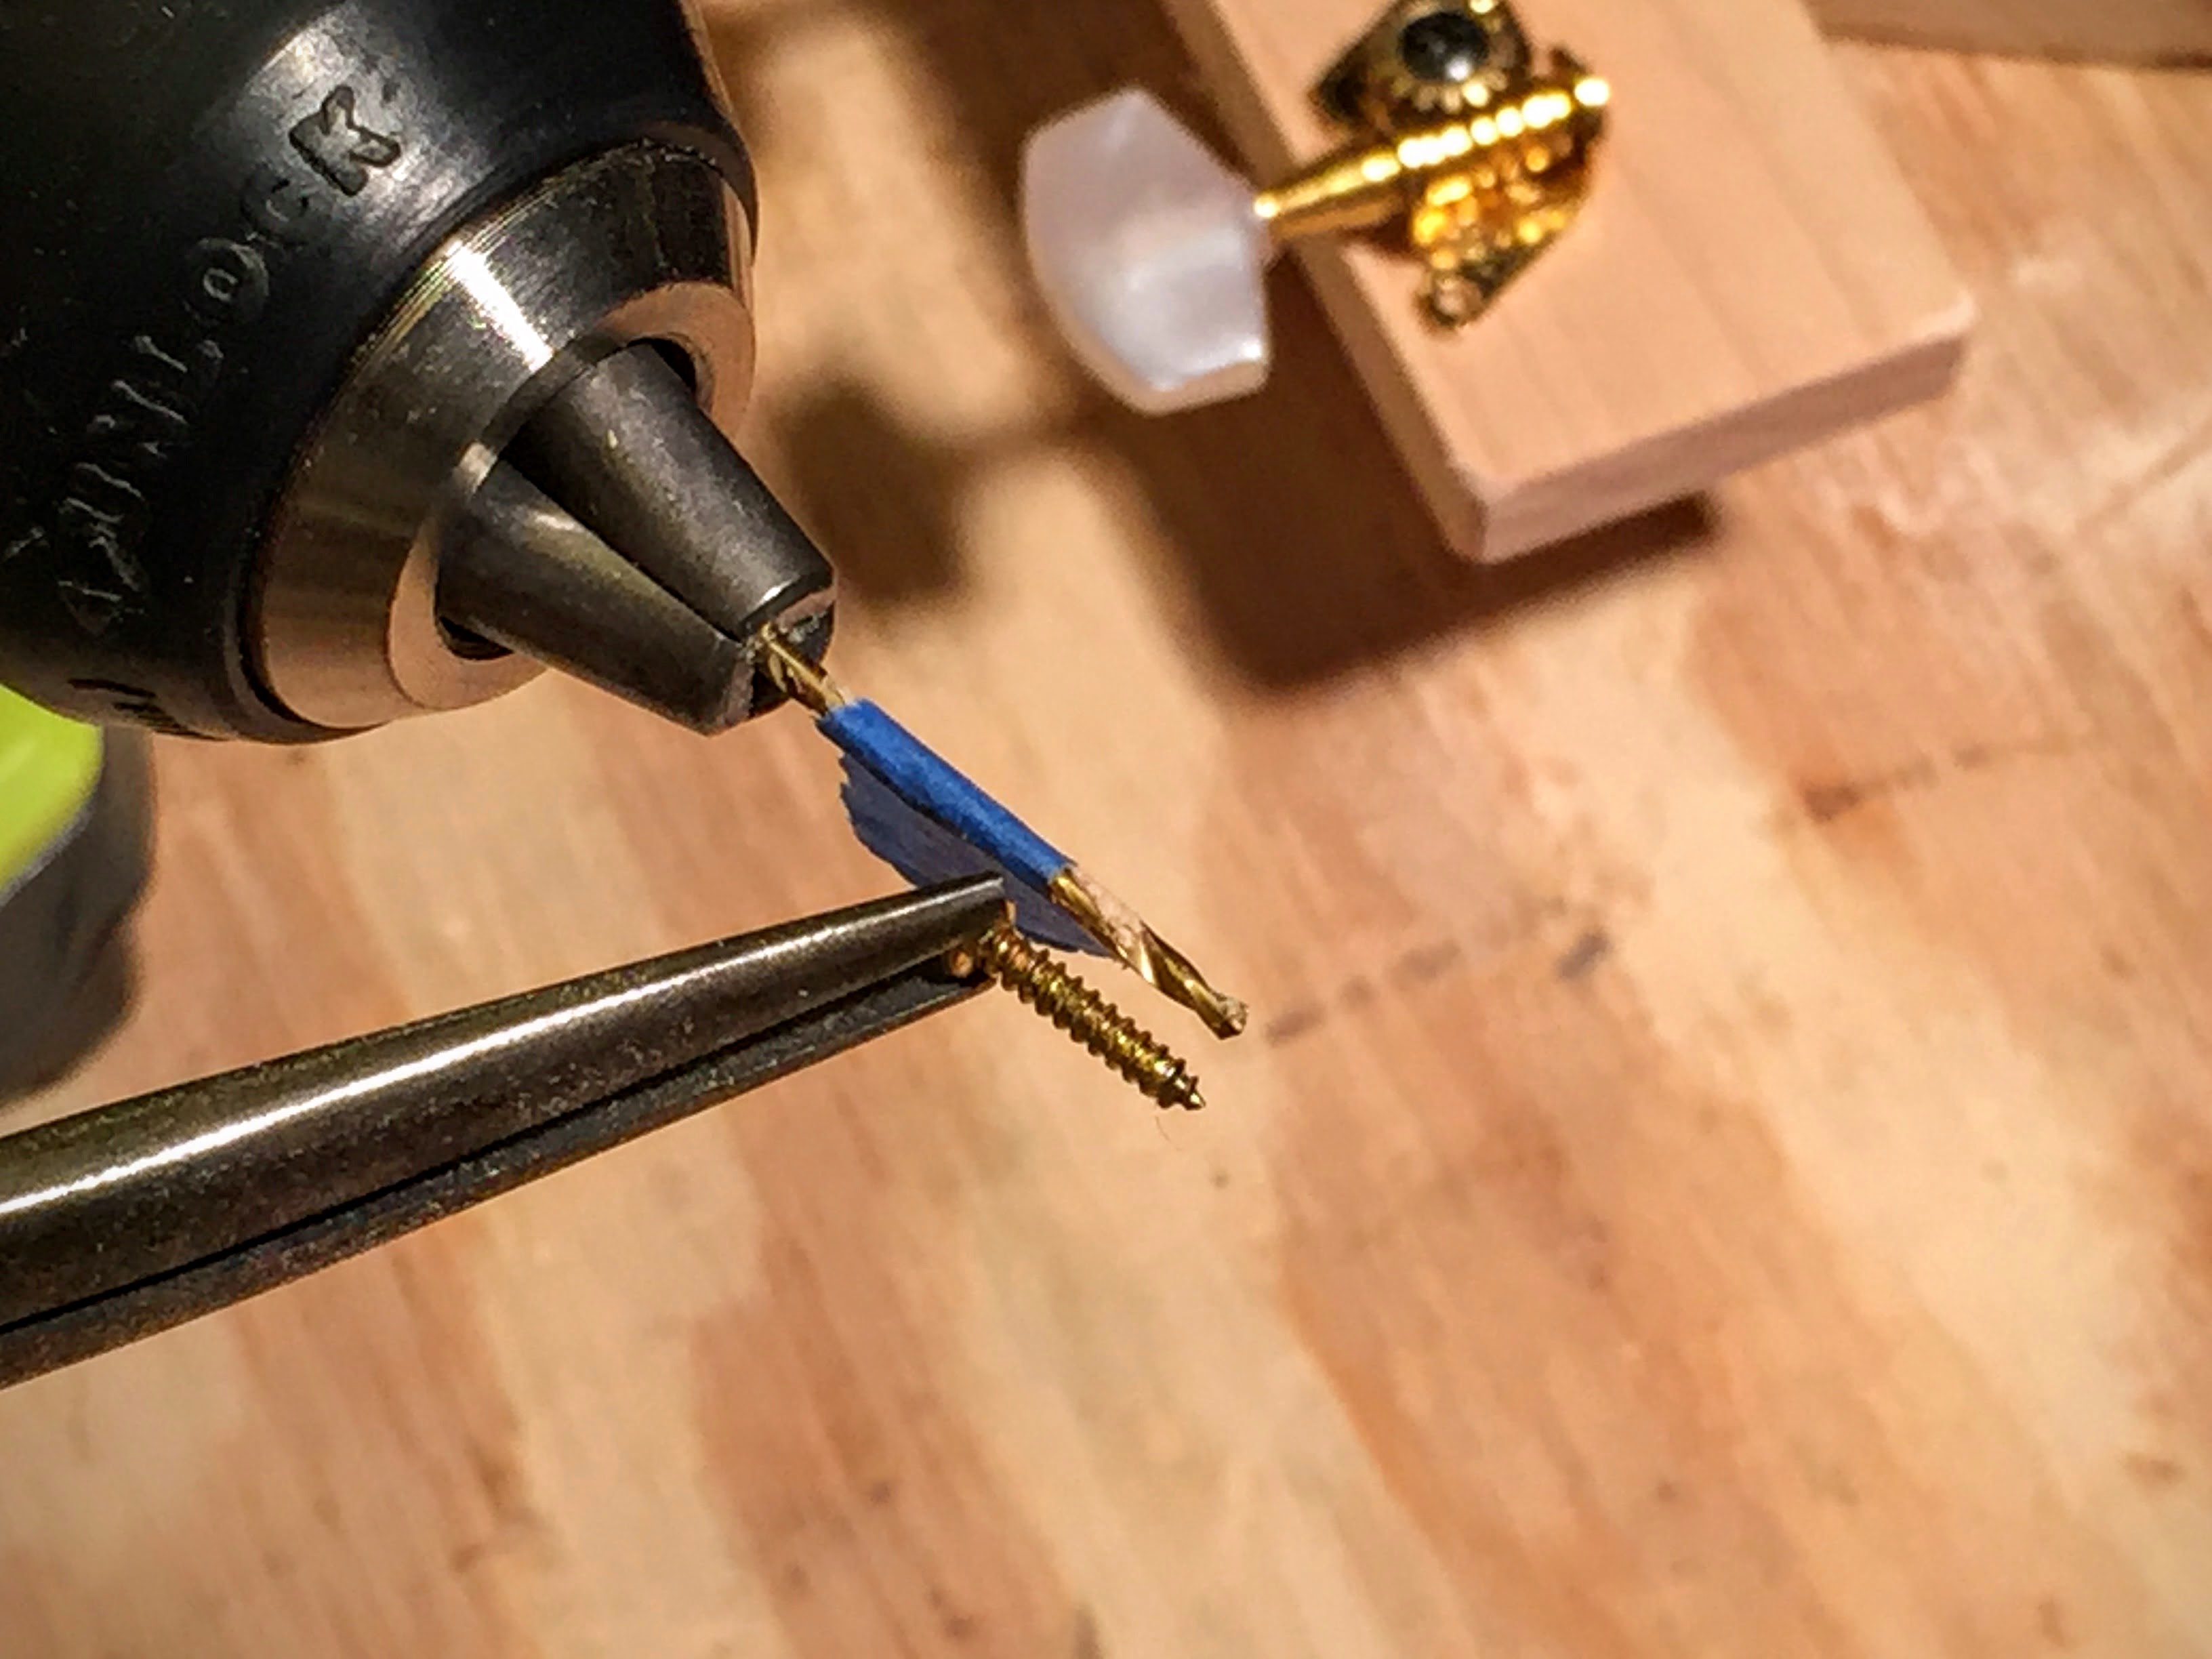
Drill holes into each spot that you’ve marked for the mounting screws.
When the tape reaches the wood you’re drilling, you know to stop.
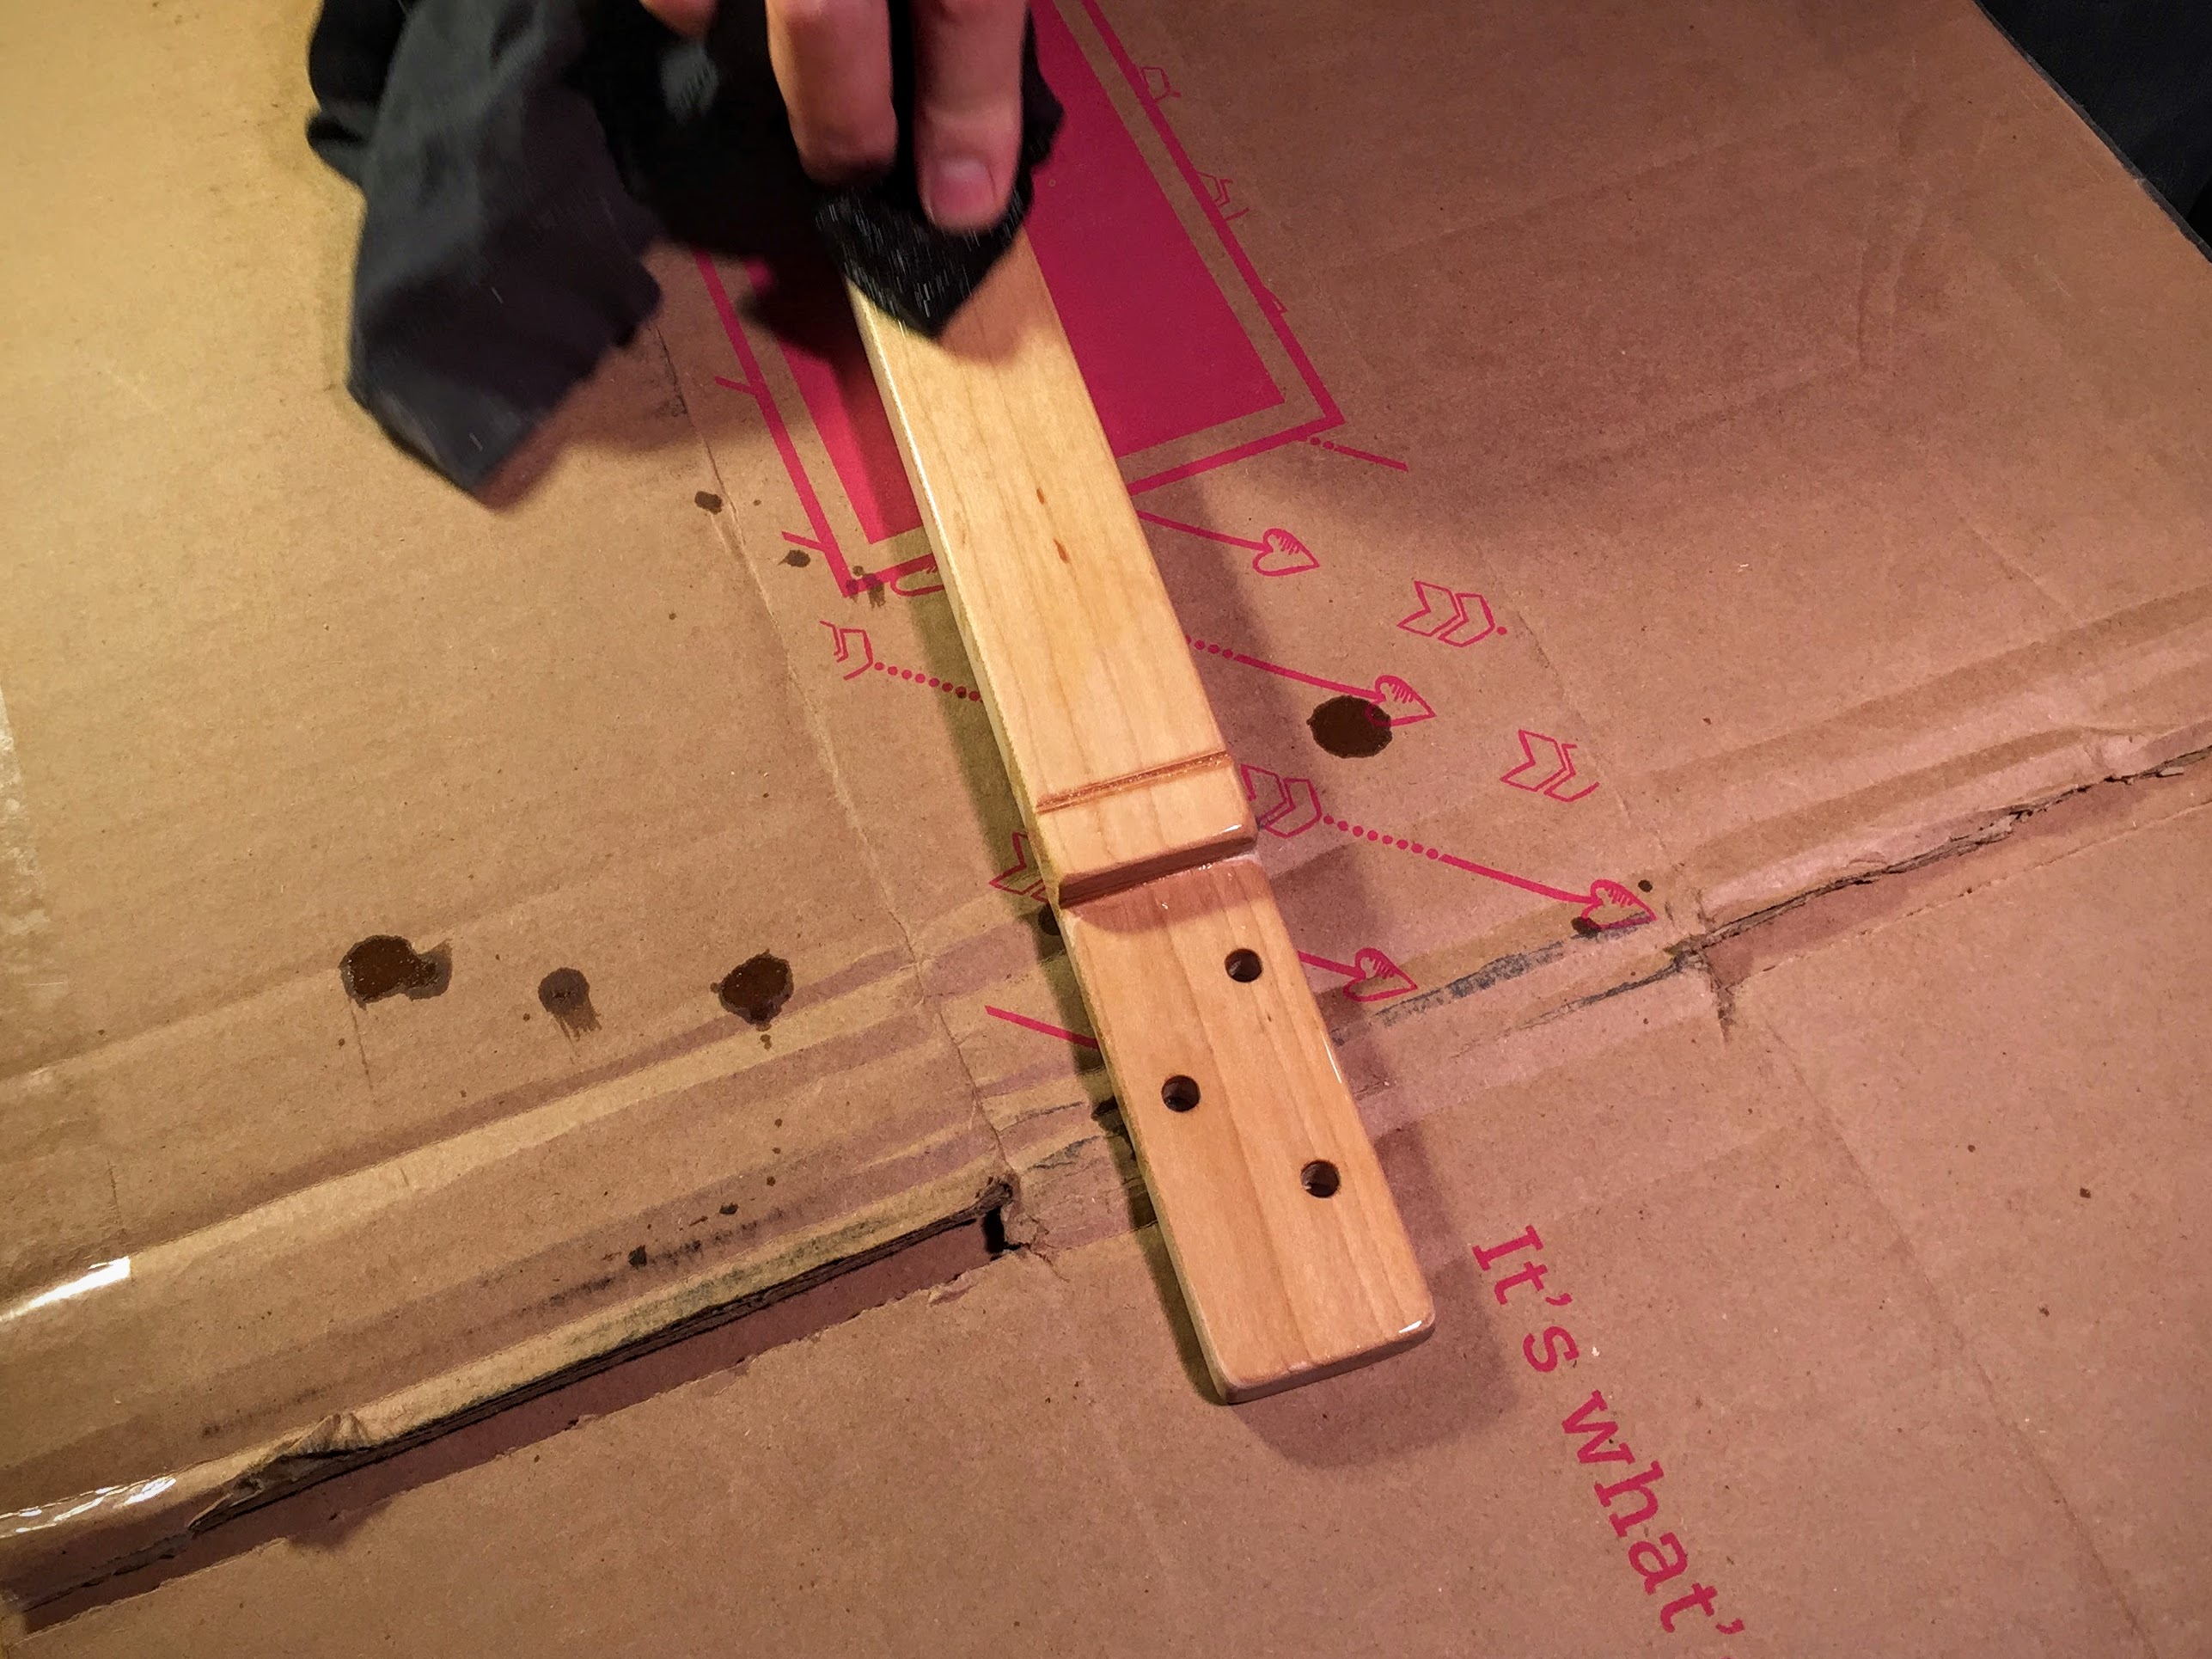
Sand and oil the neck
File and sand the neck until you are satisfied with how it feels.
Start with the coarse grits and finish with the finer grits.
Wipe the dust off the neck.
Following the manufacturer’s instructions (and warnings), apply the linseed oil to the neck, or whatever finish you’ve chosen.
A finish isn’t necessary but does help to protect the wood and enhance the appearance.
Let the neck dry.
Wait longer than 24 hours if you can help it.
It’s easy to dive right back into building before the neck is fully dry because you’re eager to get it done.
Wait a couple of days, and you’ll get better results.
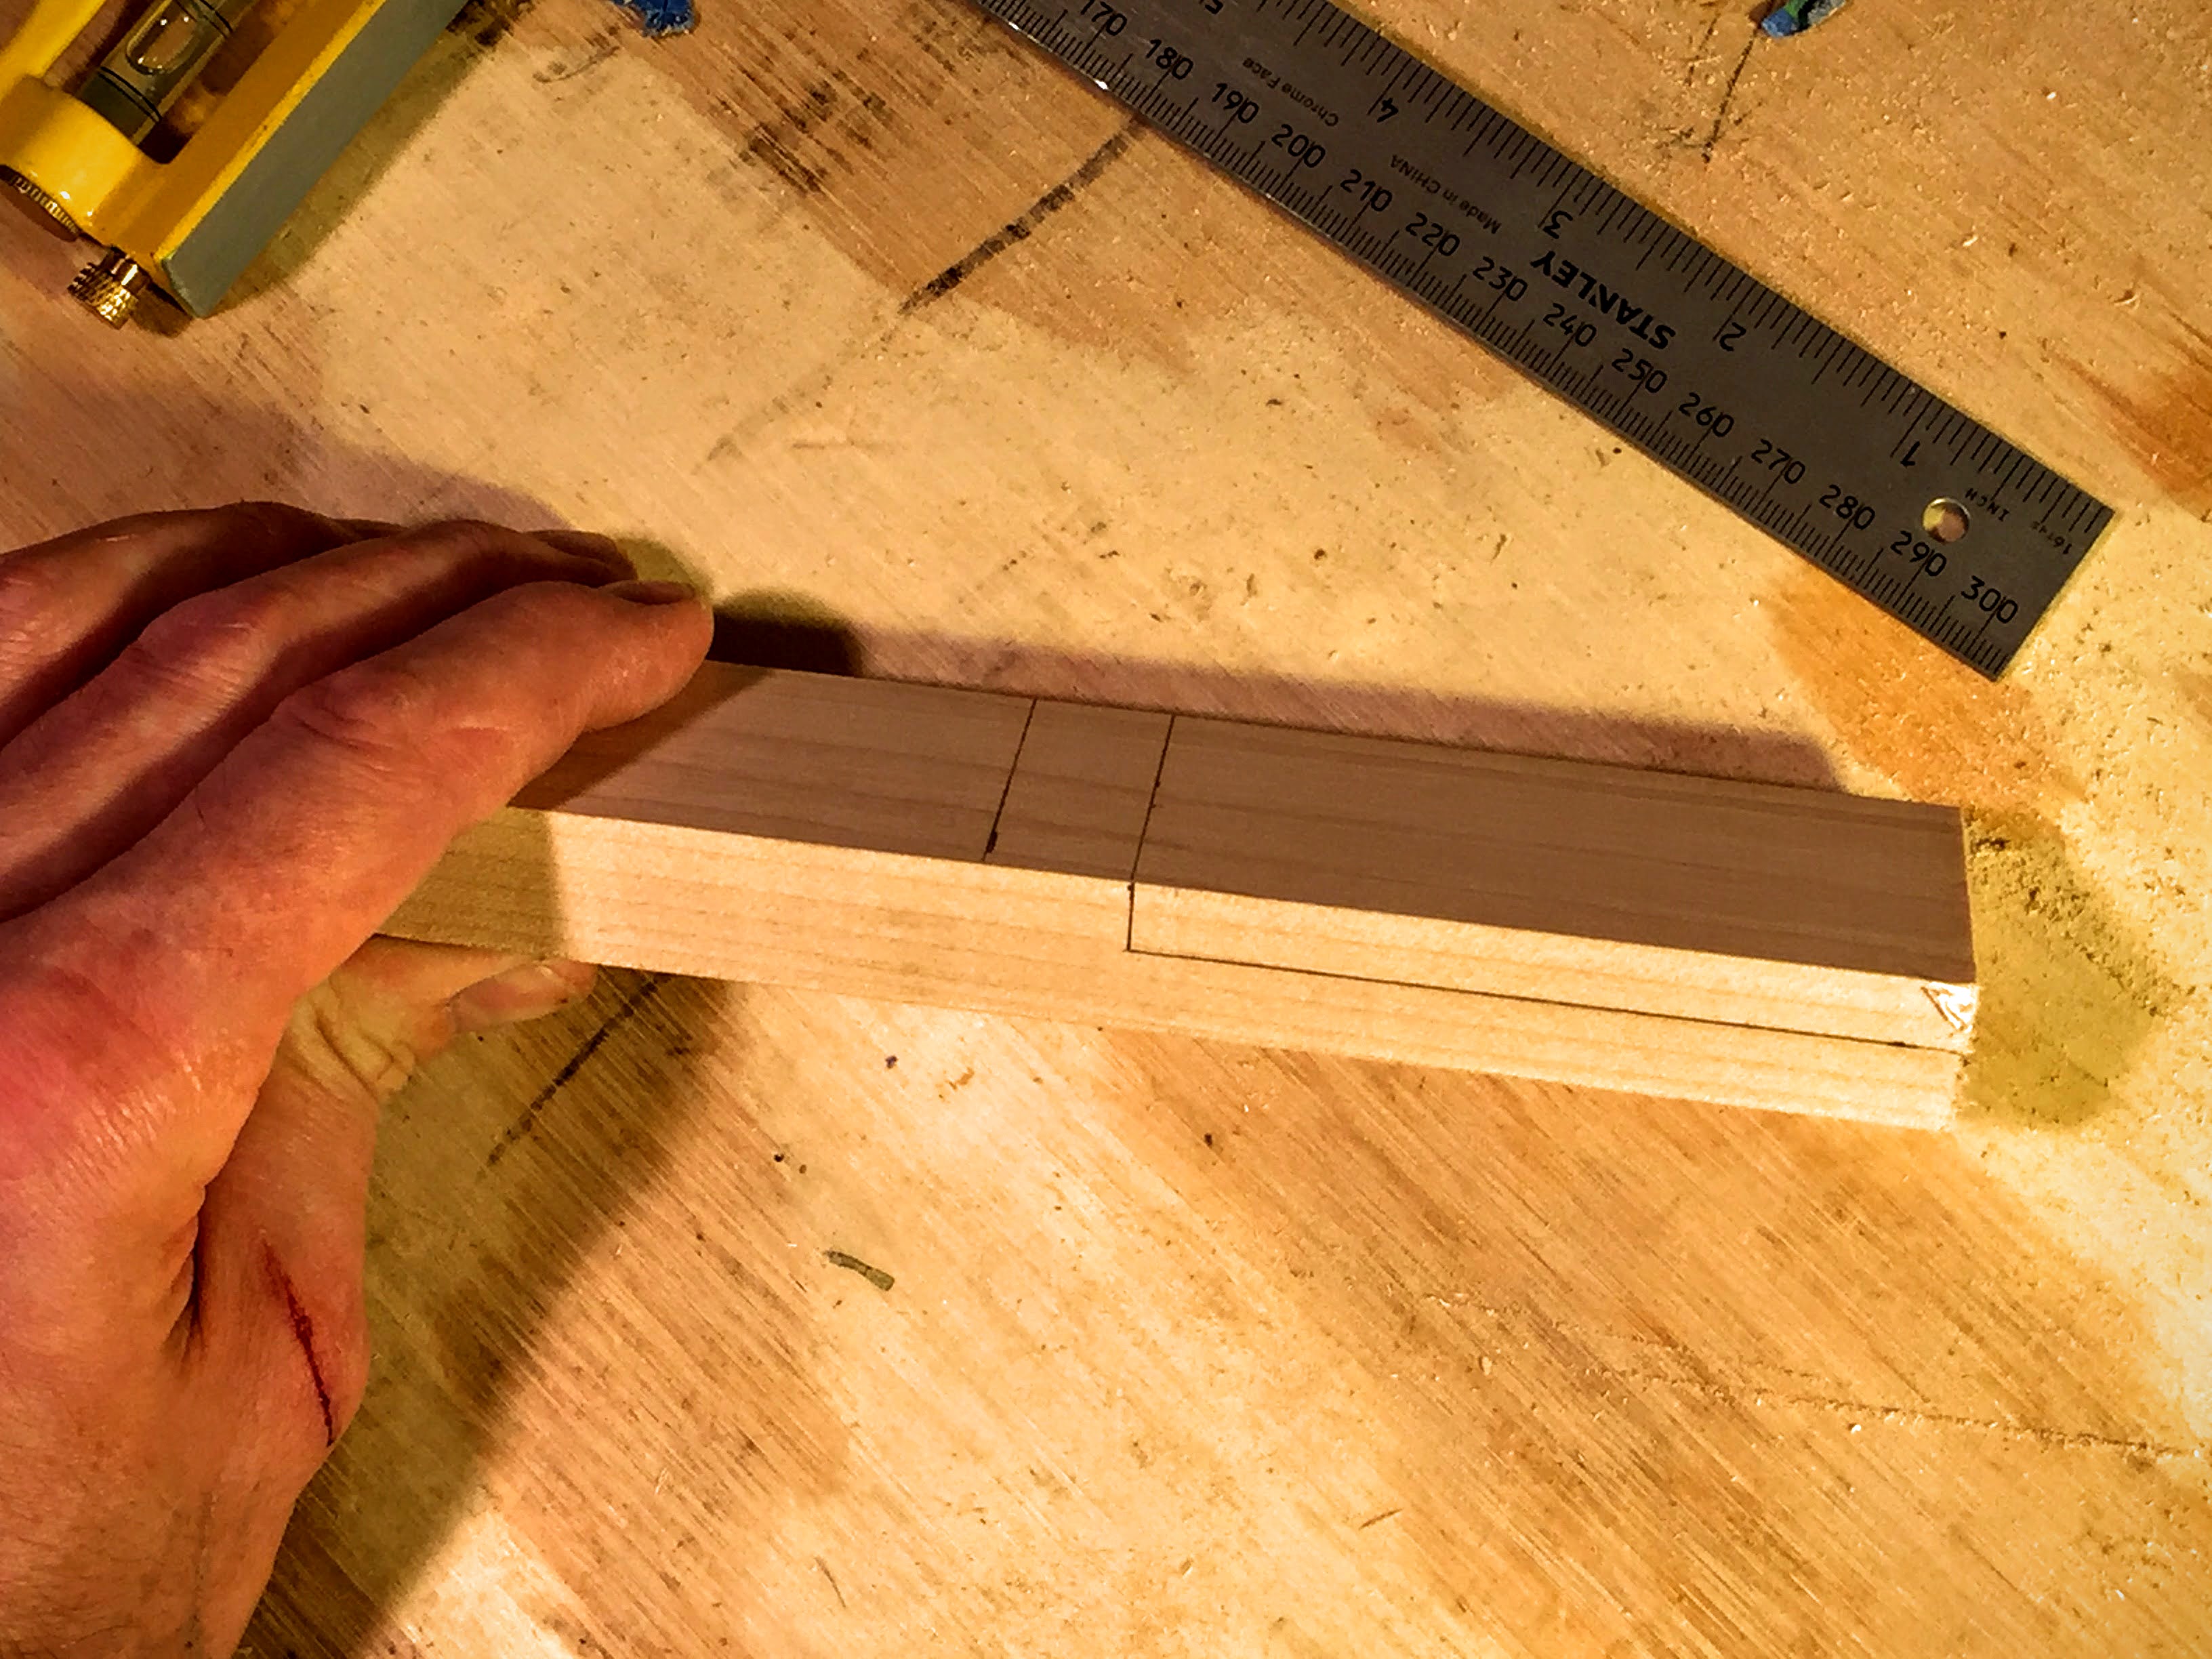
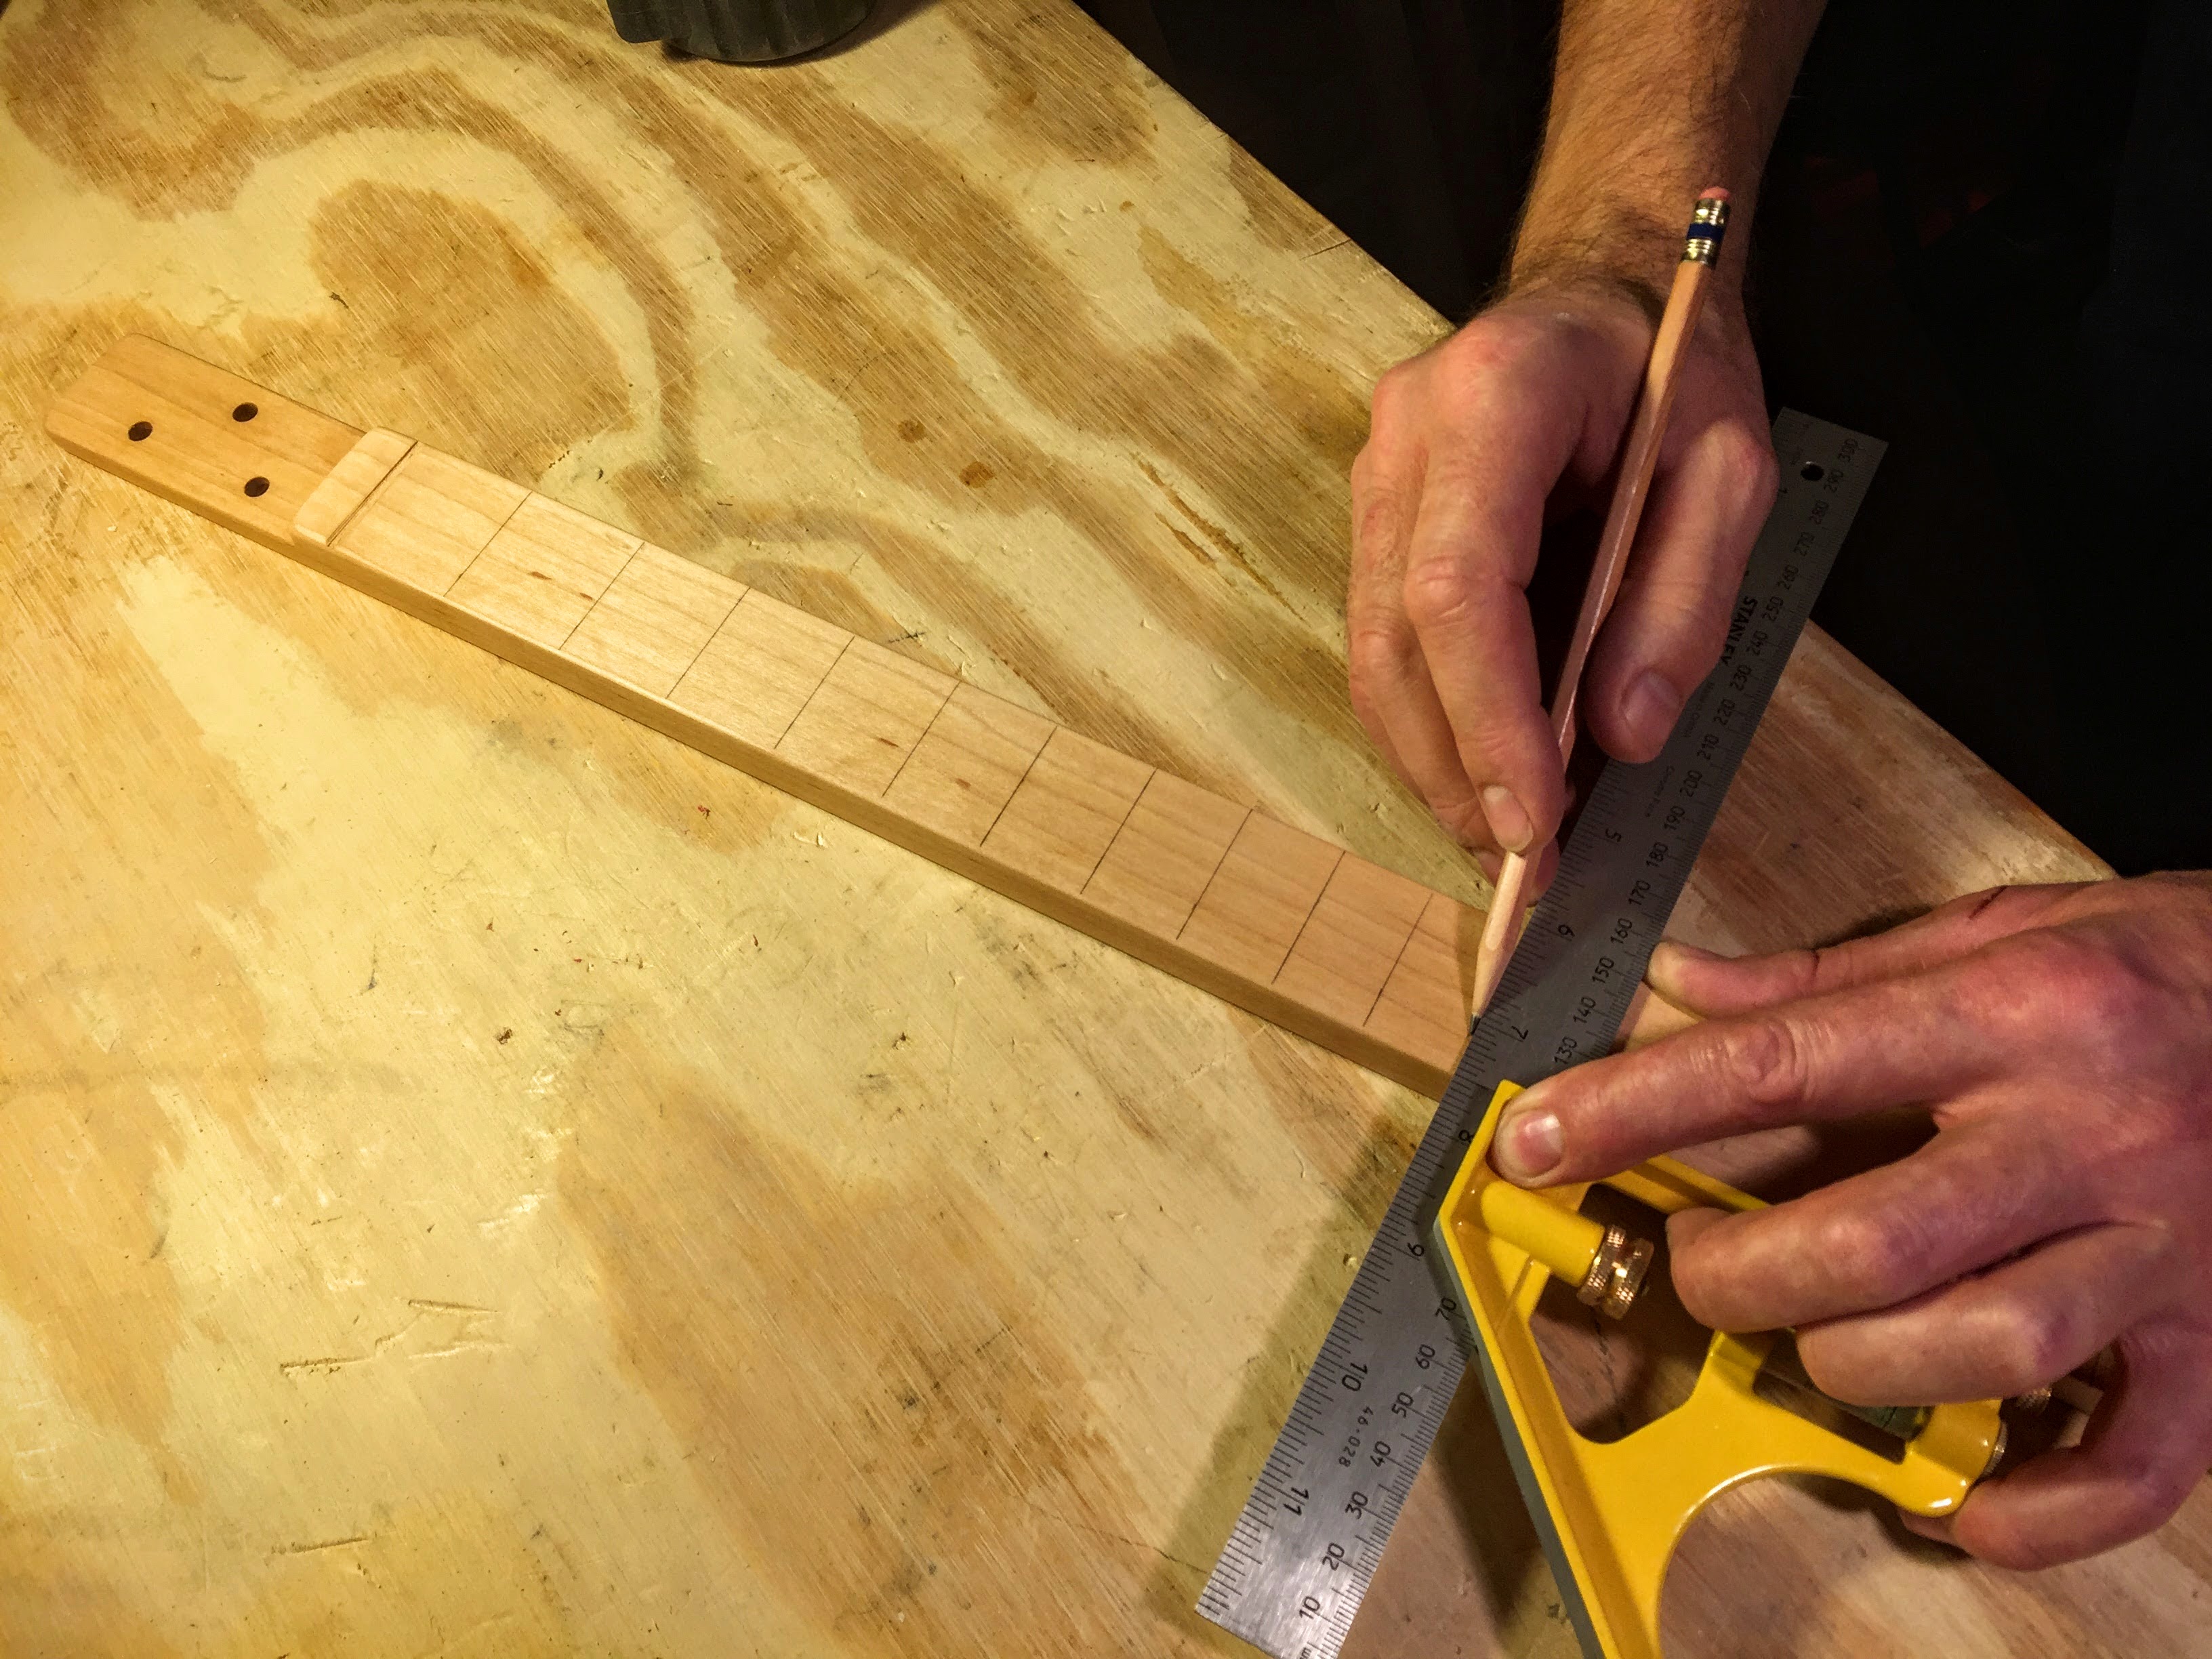
Mark and draw the fret locations
Lay your yard/meter stick or tape measure on the top of the neck.
Center the starting end of the stick over the space where the nut will sit.
Use whatever you’d like – pencil, permanent marker, wood burner, etc. – to mark the fret lines and location markers
At each following measurement draw a line.
- 1 7/16” (36mm)
- 2 3/4” (69mm)
- 4” (101mm)
- 5 3/16” (131mm)
- 6 1/4” (159mm)
- 7 5/16” (186mm)
- 8 5/16” (211mm)
- 9 1/4” (235mm)
- 10 1/8” (257mm)
- 10 15/16” (278mm)
- 11 3/4” (298mm)
- 12 1/2” (317mm)
- 13 3/16” (335mm)
- 13 7/8” (352mm)
- 14 7/16” (367mm)
Use your square to draw an “X” in the center of the neck behind the 3rd, 5th, 7th, 9th, and 15th fret lines.
Place your square in each corner of the box, diagonal from each other, made by the fret lines.
Using both sets of corners in each box you will draw an “X” that is in the center of the neck.
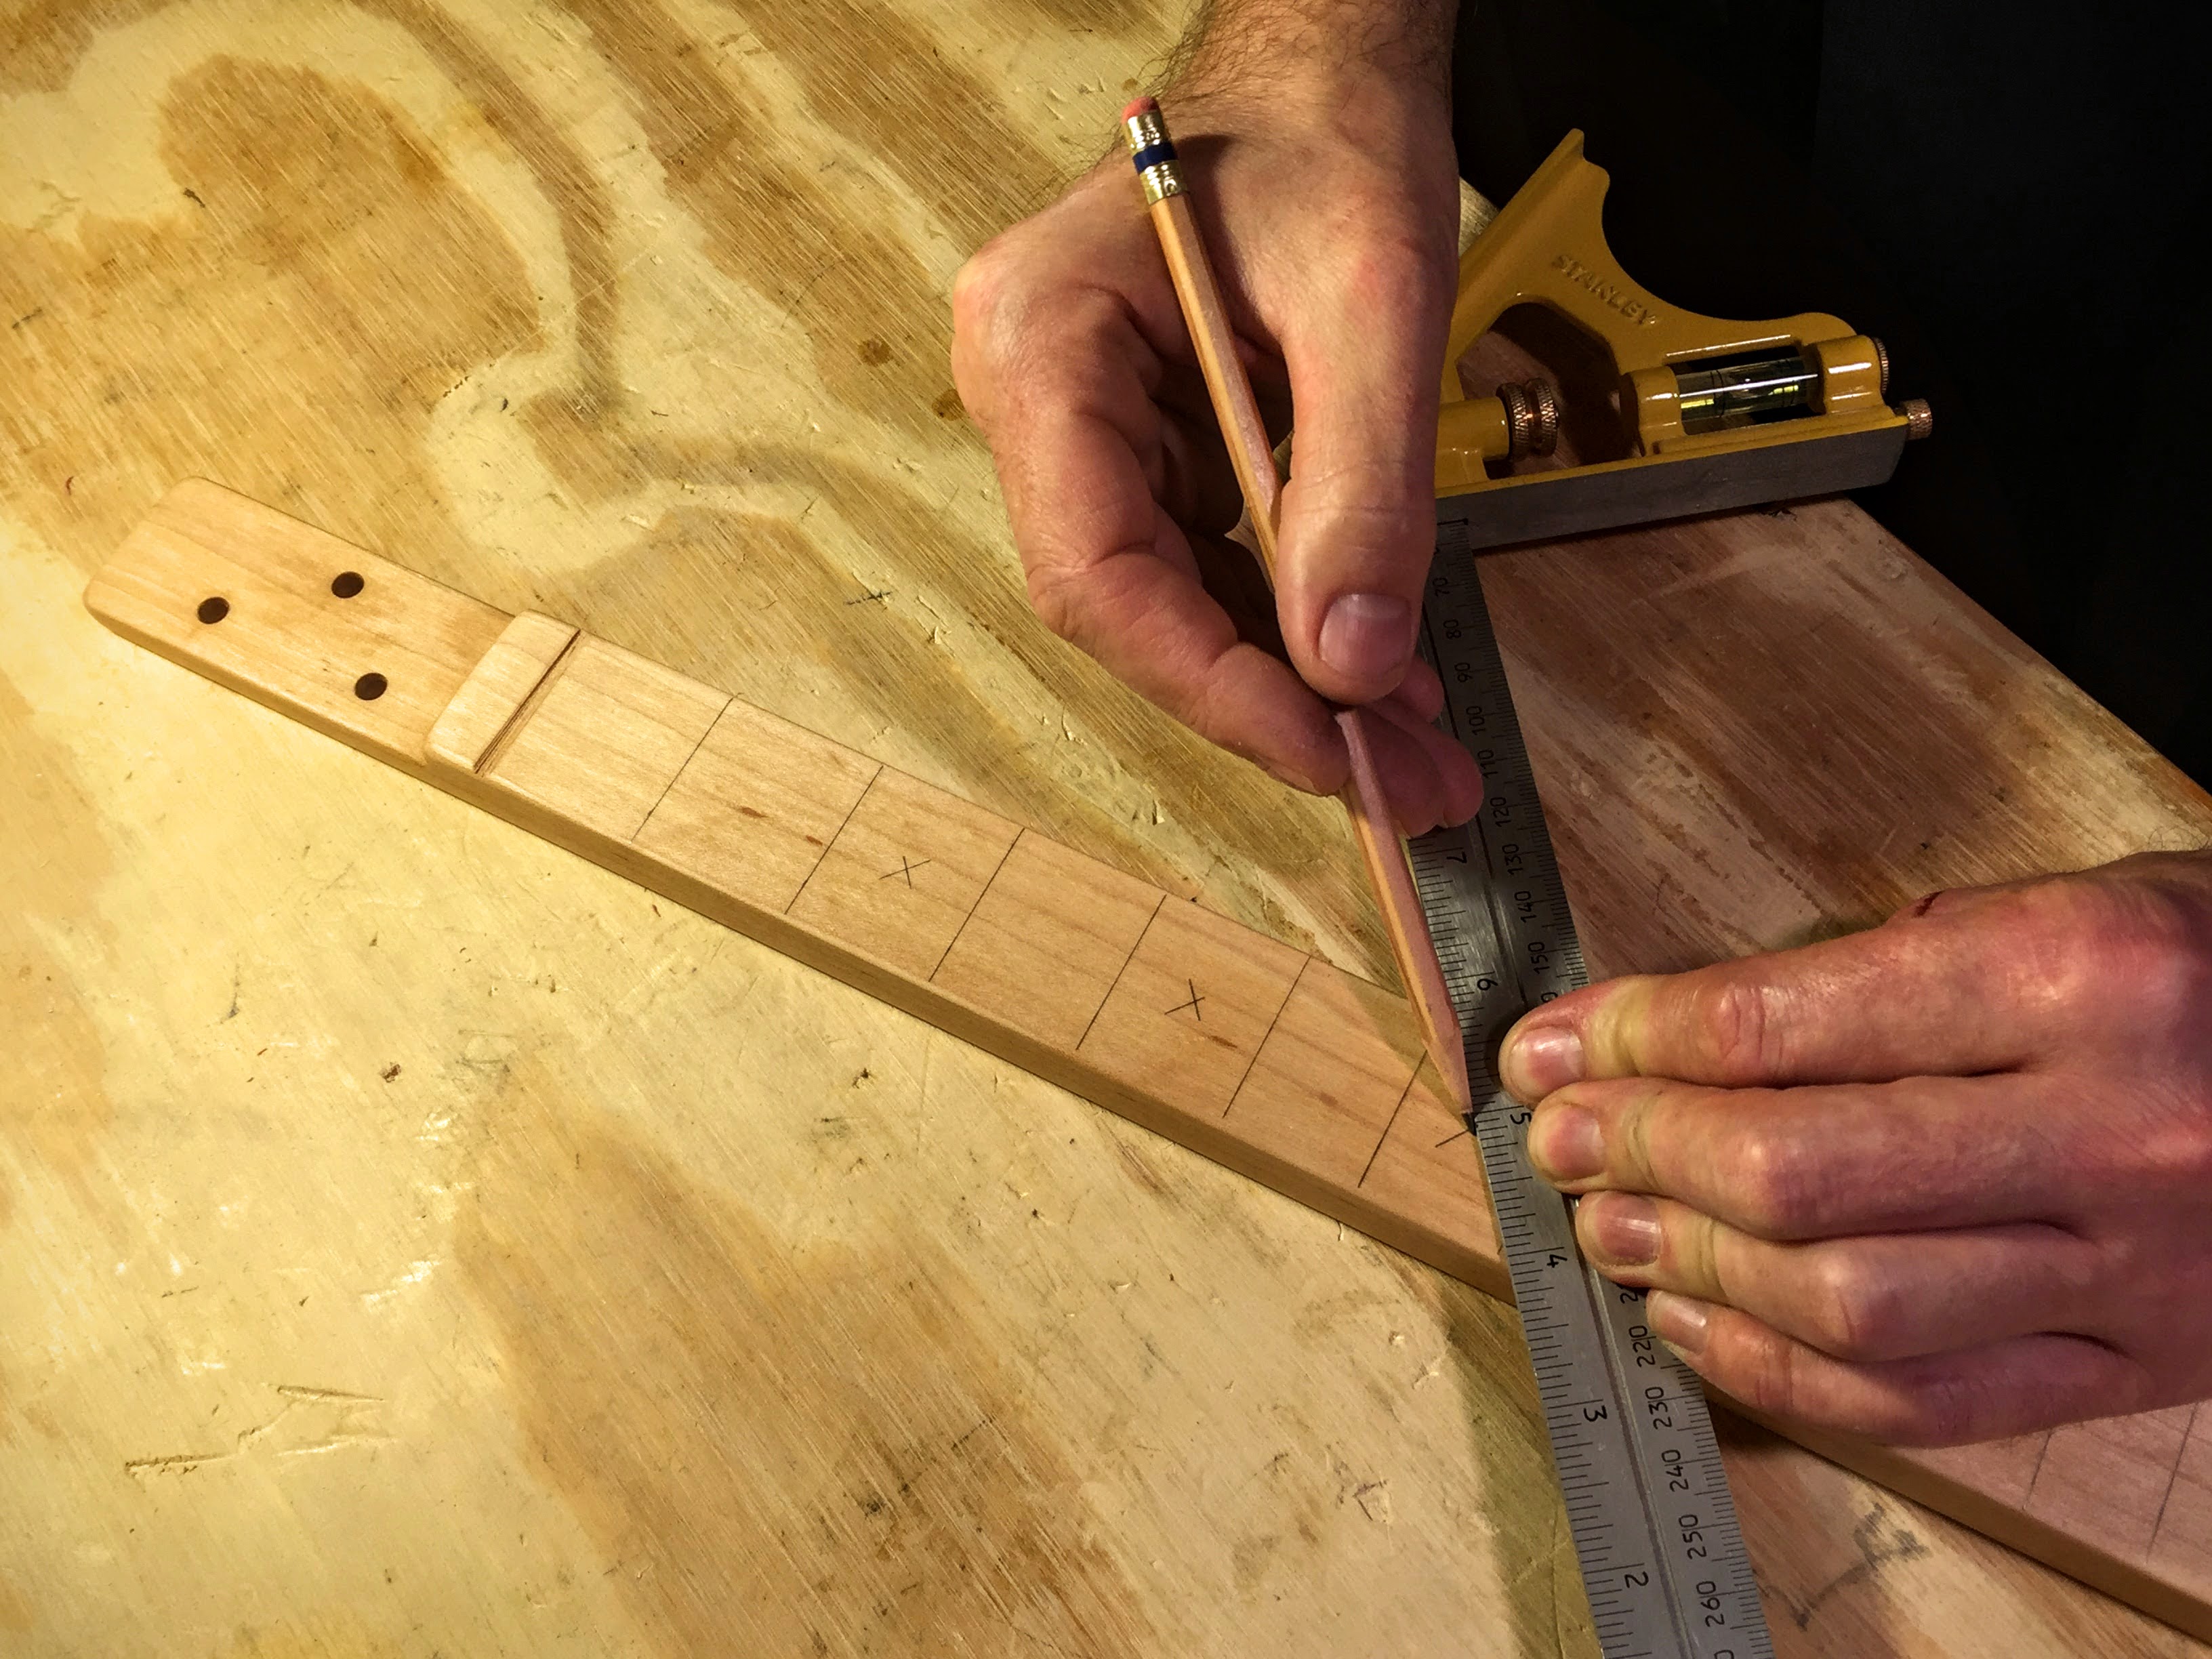
Behind the 12th fret draw two “X’s” or something fun to differentiate it from the rest of the frets.
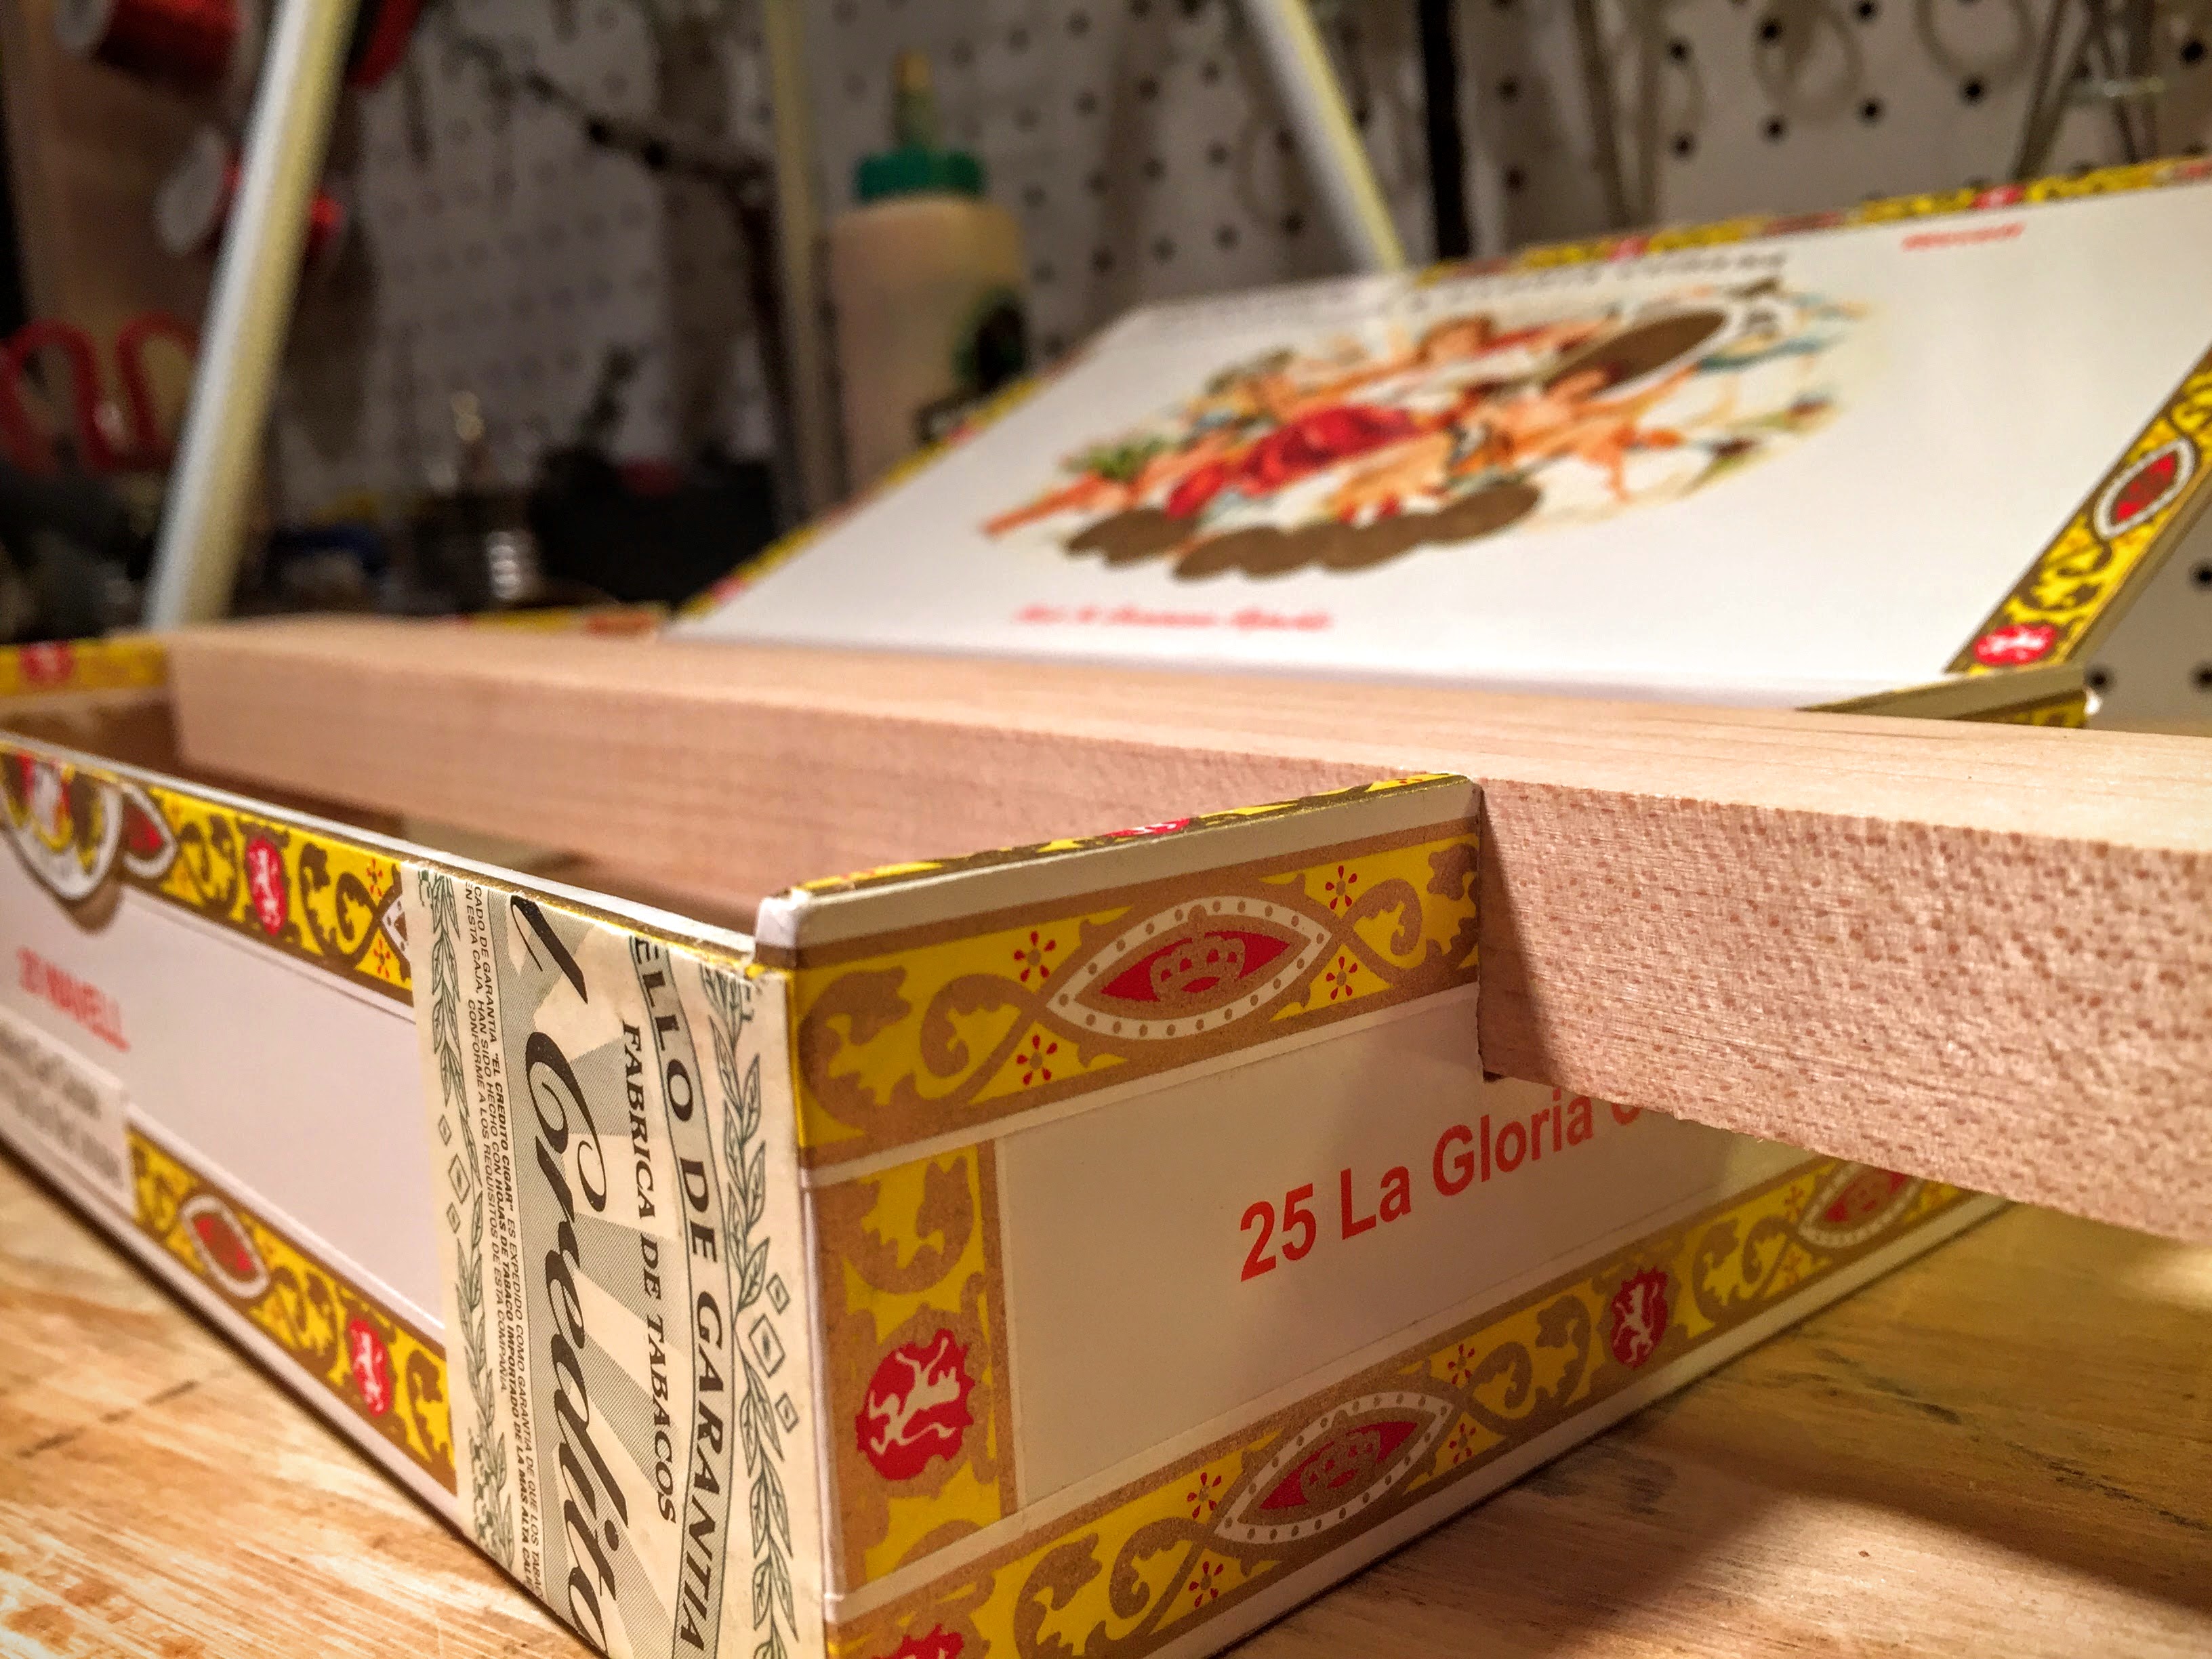
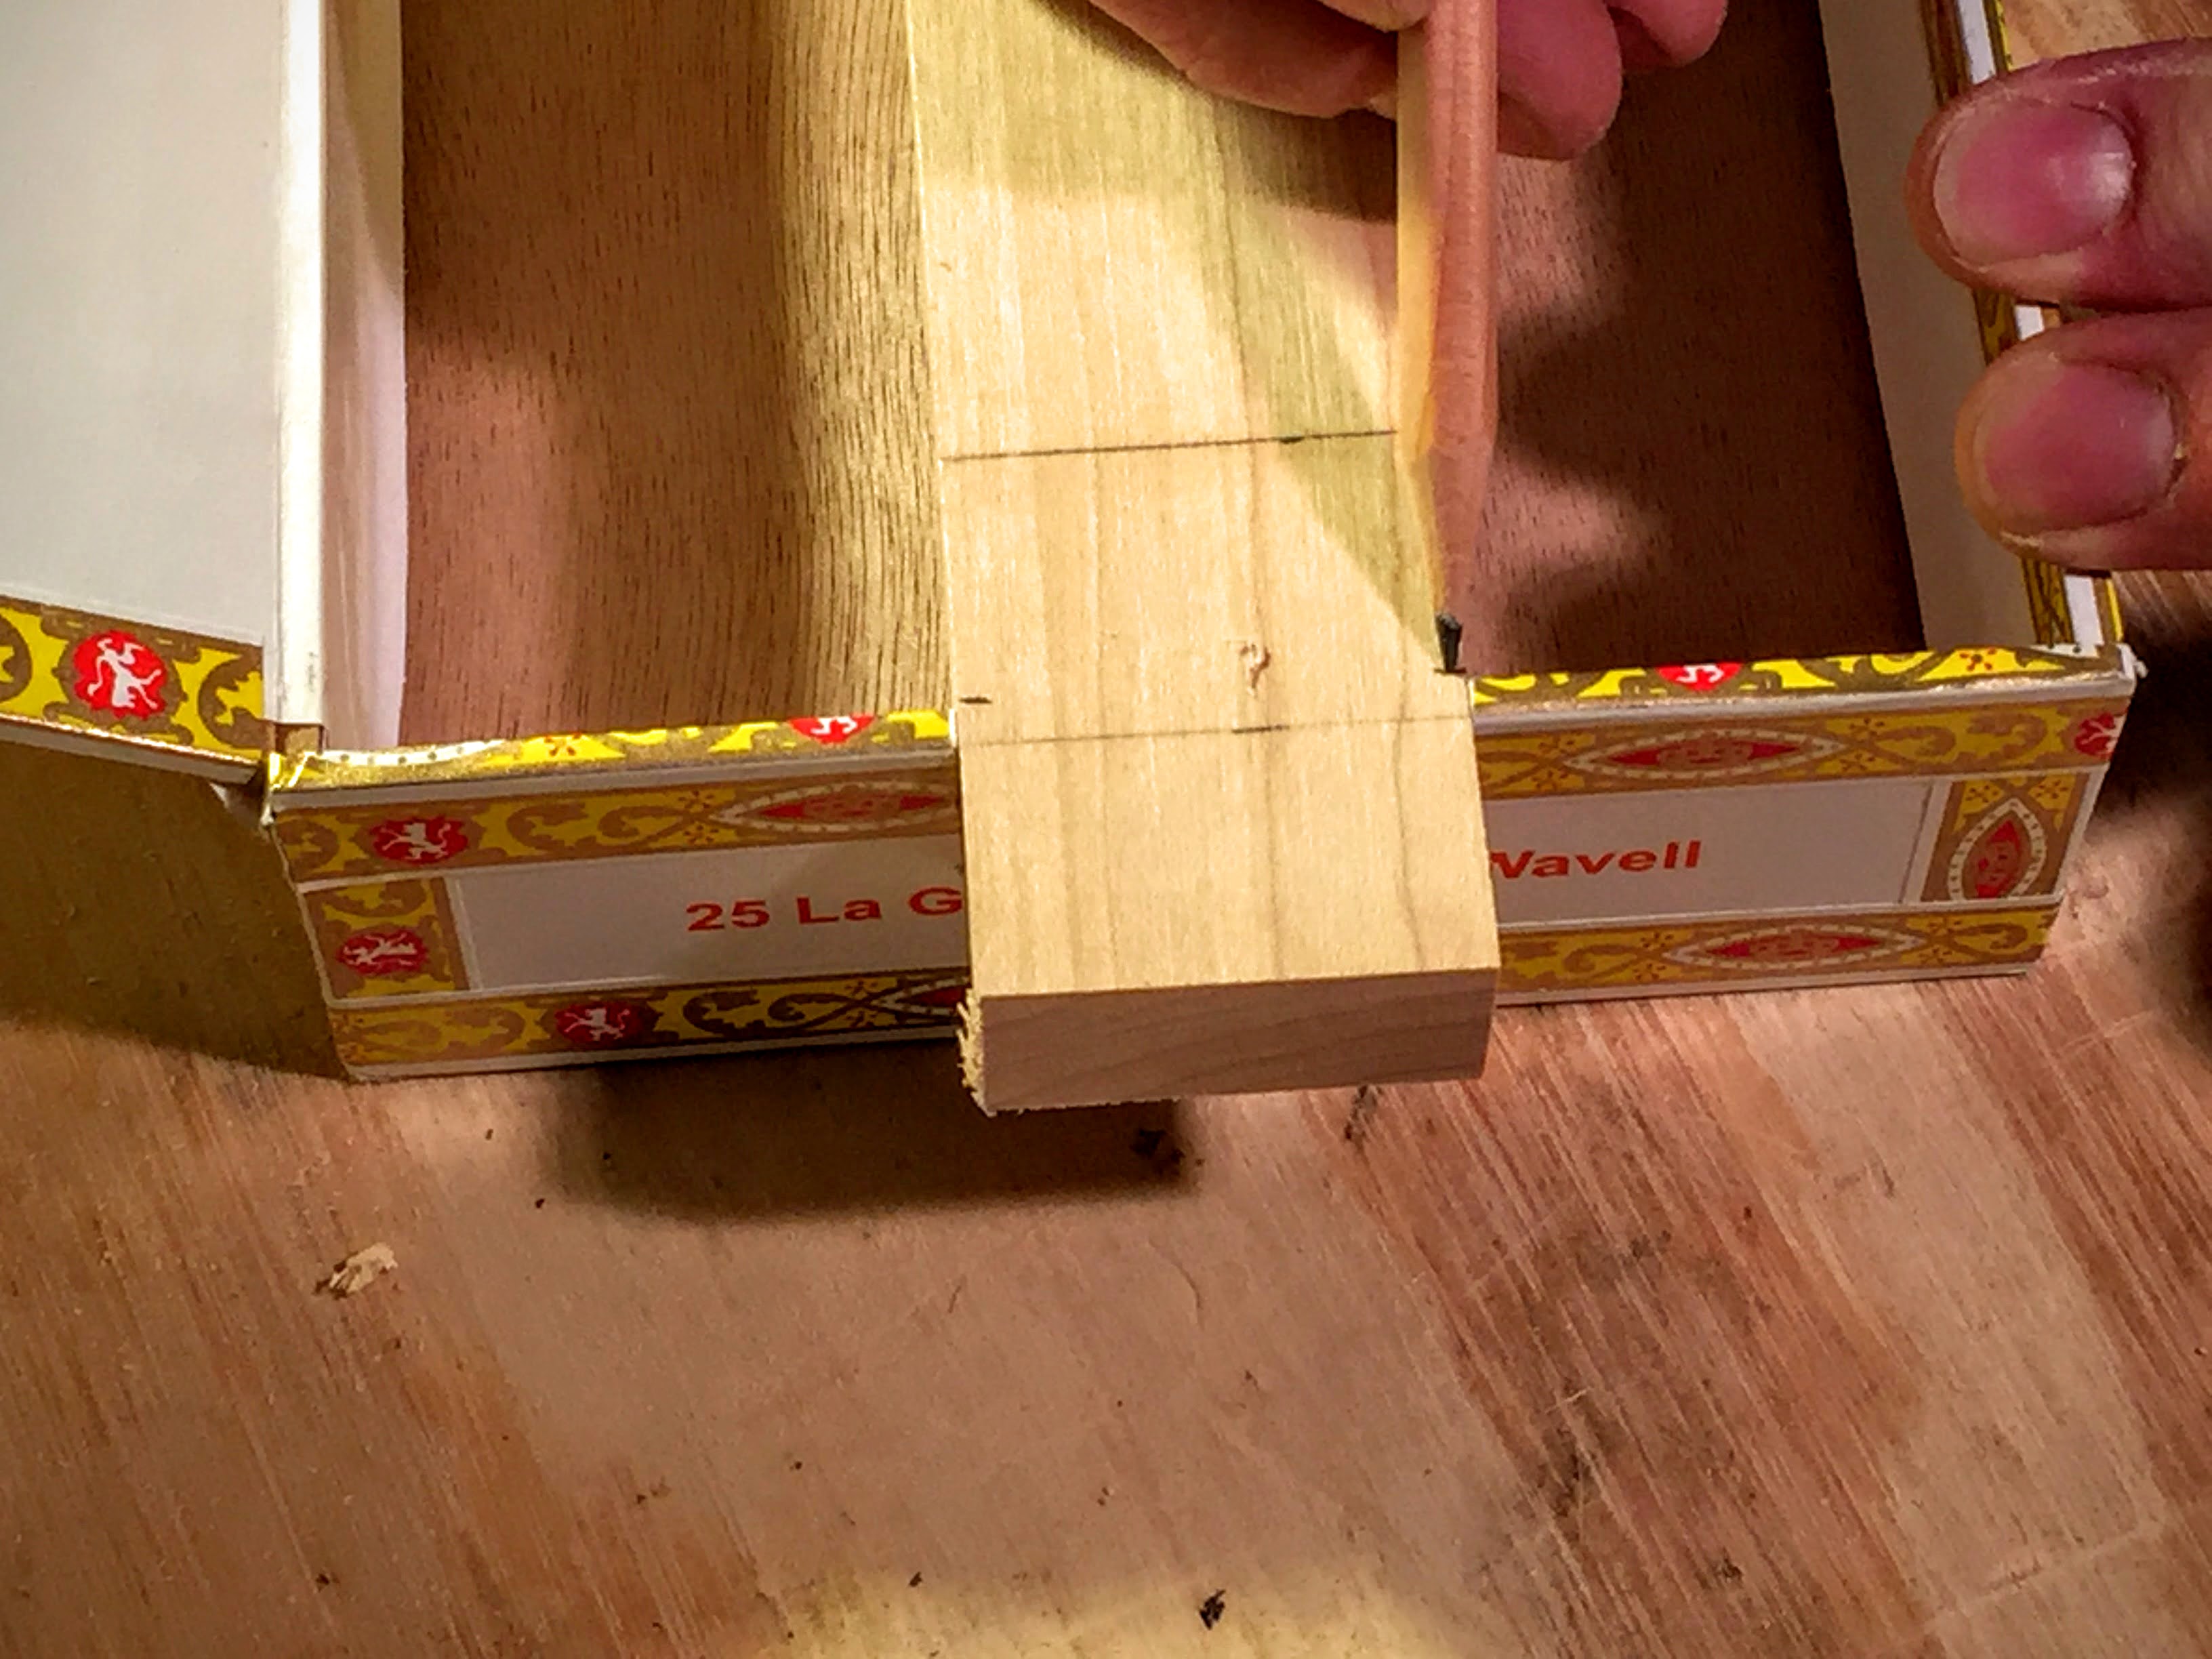
Fit the neck to the cigar box
Fit the neck back into the spaces you’ve cut into the cigar box.
Close the lid.
Make any necessary adjustments to ensure that the lid closes properly.
If you have to do a bit of filing on the spaces where the lid will be fastened, do it now.
Give the lid a tap.
There should be a hollow sound when you tap the lid while the box is closed.
If it feels like the lid is resting against the space you’ve cut out of the neck to allow the lid to vibrate, remove the neck and file that space down.
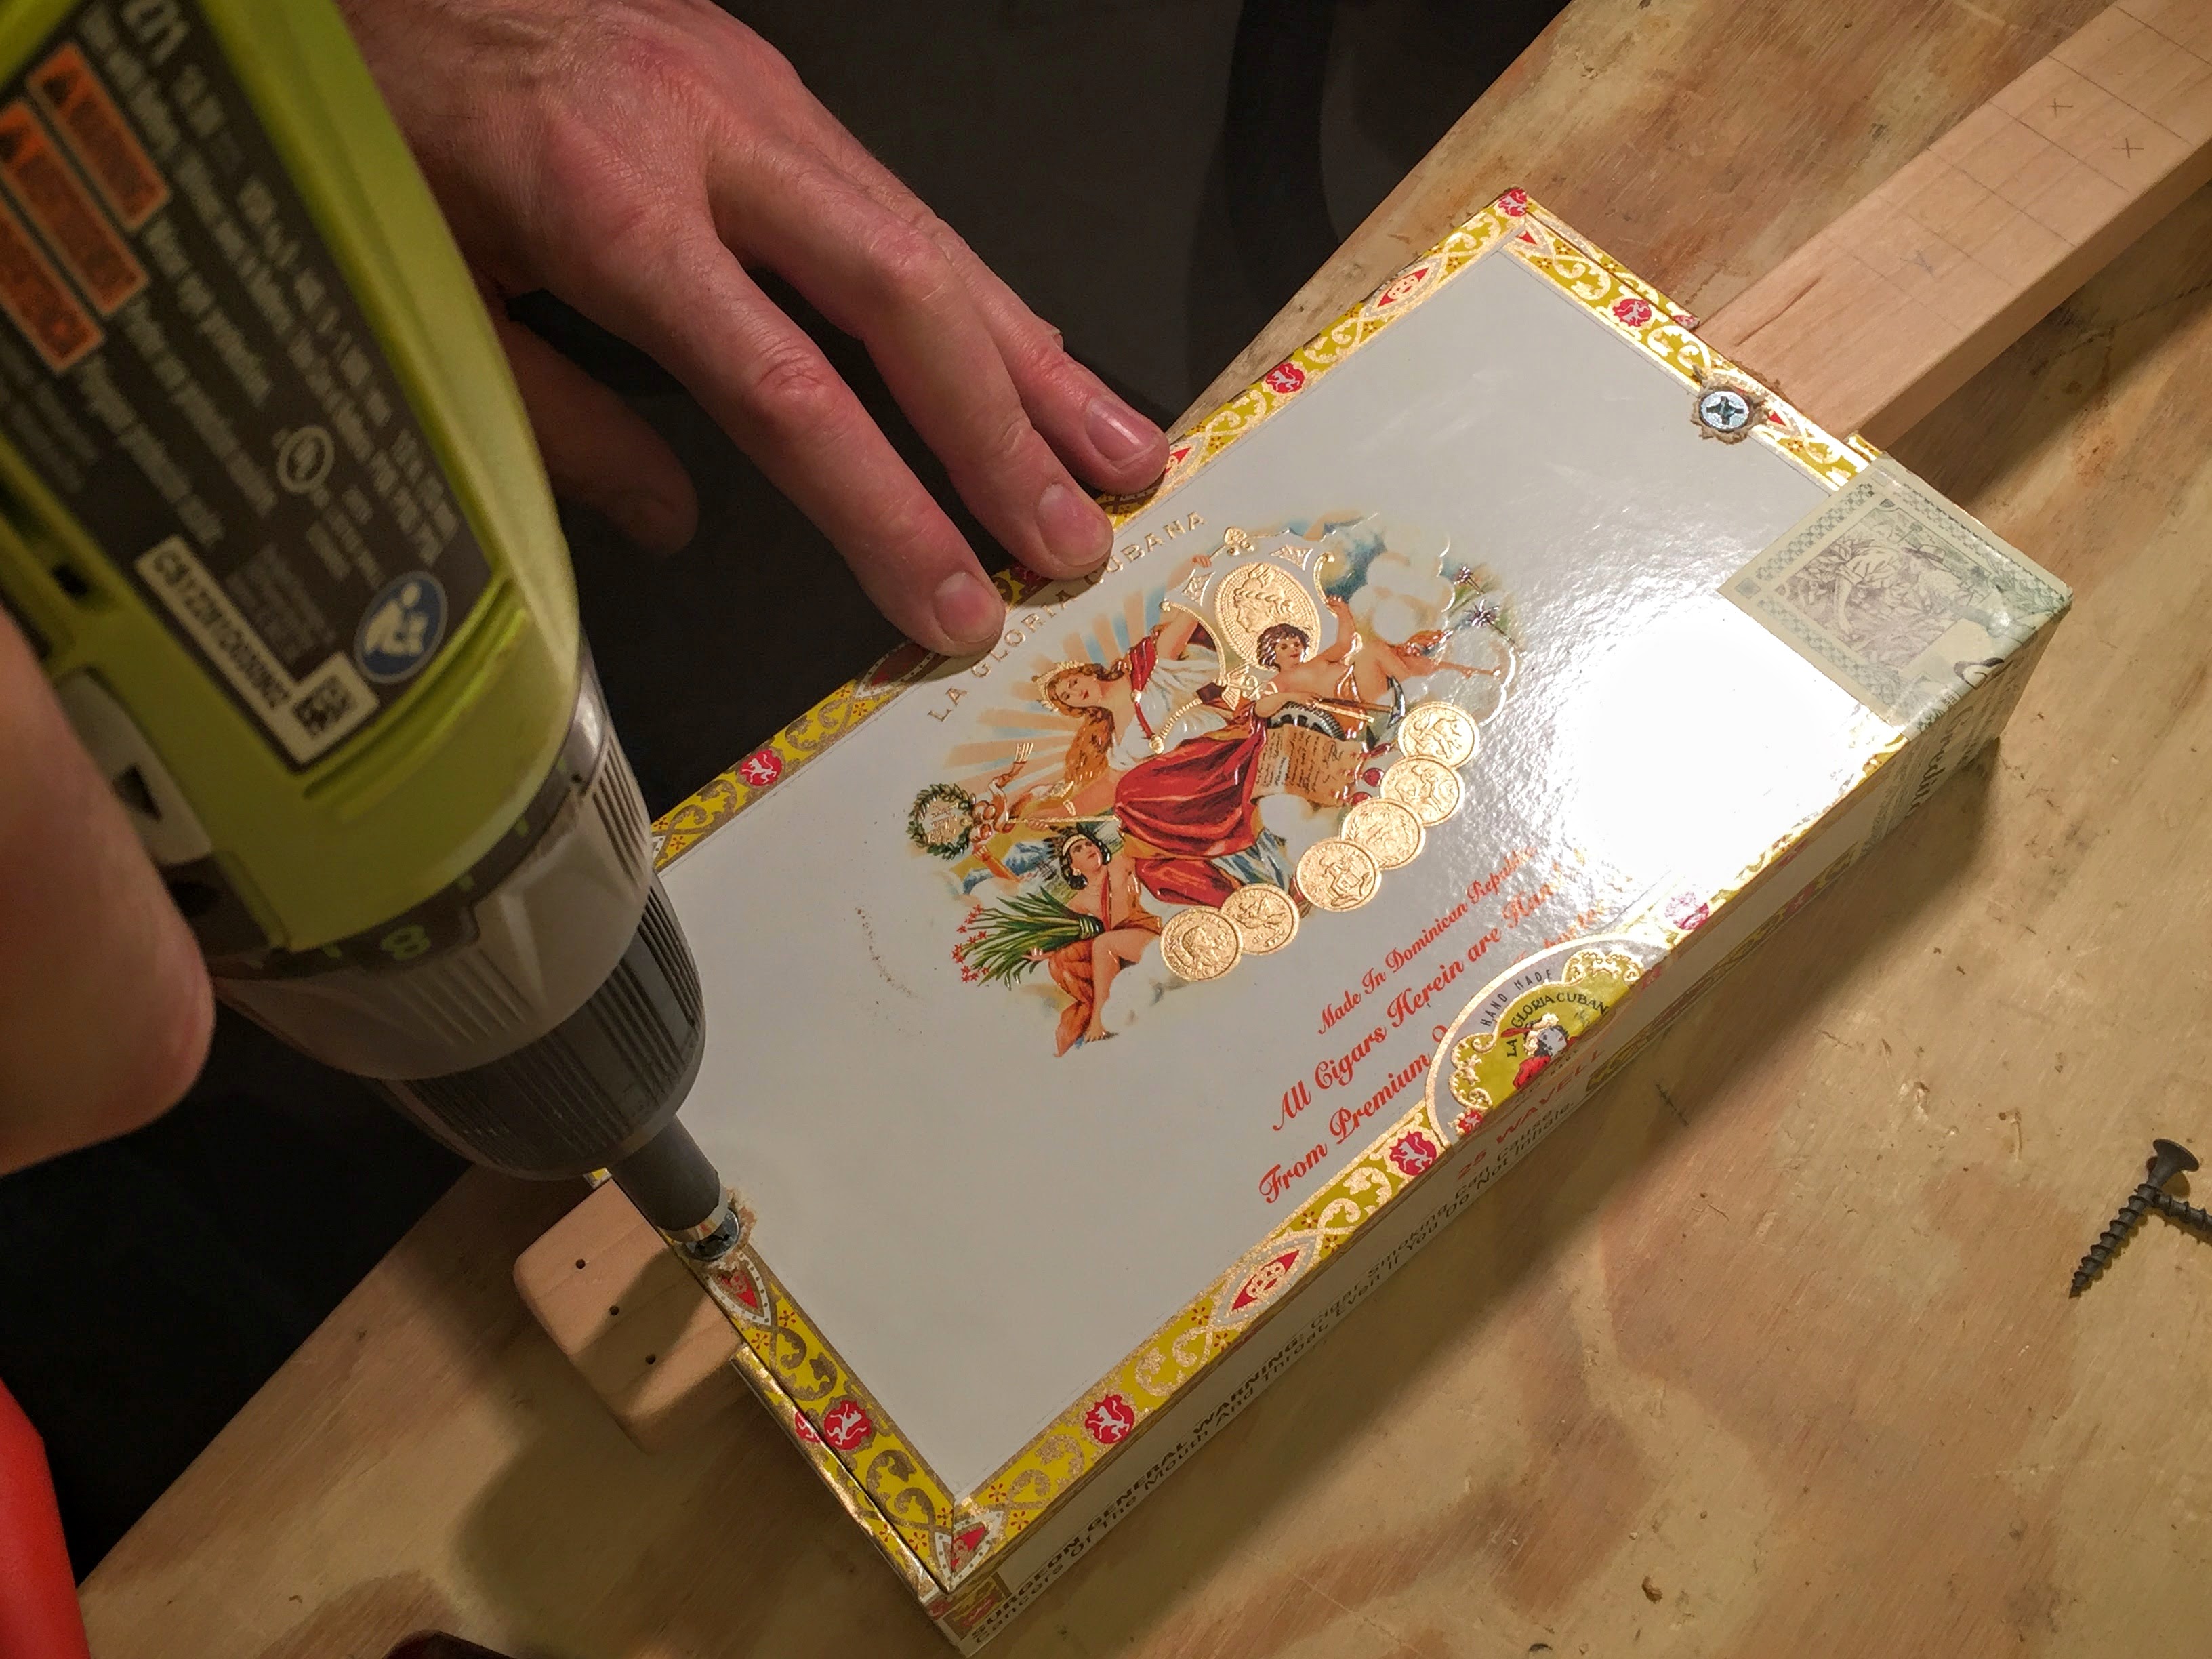
Fasten the box lid to the neck
At both ends of the lid mark a spot in the center where it will be fastened to the neck.
Use the awl, or something with a point, to give yourself a guide-hole for the drill bit.
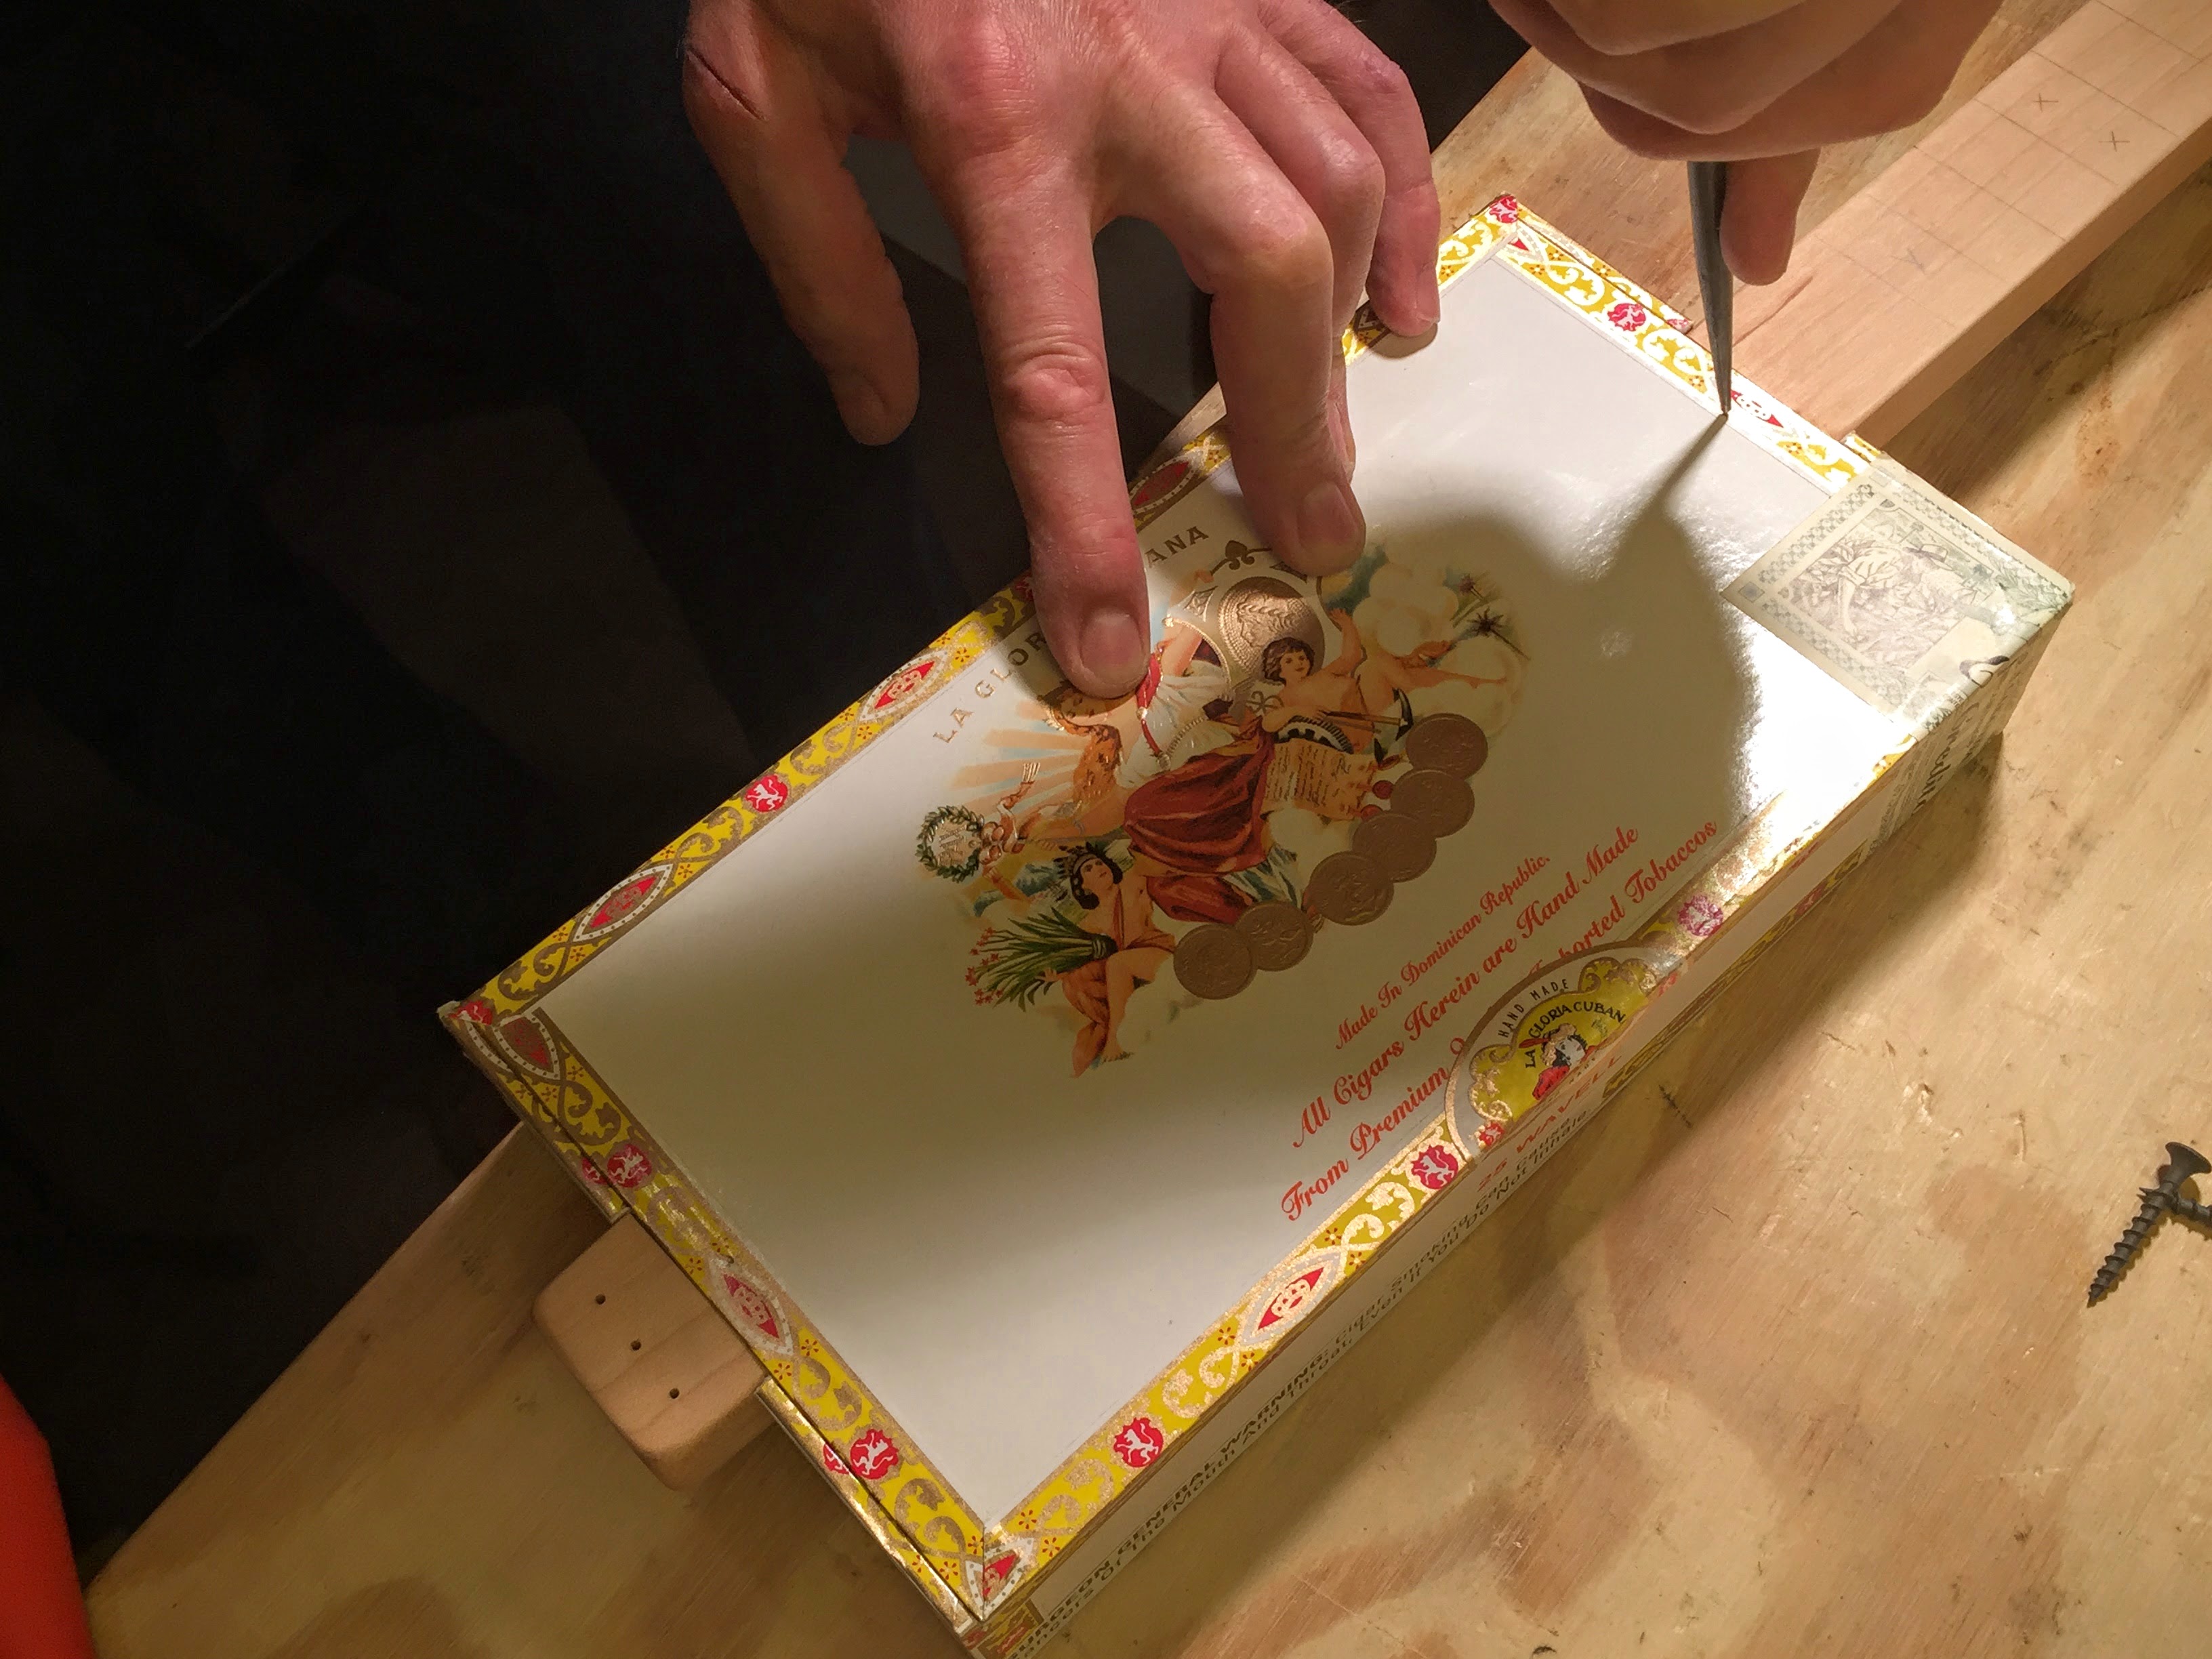
Using an appropriate size bit, drill holes deep enough for the screws.
The bit should be wider than the shaft of the screw and narrower than the threads.
Use a countersink bit (or regular bit, razor knife, etc.) to create a space on top of those holes to fit the countersunk heads of the 3/4″ (19mm) screws.
Use your screws and screwdriver to fasten the lid to the neck.
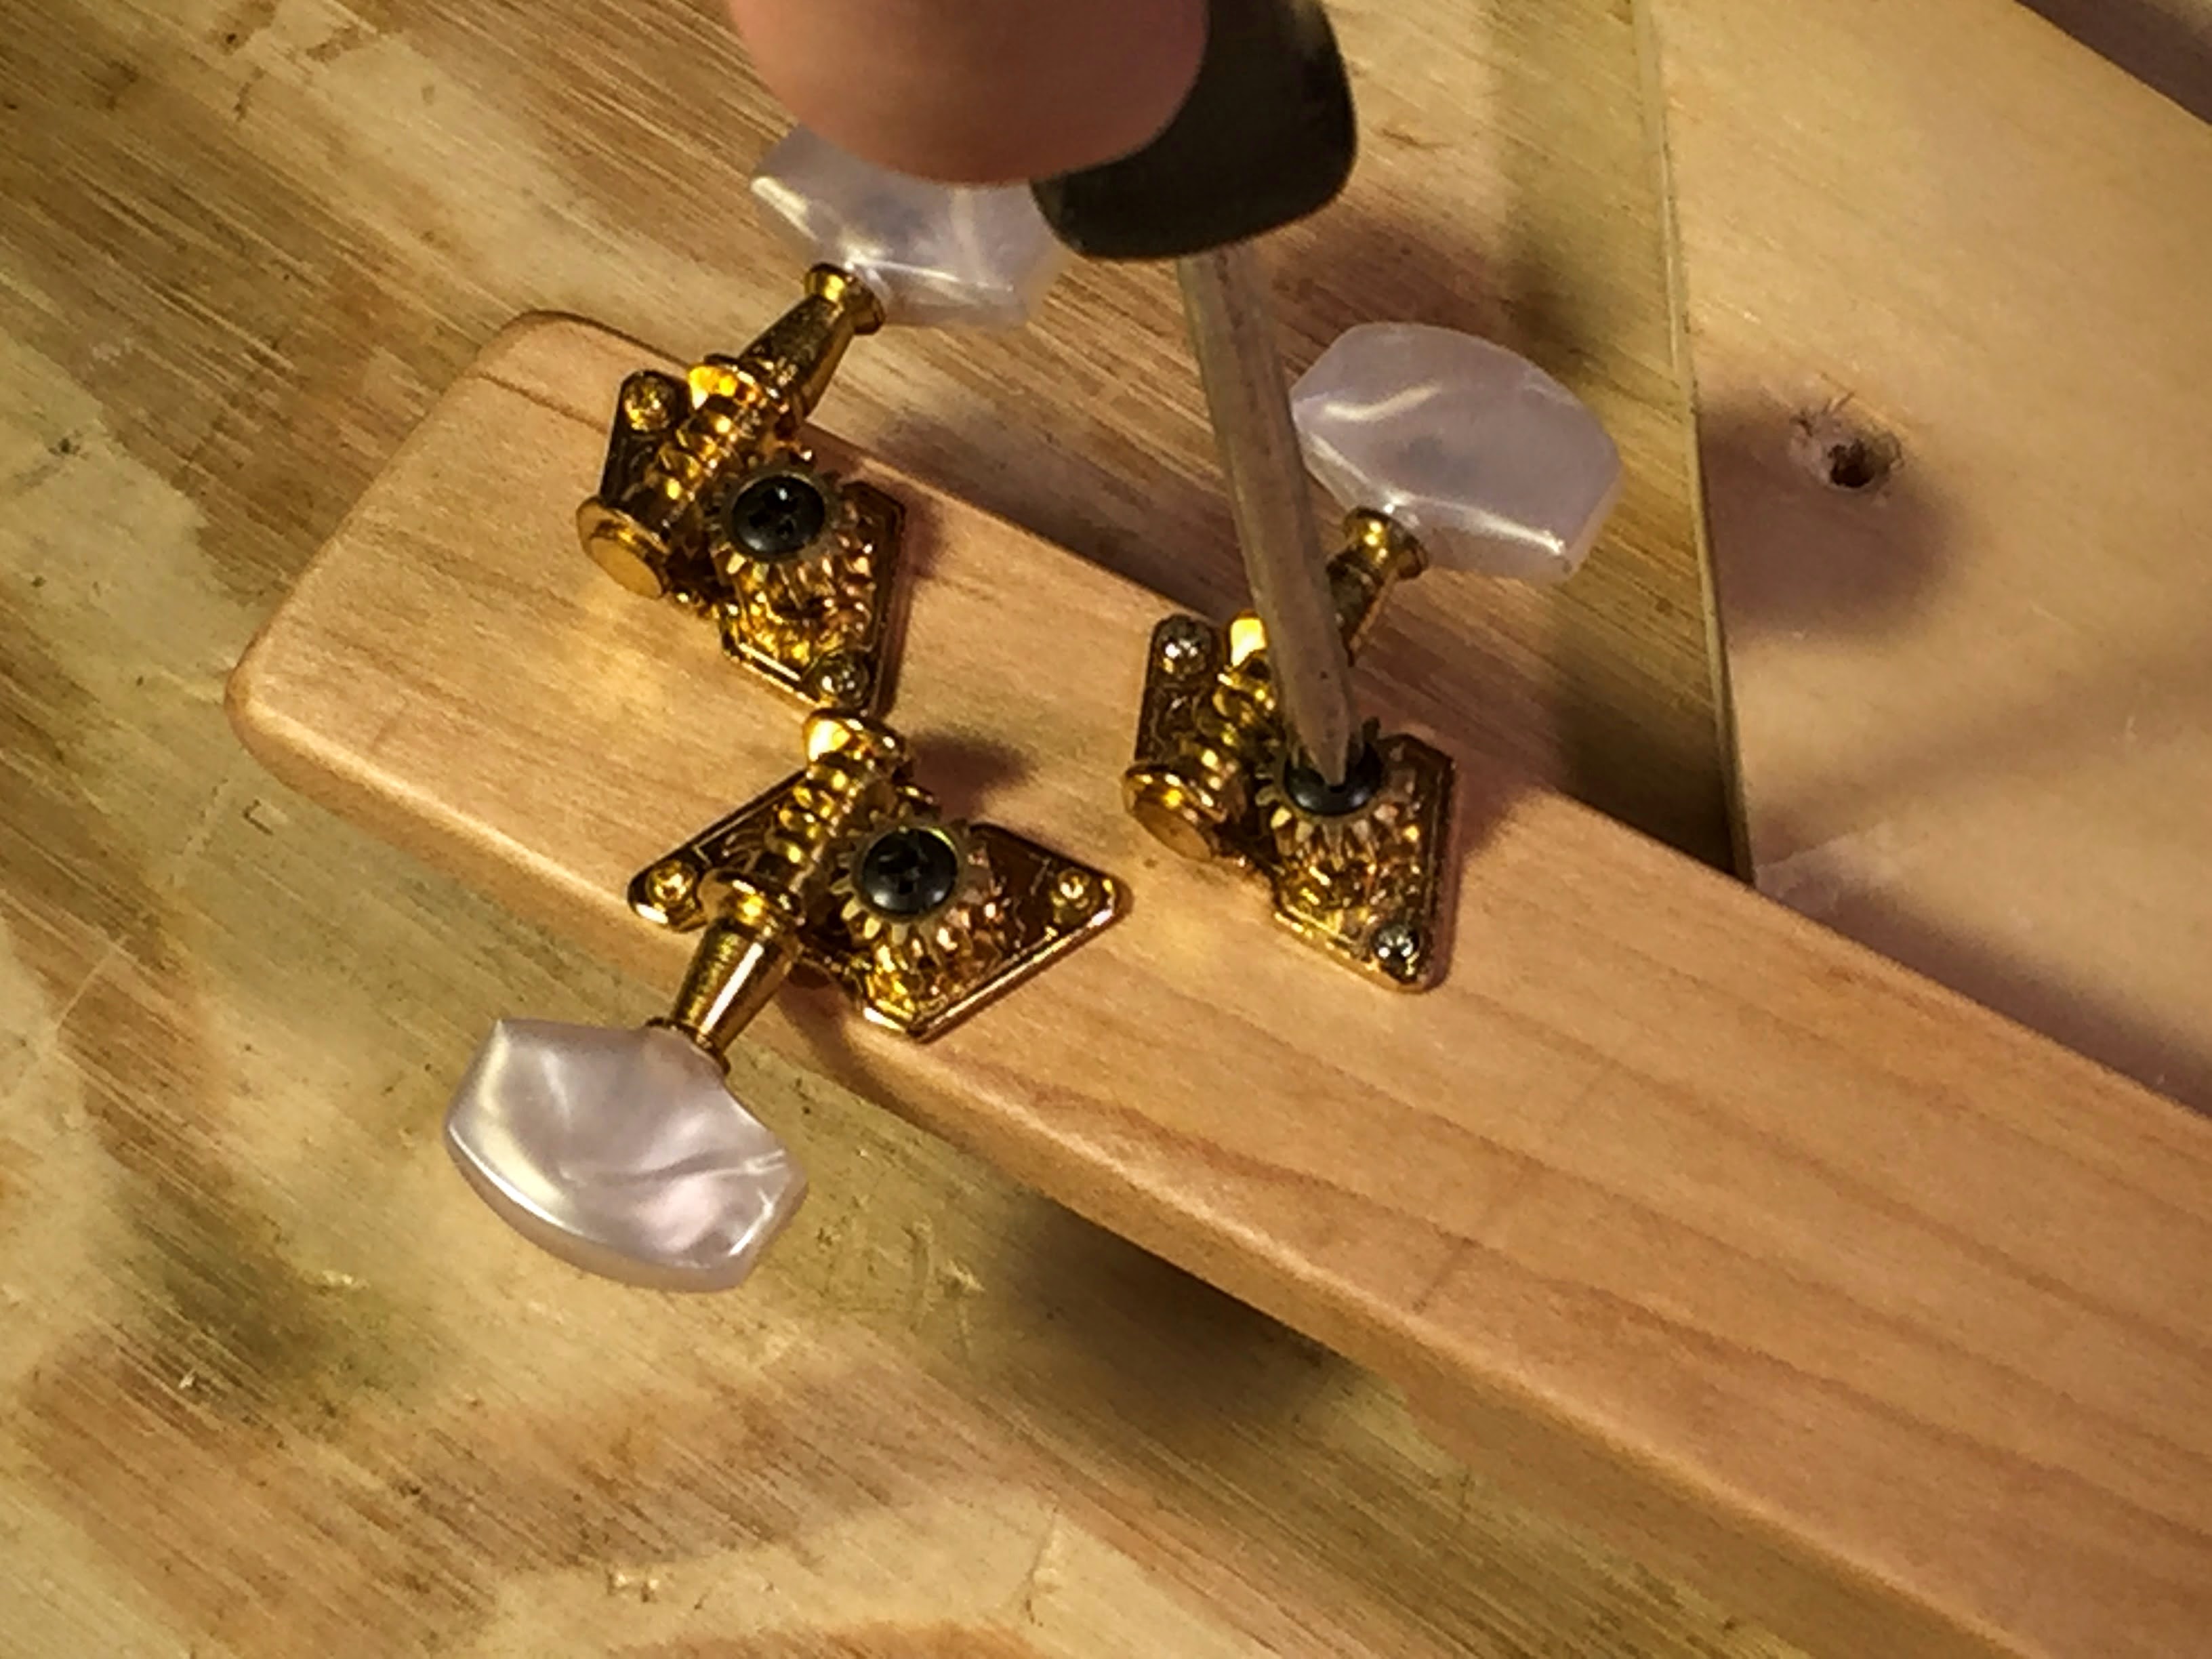
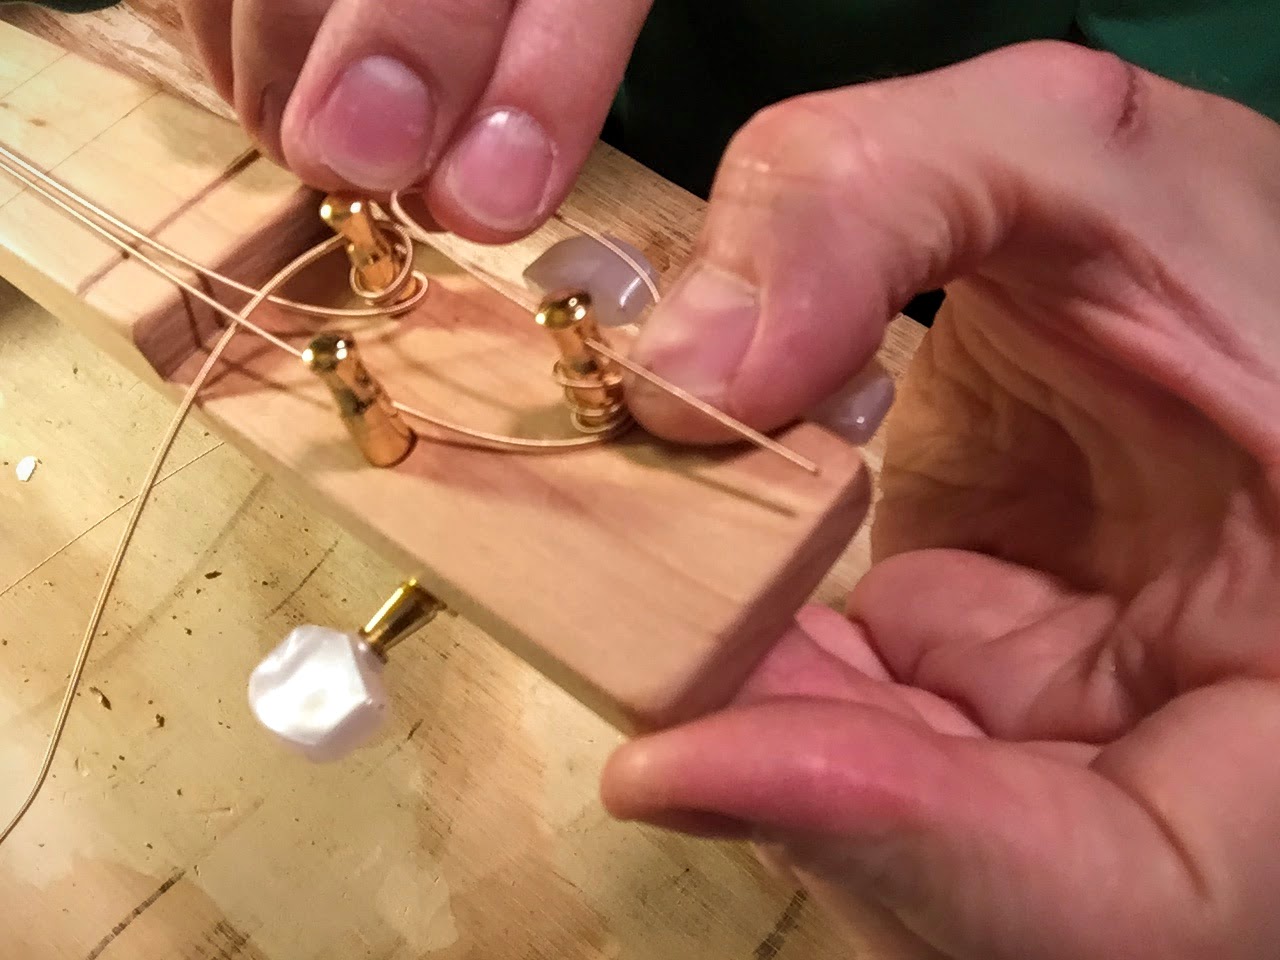
Install the tuners
Place the tuners back into the holes you’ve drilled for them in the headstock.
Use your screwdriver to fasten the tuners to the headstock with the included mounting screws.
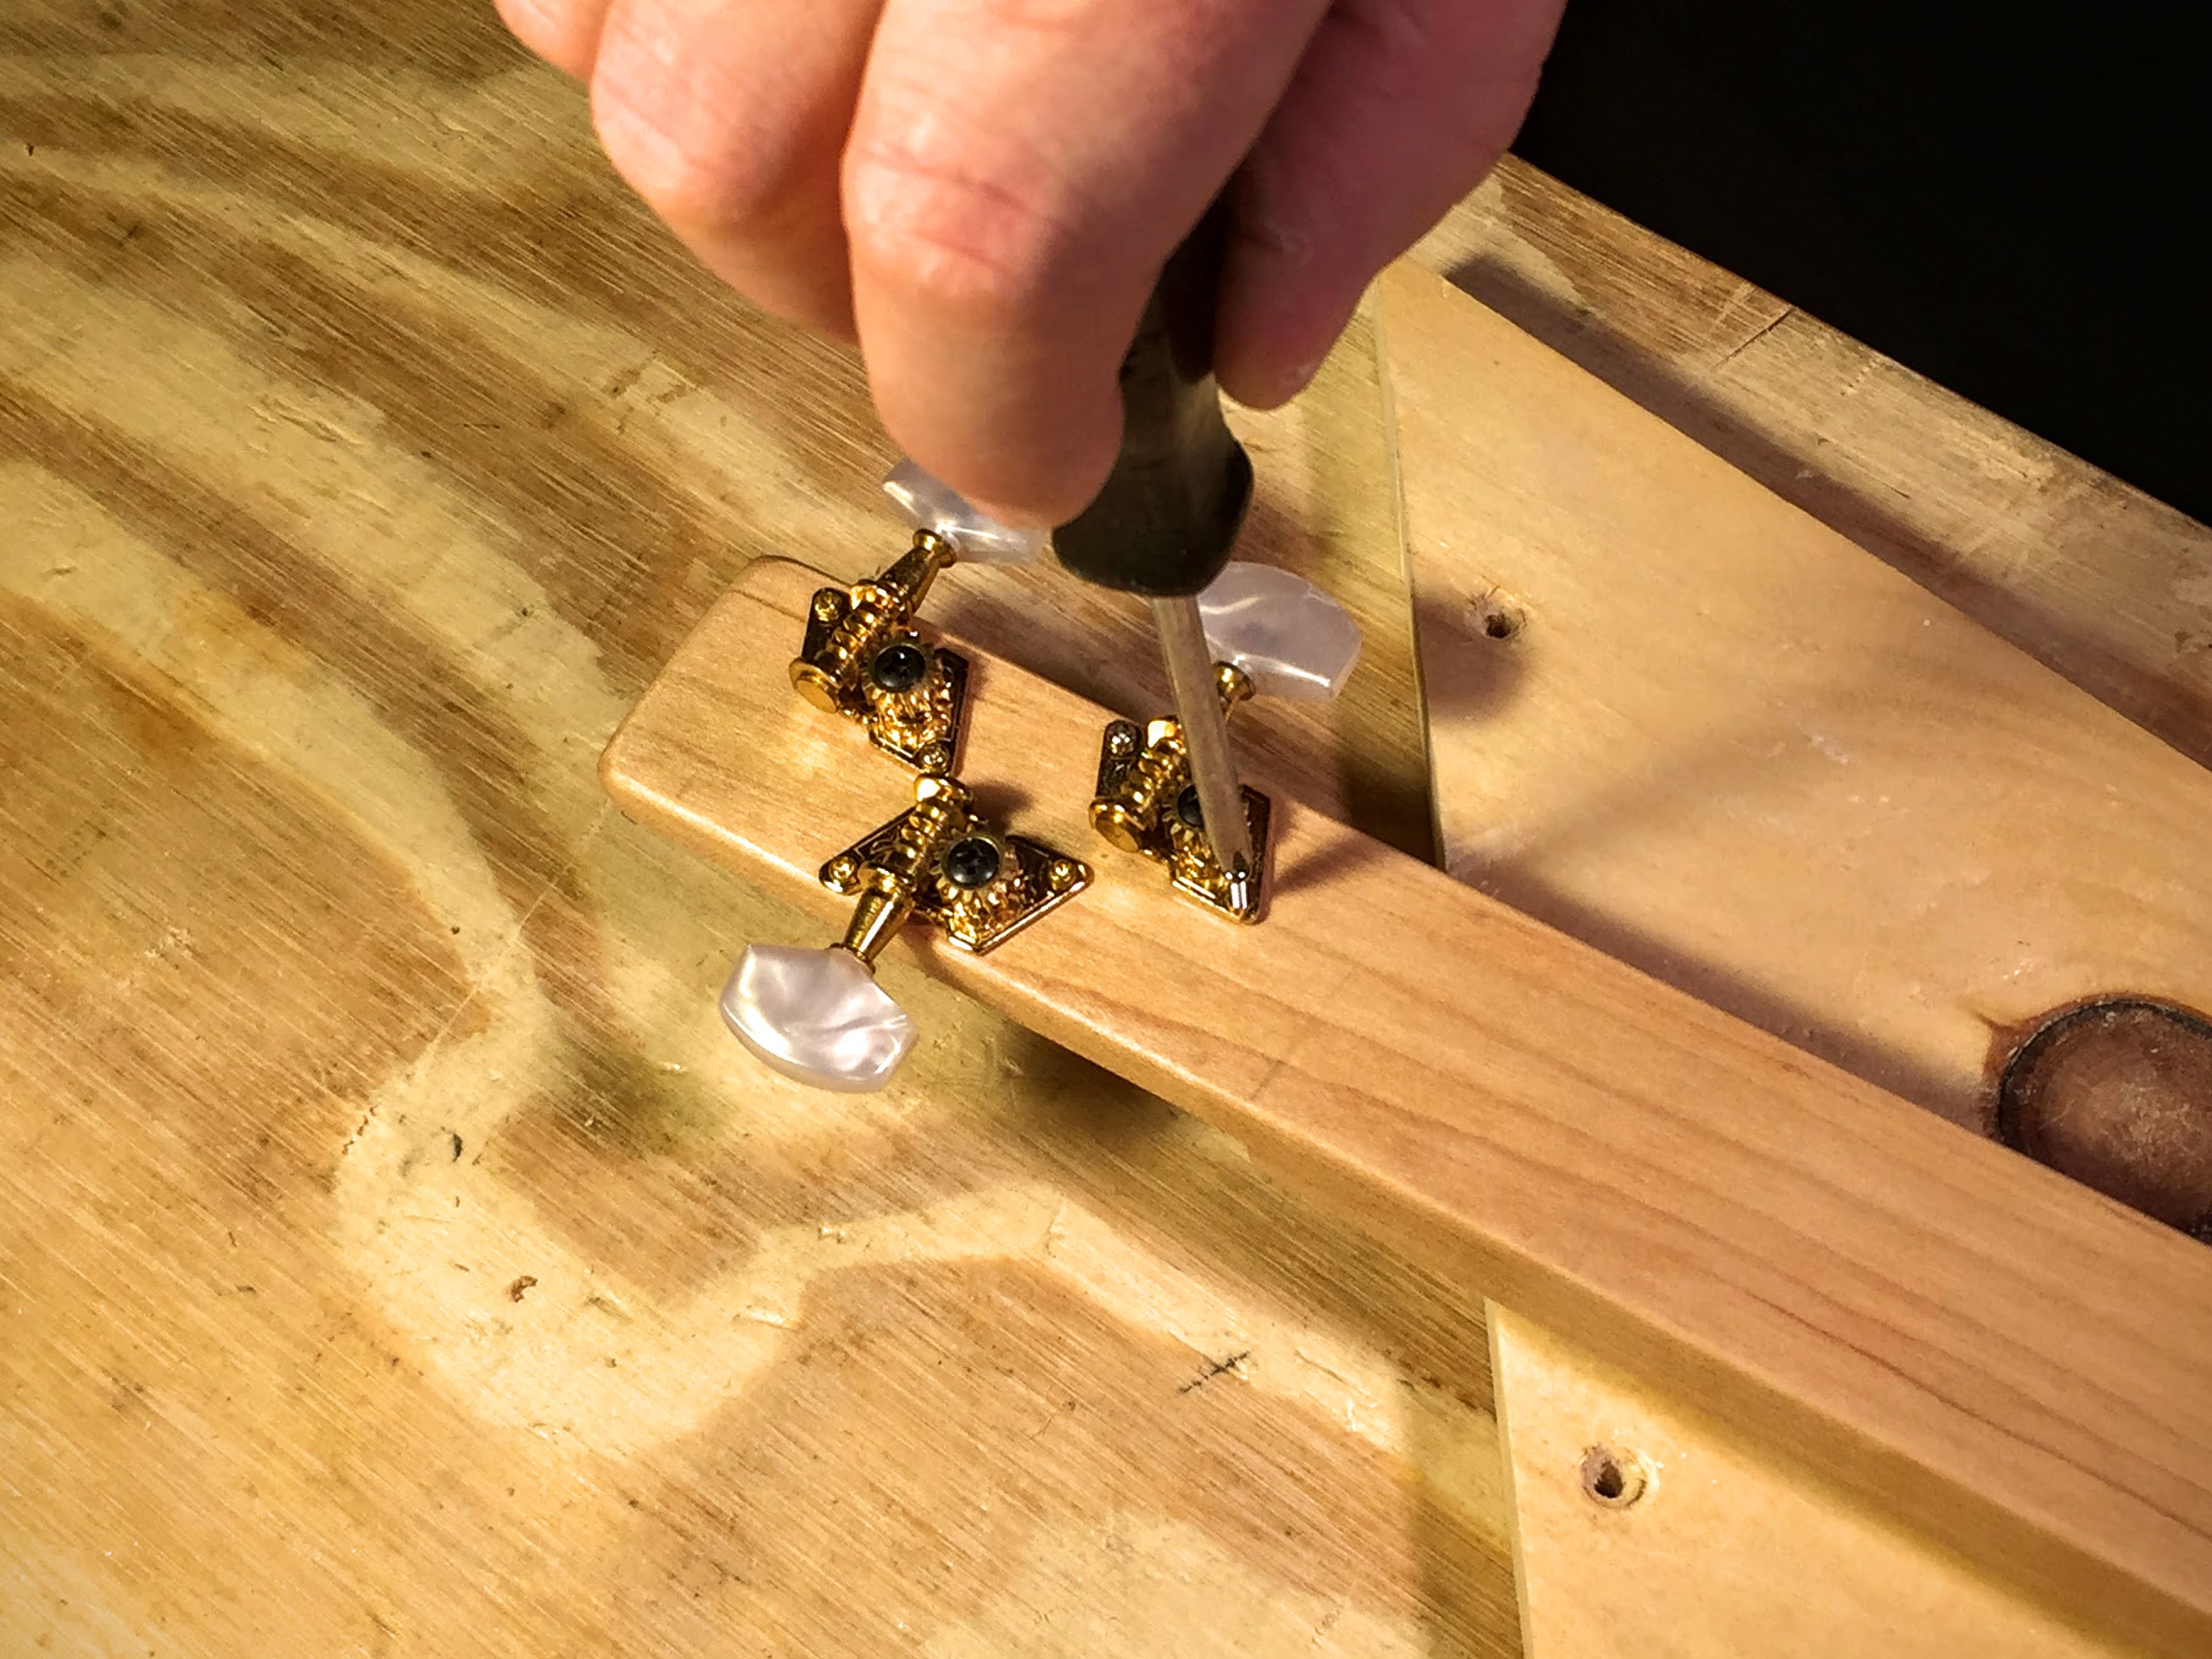
After the tuners are secured, tighten the screws that fasten the pinion gears to the tuner mounting plate.
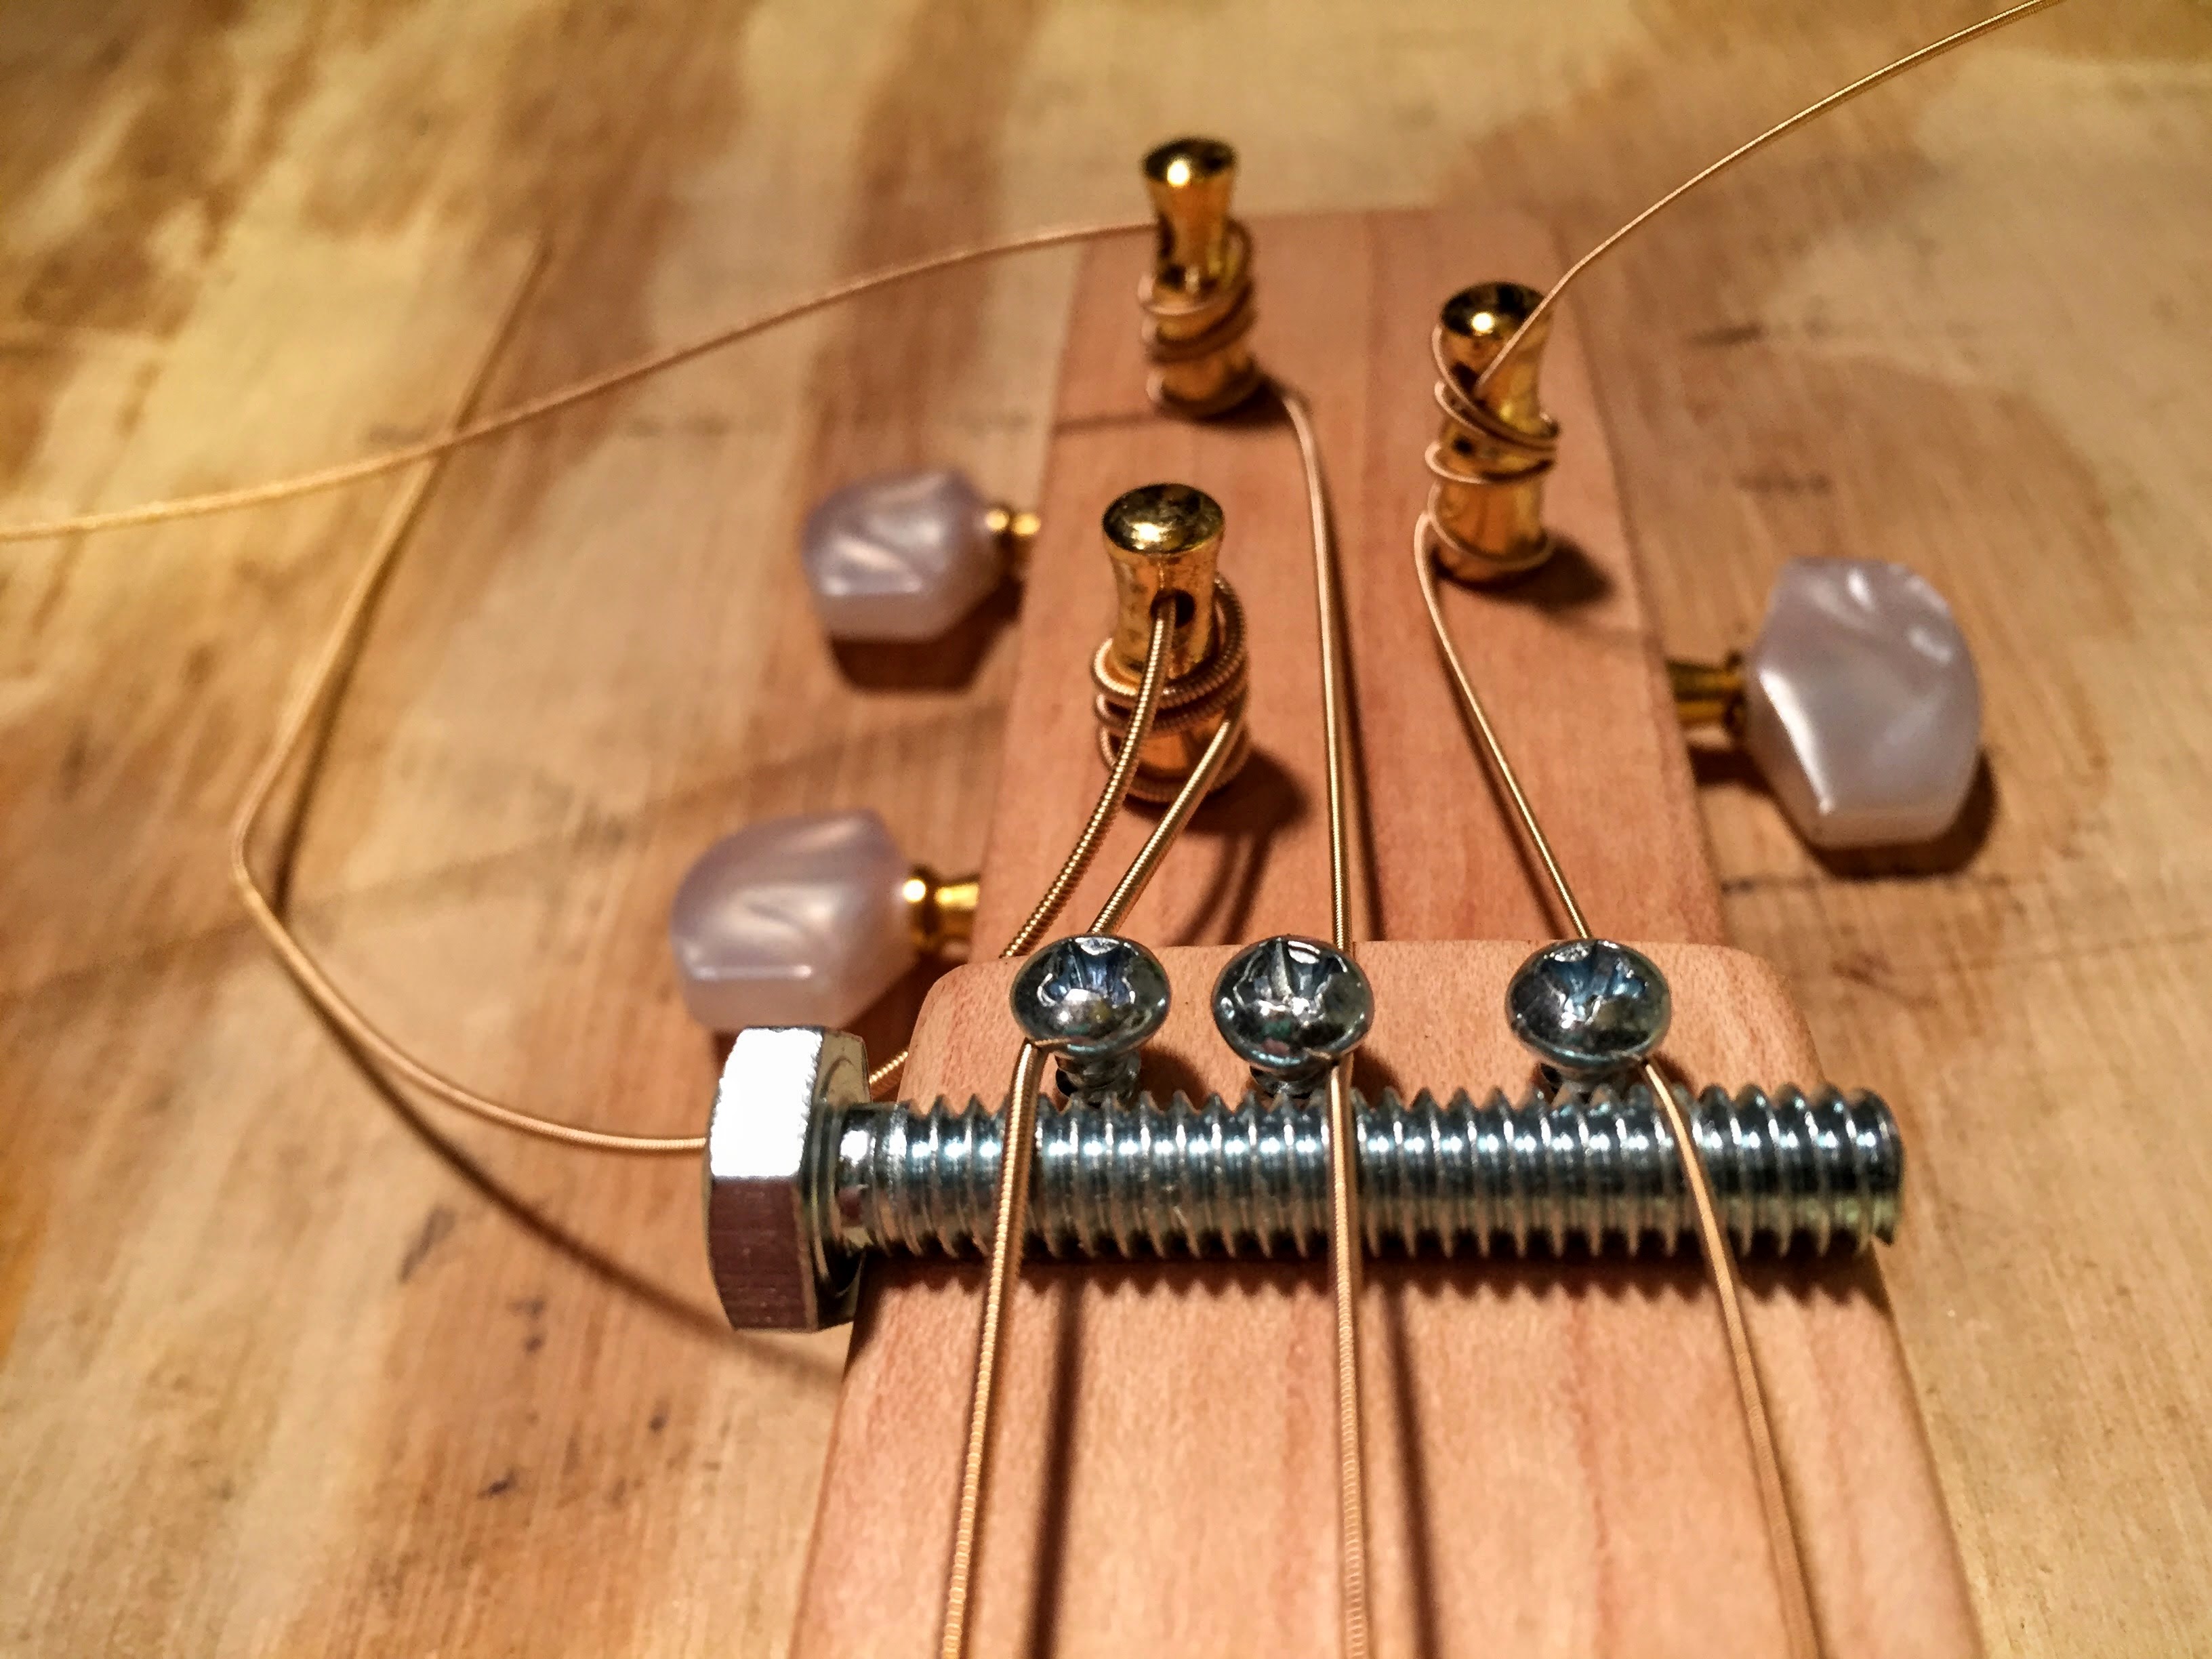
Install the strings
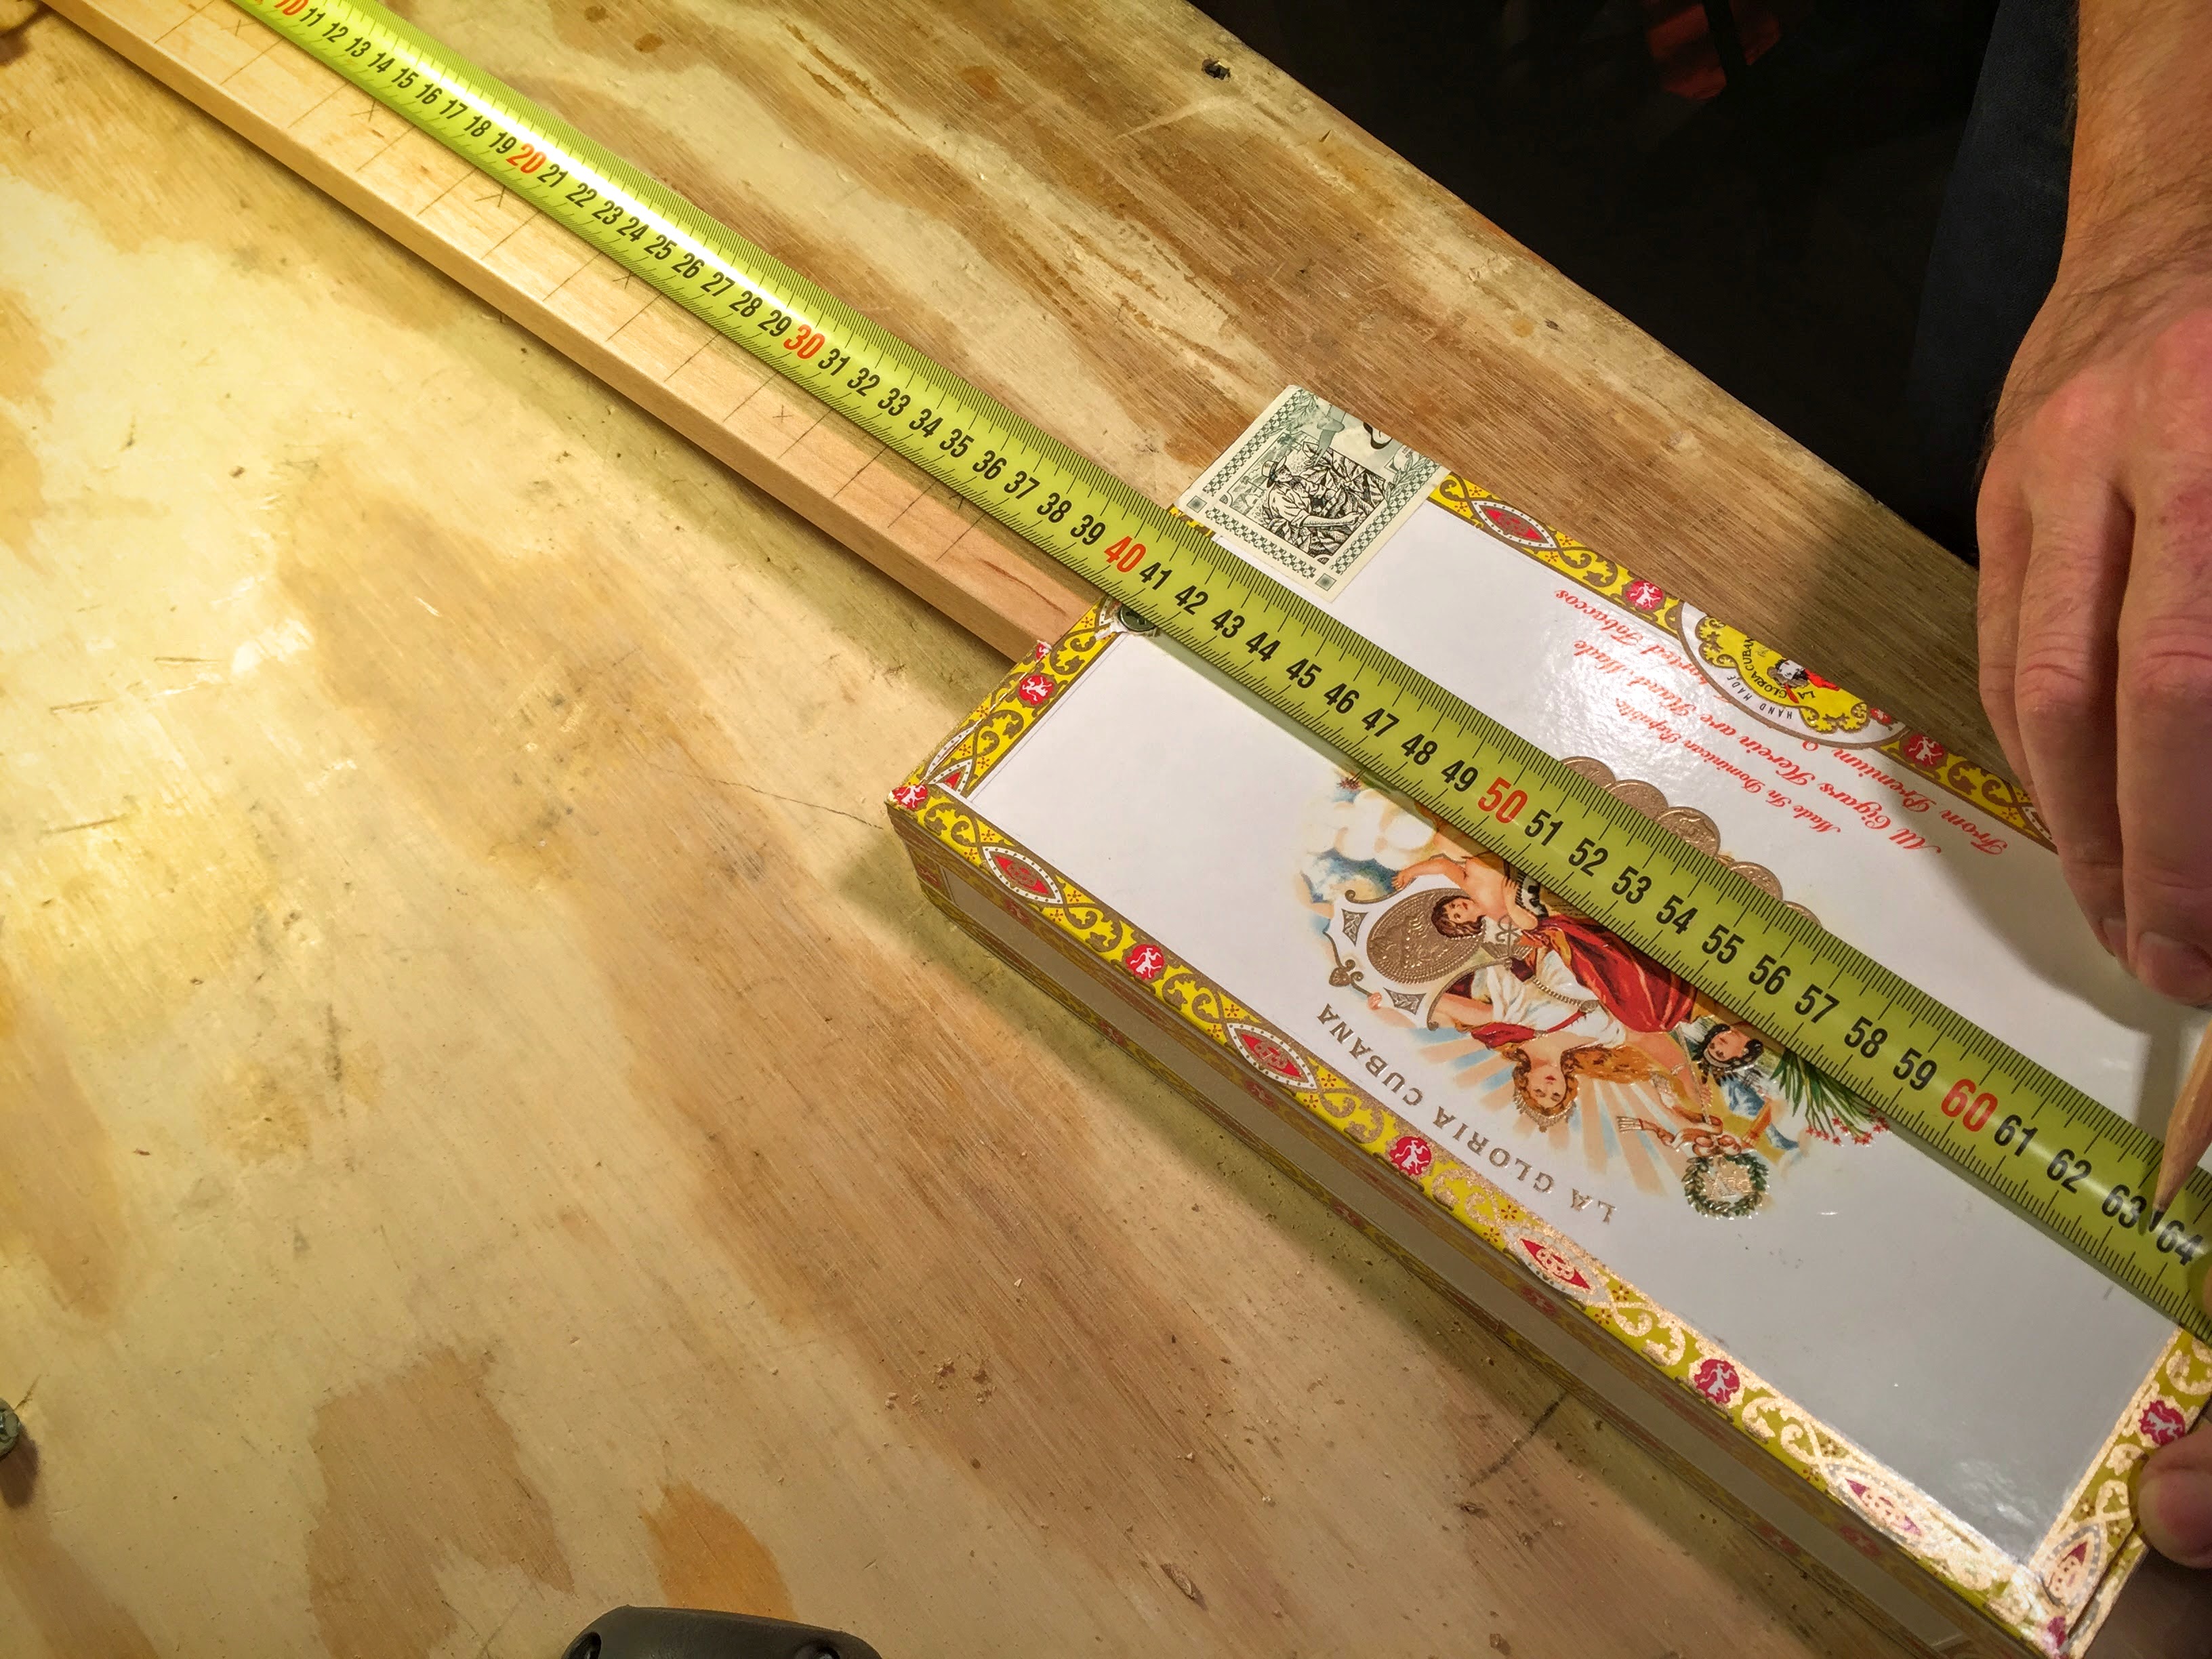
Place the end of the tape measure or yard/meter stick over where the nut will be.
Measure down 25” (635mm). Lightly mark the spot with a pencil on the box lid.
This is where the bridge is placed.
Feed the guitar strings through the back of the holes you drilled in the tail end of the neck.
The thickest string will be on top of the other two when the guitar is in the playing position.
Pull the strings through the holes until the ball end is secured against the tail.
Wind each string around its tuner a few times before inserting the end of the string through the hole in the shaft.
To wind the string around, start by keeping the string at the base of the shaft.
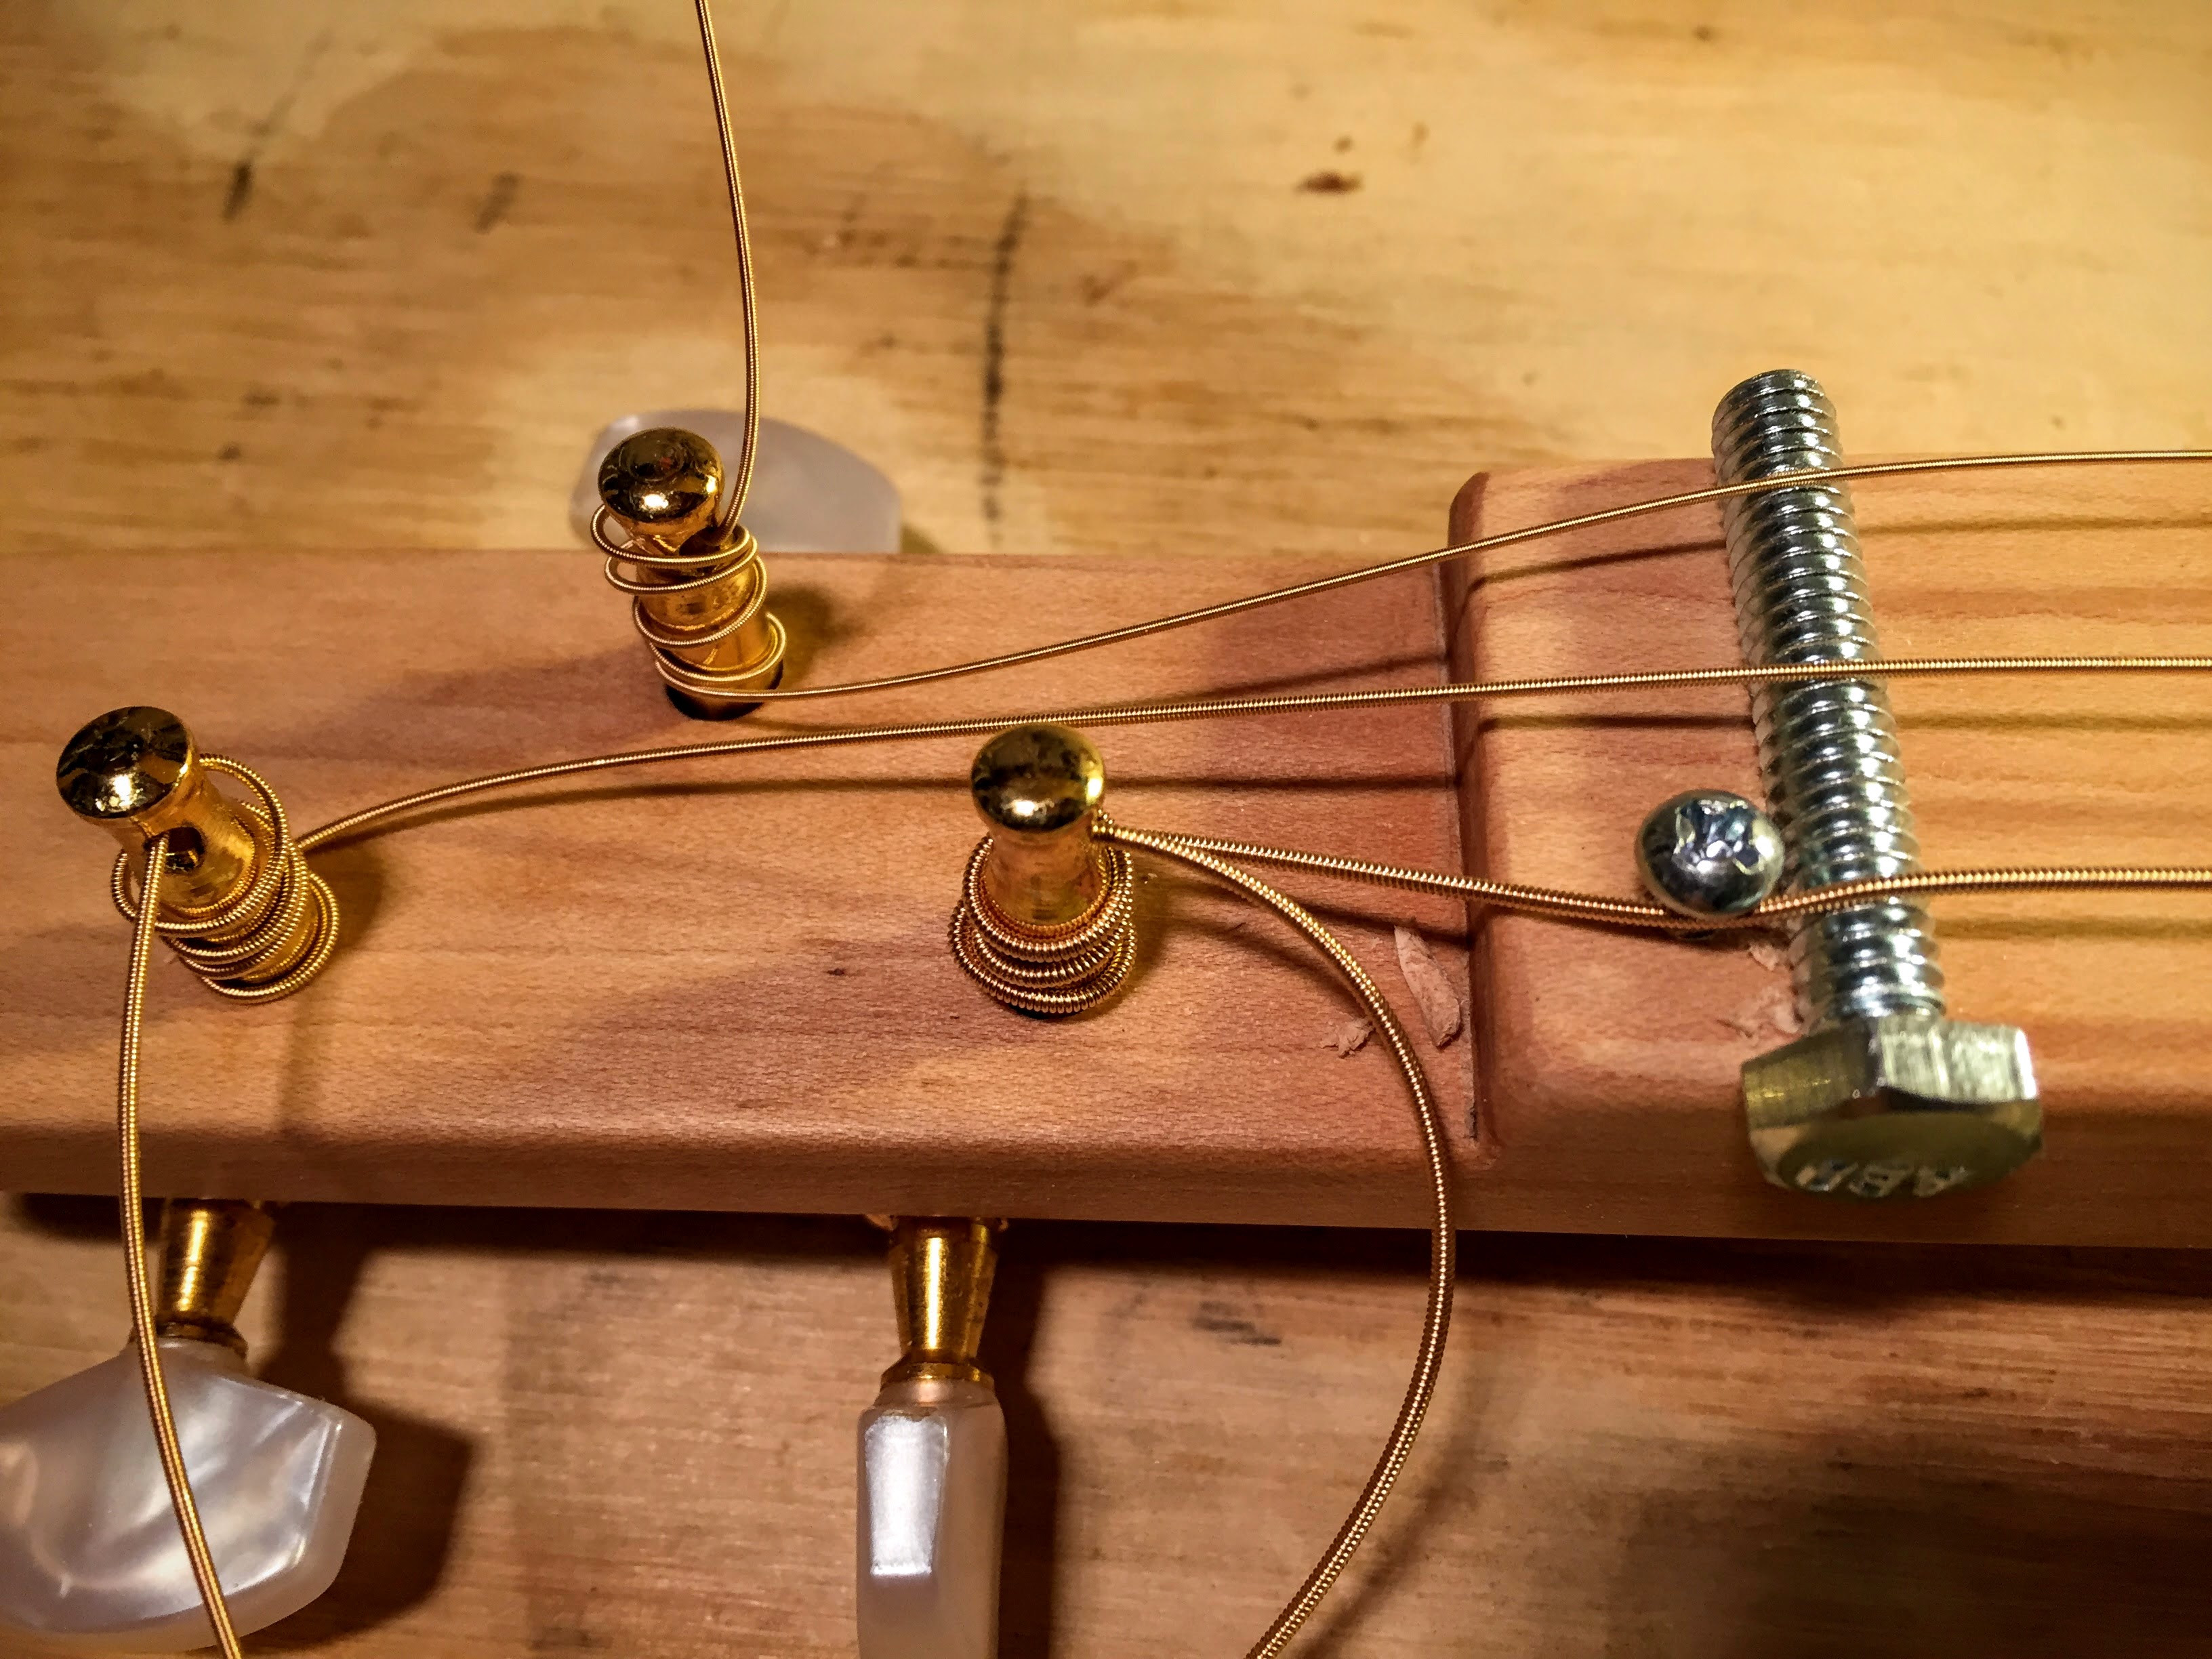
Place the nut/bolt in the slot you cut for it.
Leave some slack in the strings and space them evenly over the nut –
one in the center and two 5/16” (8mm) from the sides of the neck.
You’ll install 3 wood screws to keep the strings in place on the nut.
The screws will also hold the strings down.
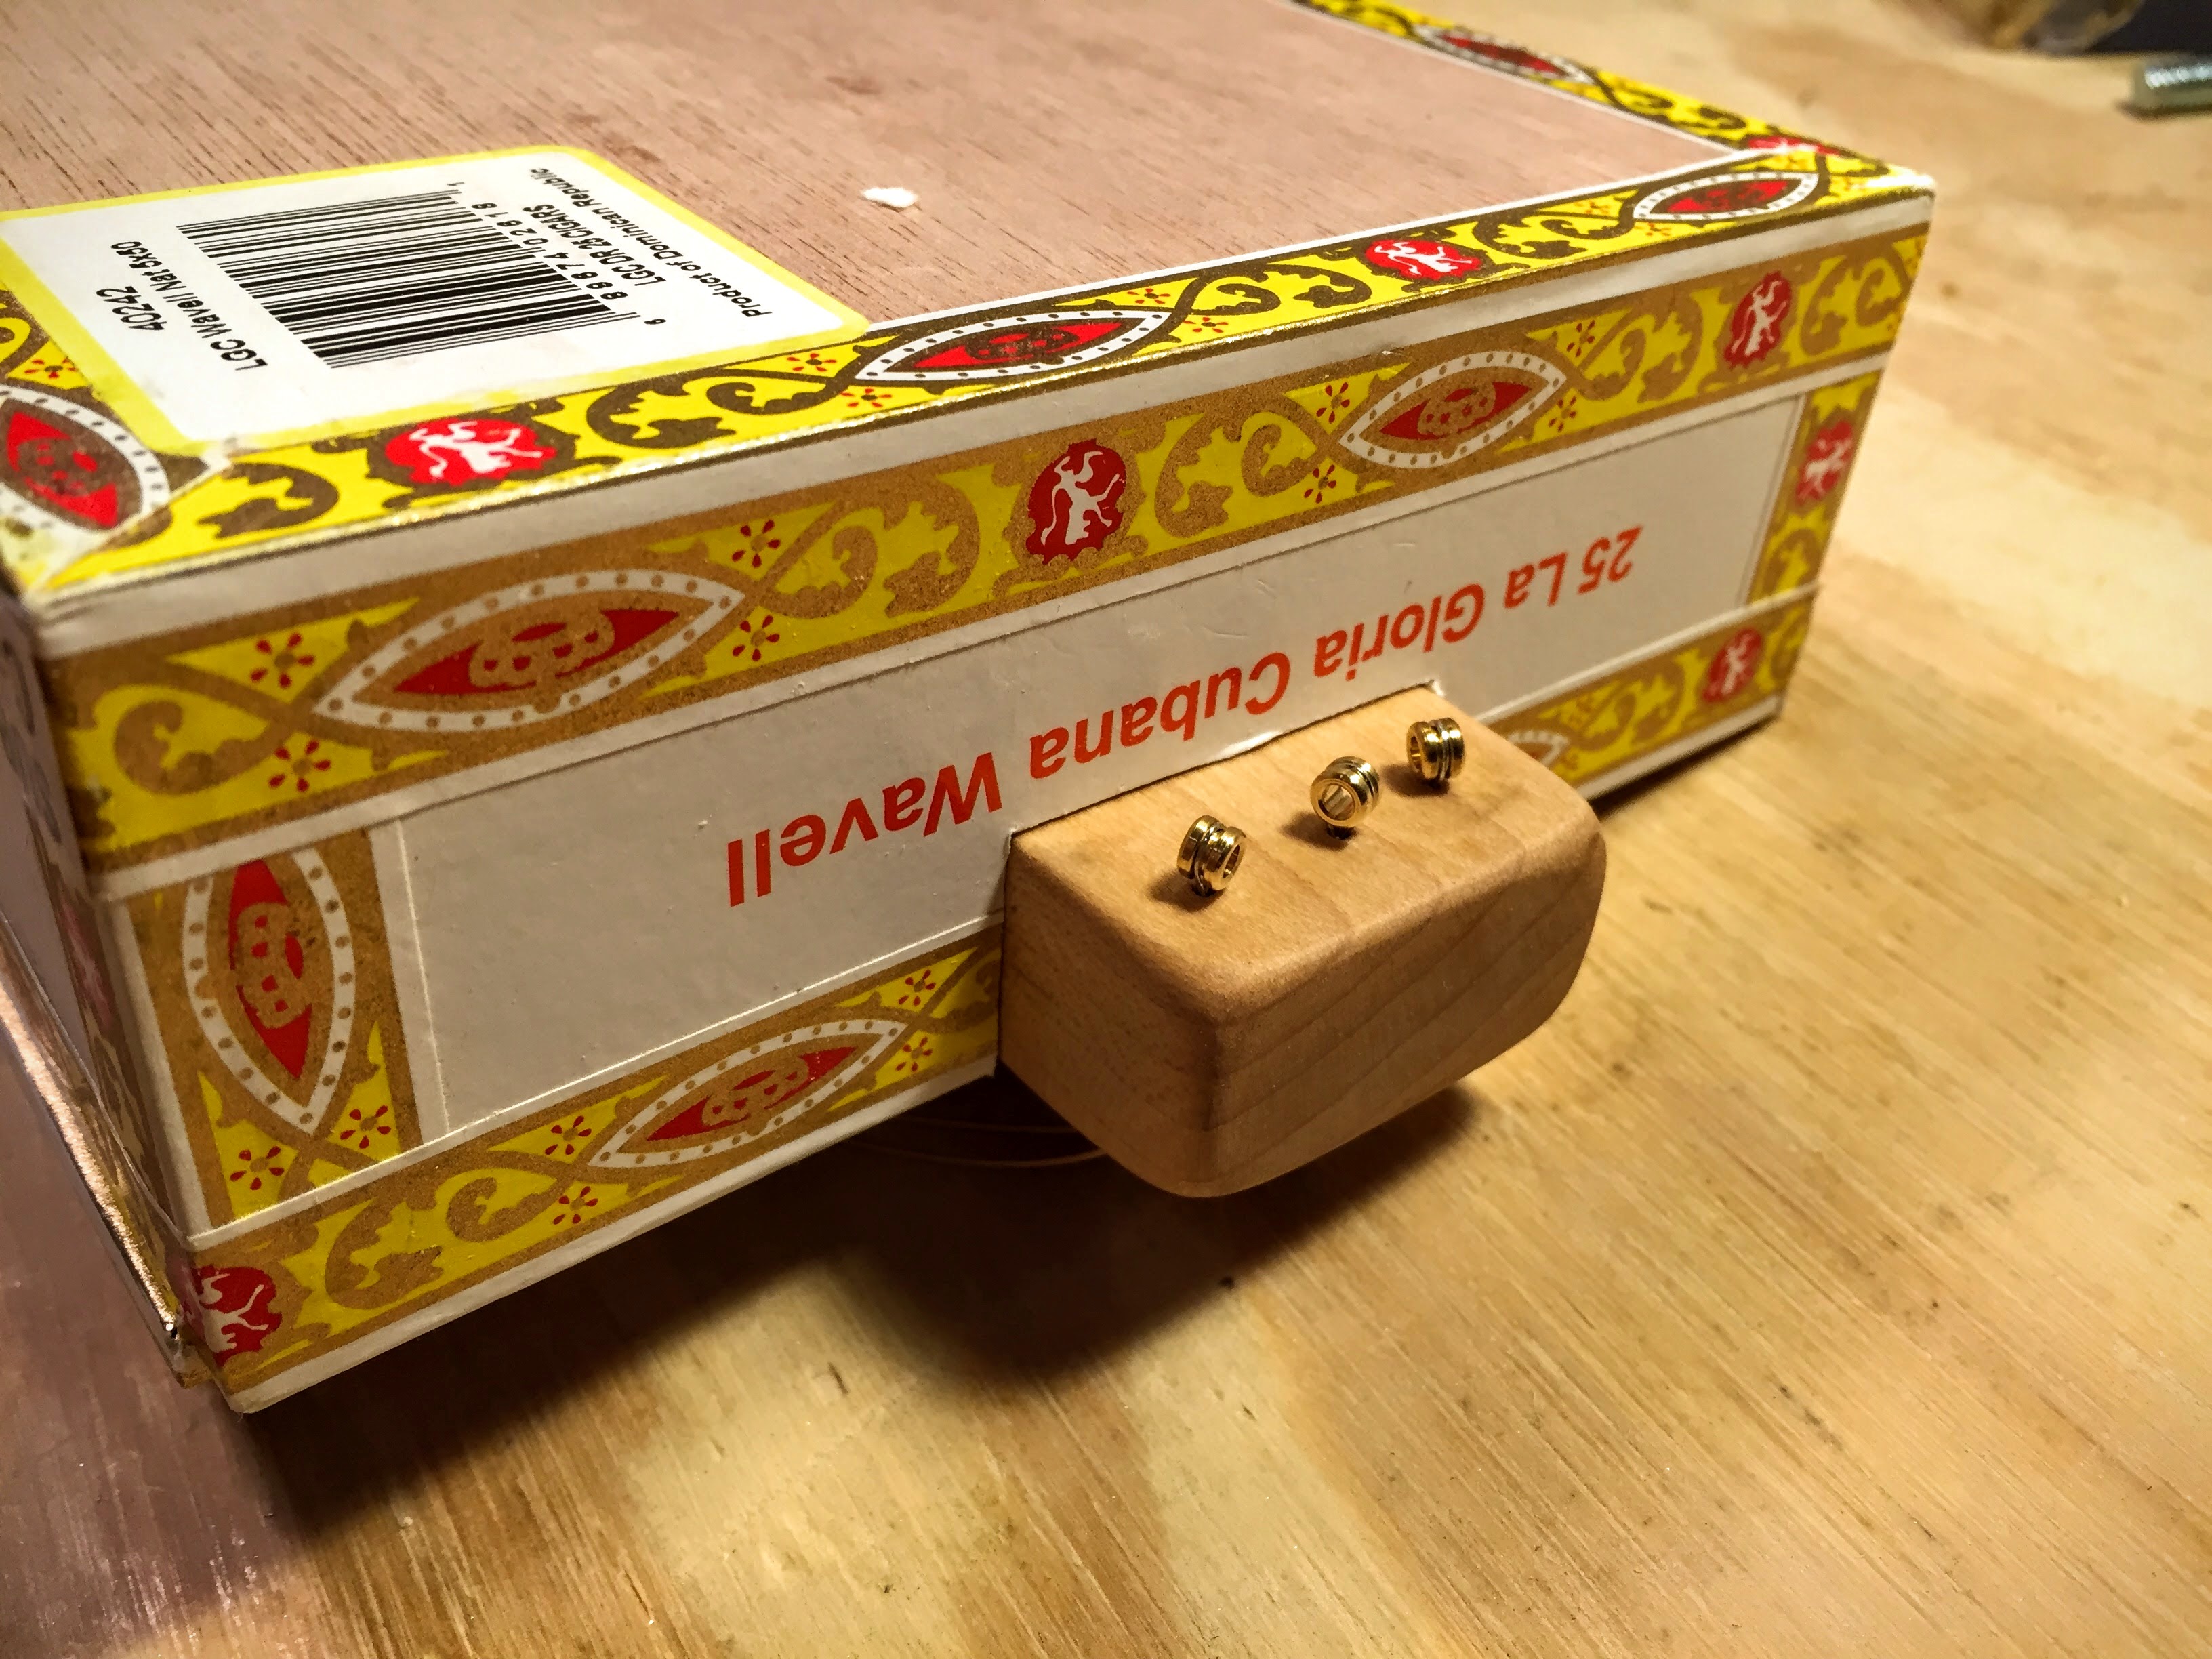
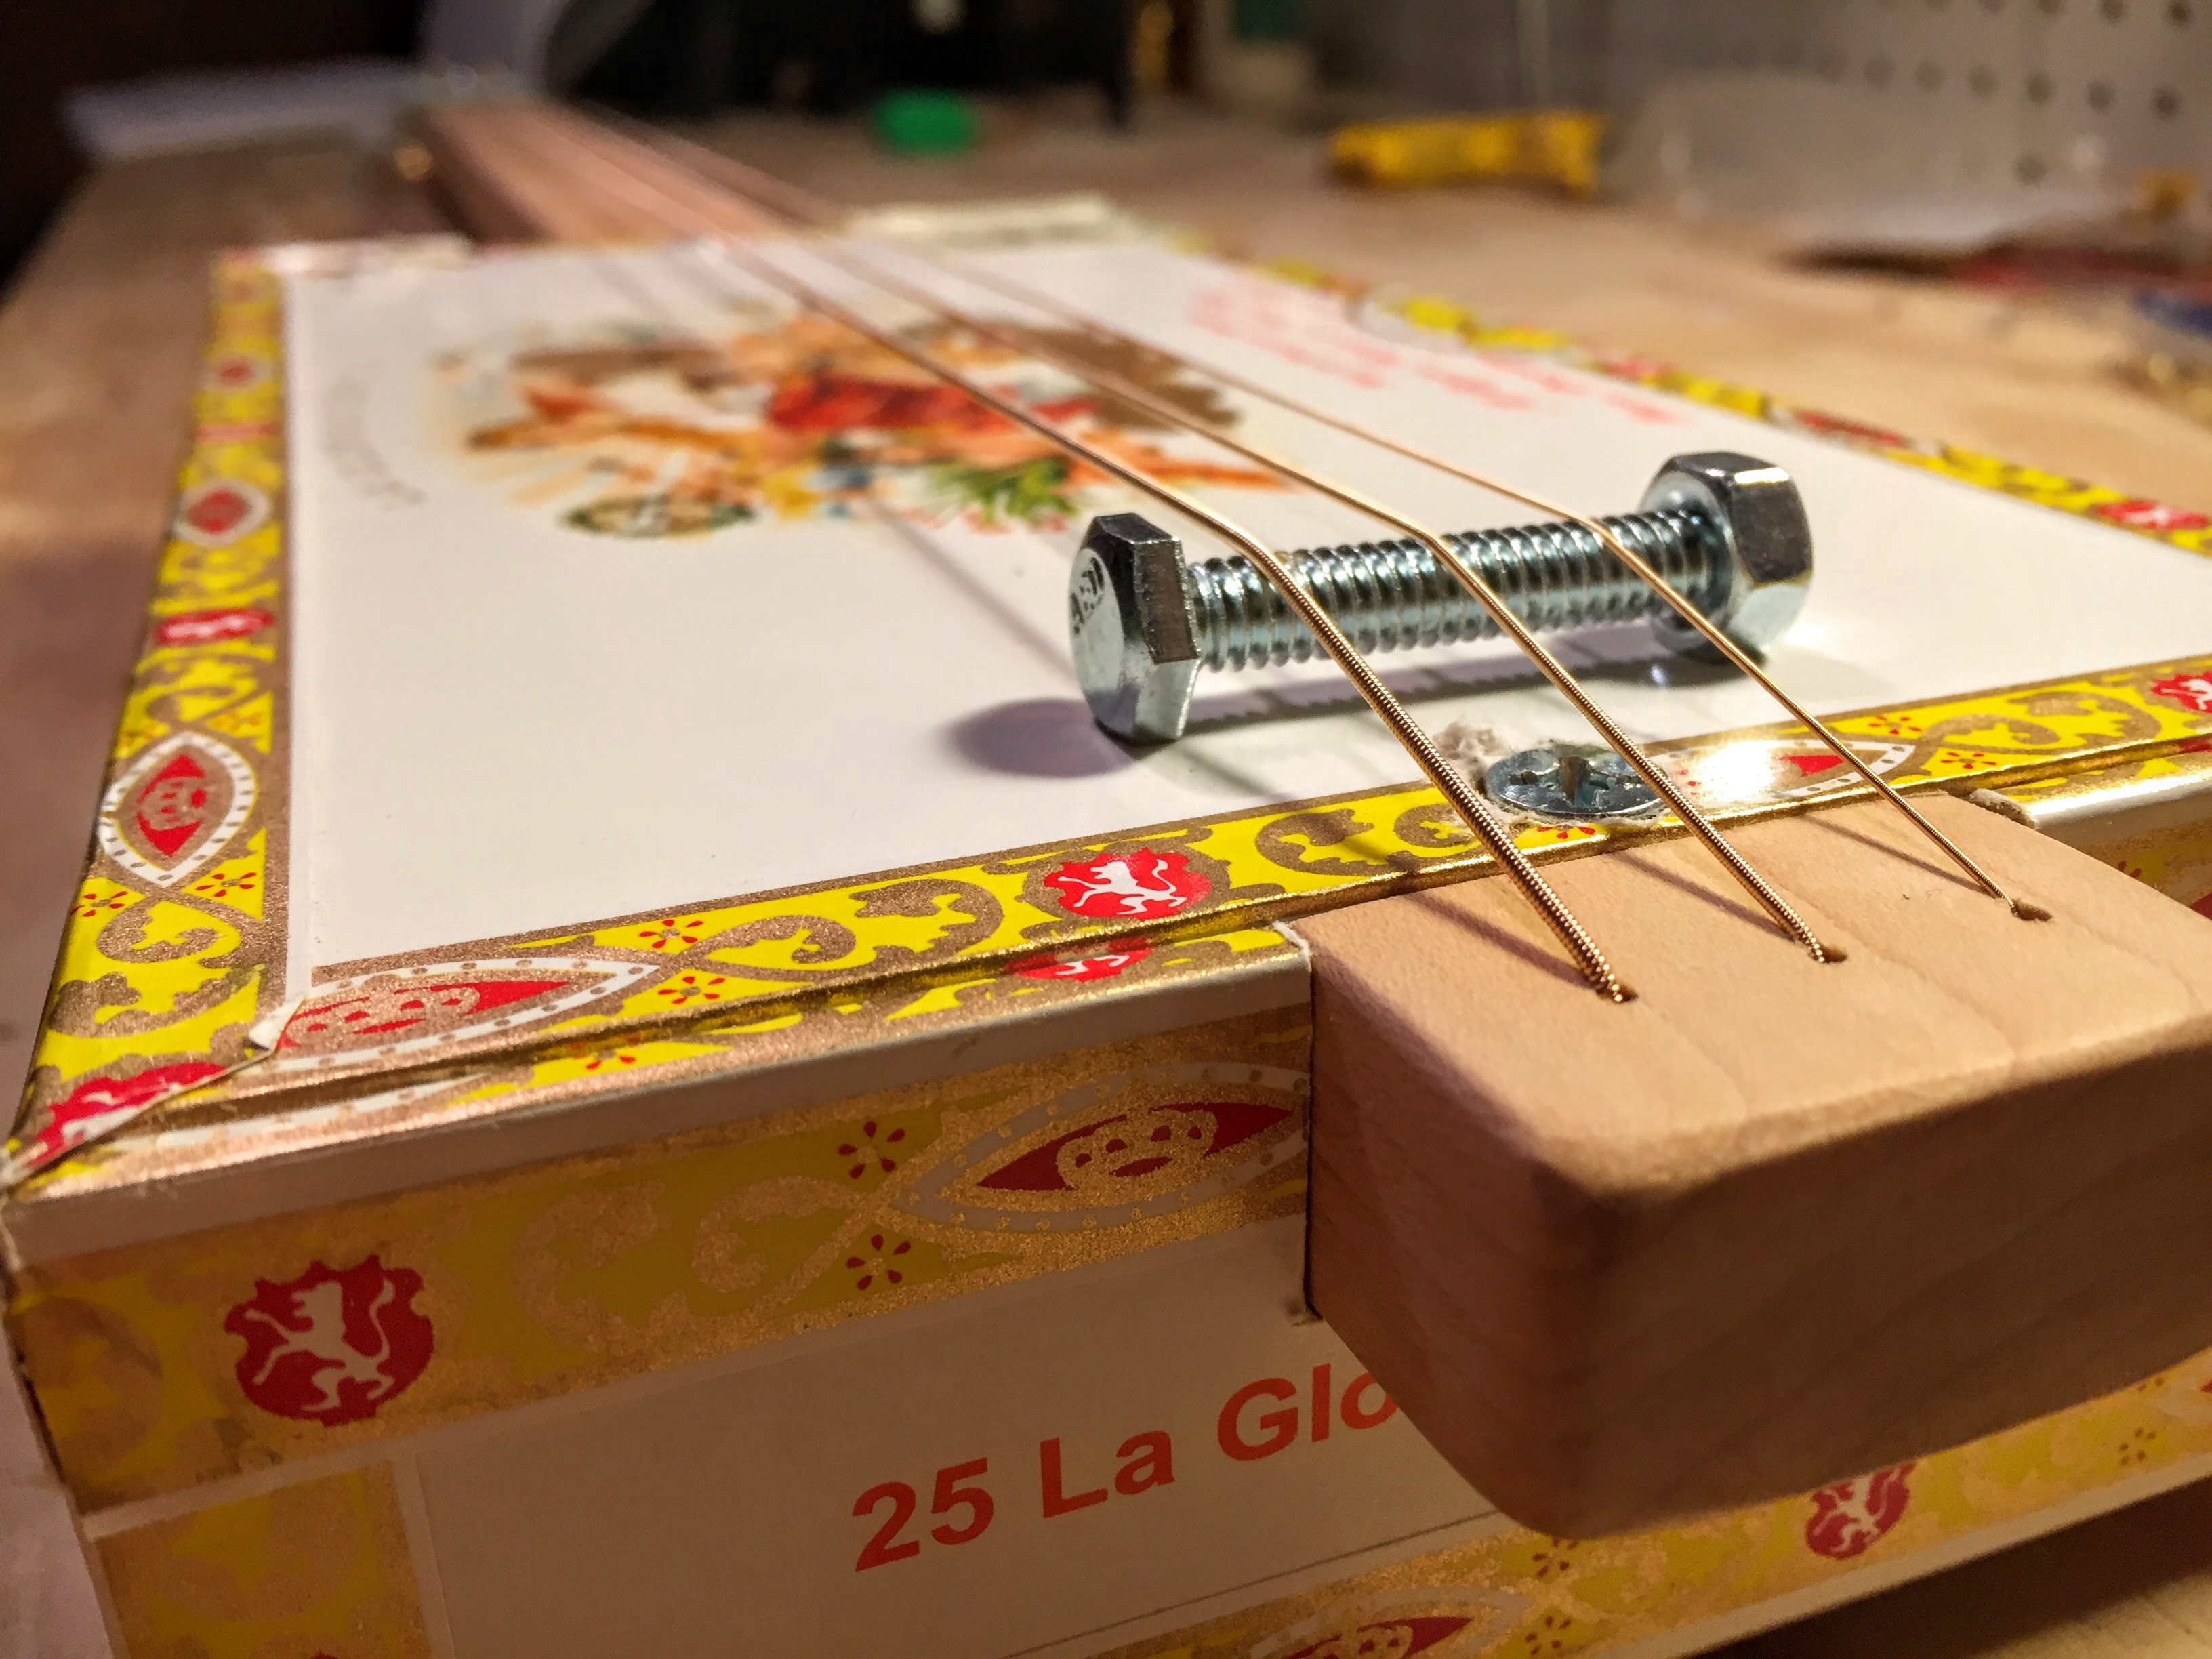
Install the string retainers
Look at the headstock while it’s facing you.
The screws will be installed on the top/headstock side of the nut.
Use the awl to mimic the shaft of the screw.
Poke holes into the neck where the screws will go.
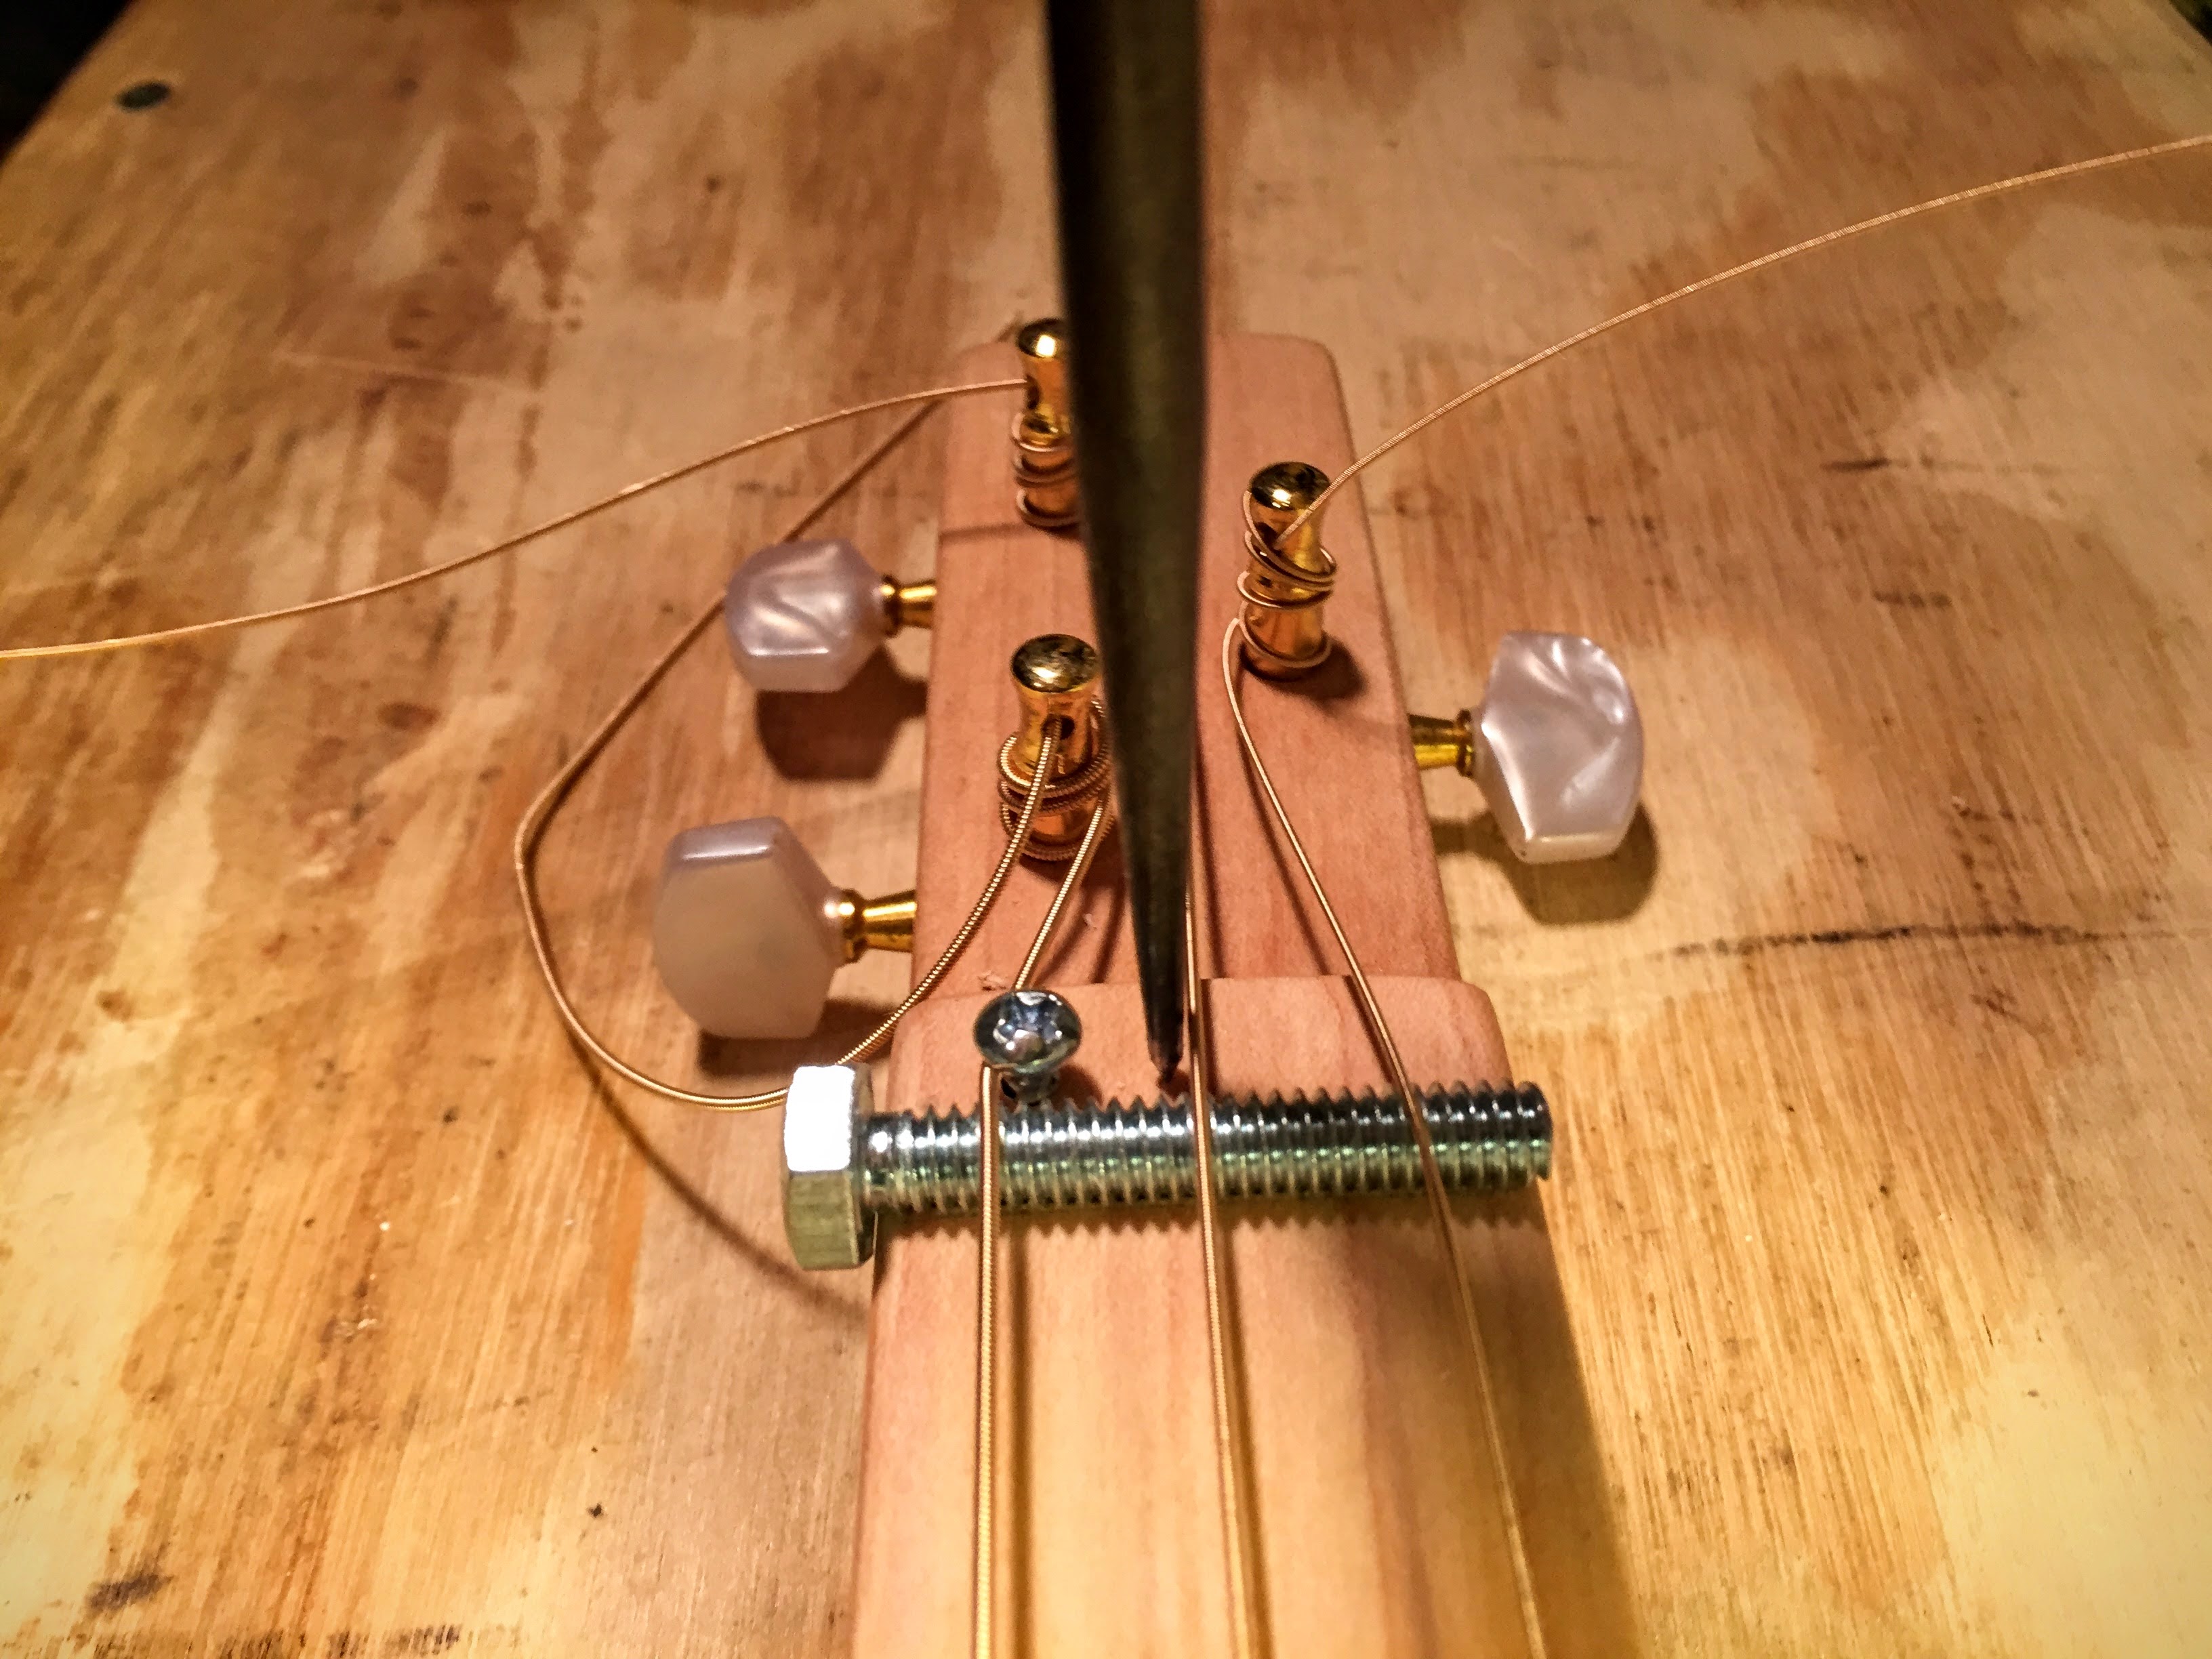
The screw for the thickest string is on the right side of the string.
The screw for the middle string is on the same side as the tuner for that string.
The screw for the thinnest string is to the left of the string.
Use your drill and bit to drill holes for the screws.
The bit should be wider than the shaft of the screw but narrower than the threads.
Use the tape/depth gauge trick you used earlier.
Use your screwdriver to install the screws/string retainers.
Leave about 1/4” (6mm) of the shaft exposed.
You can adjust the screw up or down later, and as necessary.
Fit the string under the screw heads.
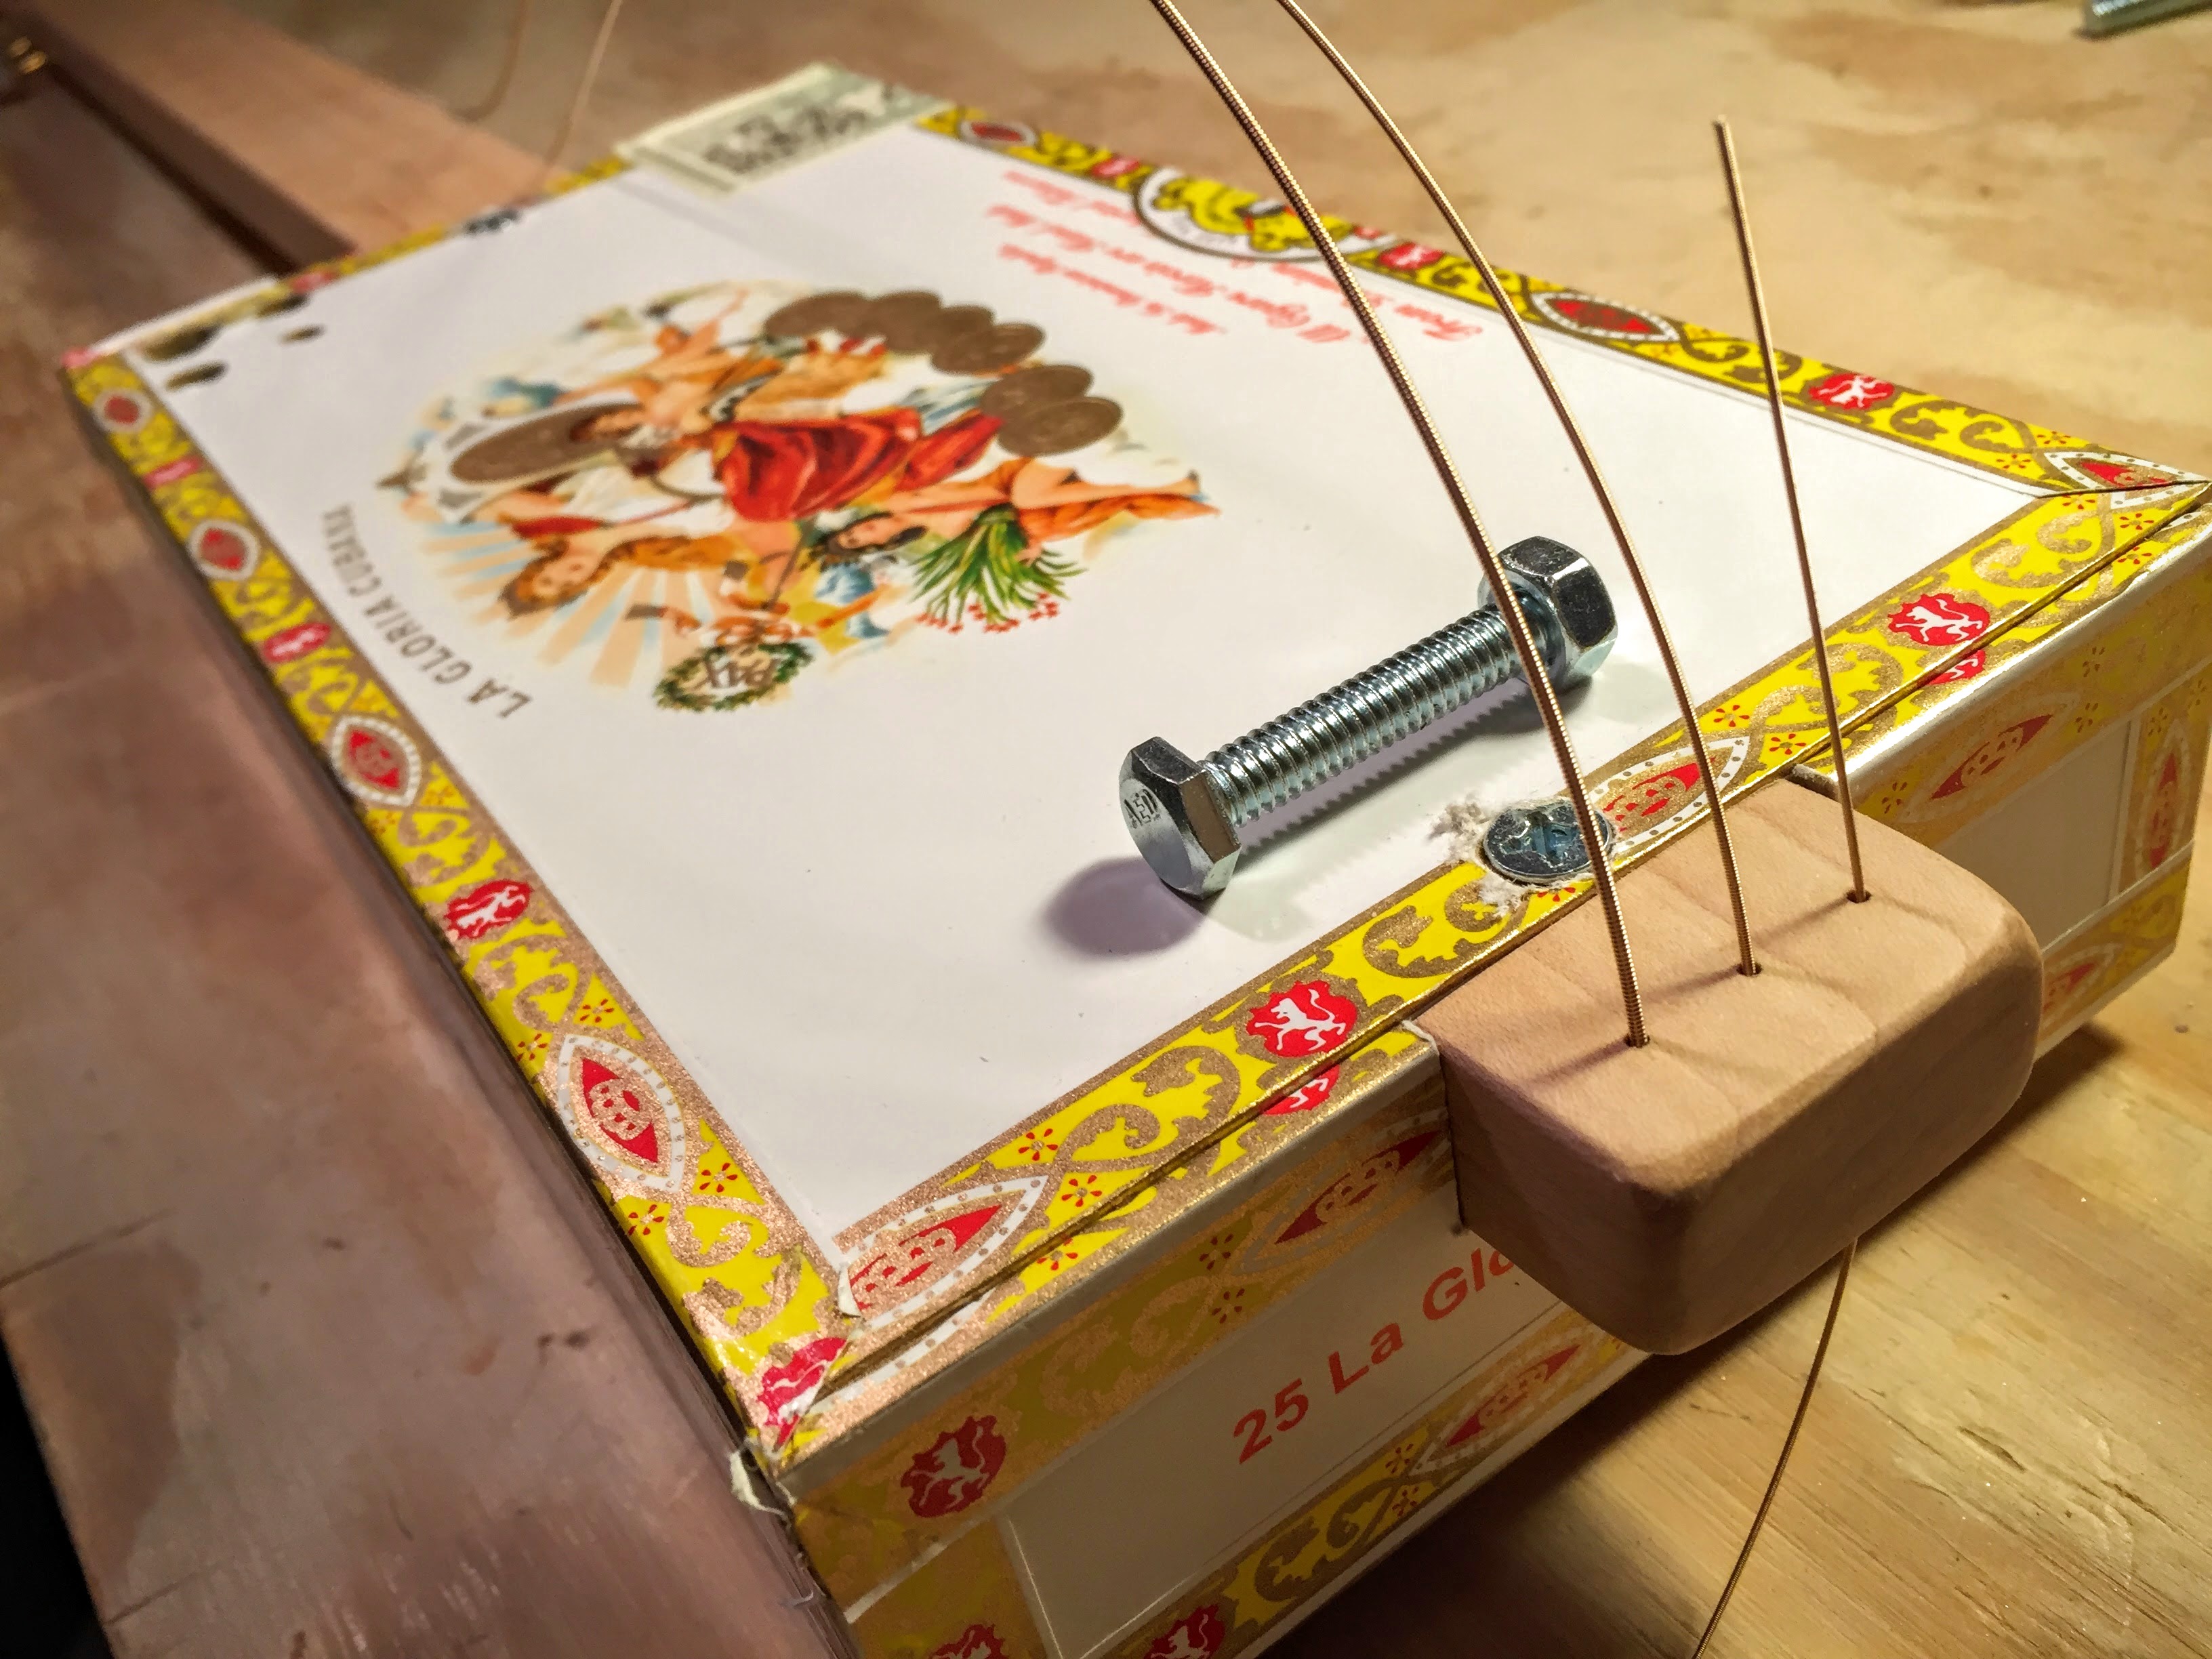
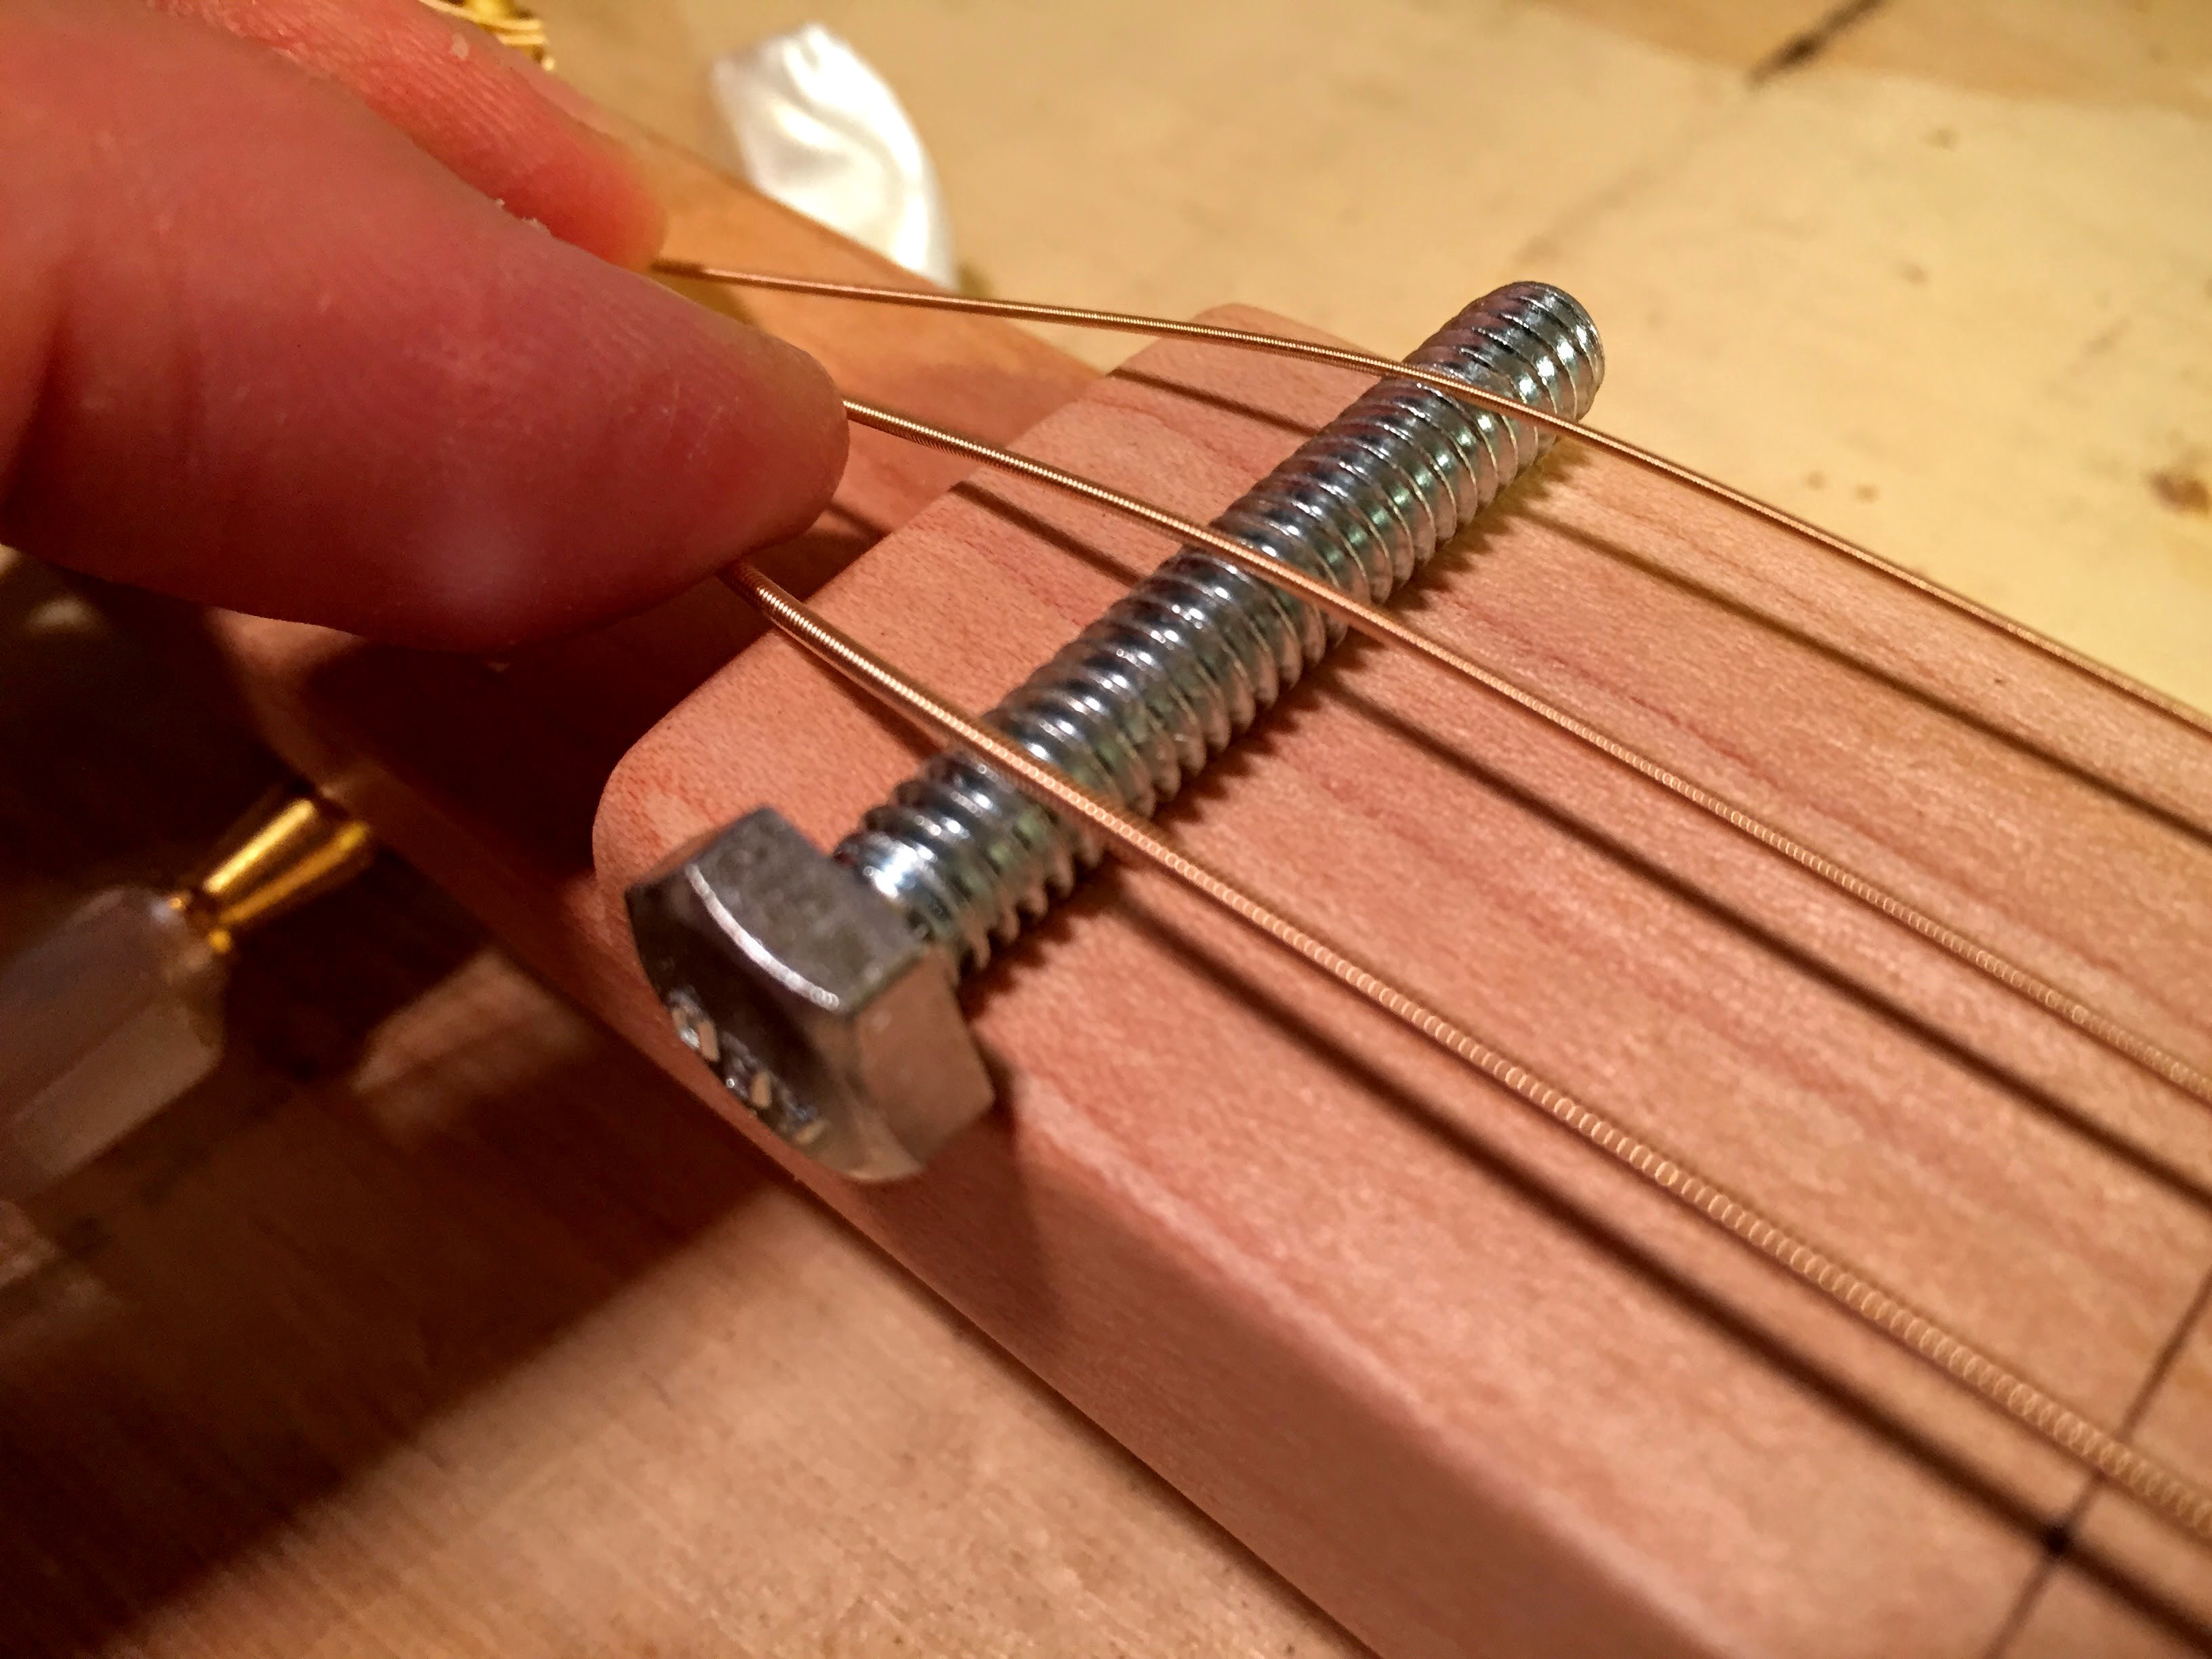
Place the bolt bridge
Slide the bridge / bolt under the strings.
Place it on the box lid 25” (635mm) away from the nut.
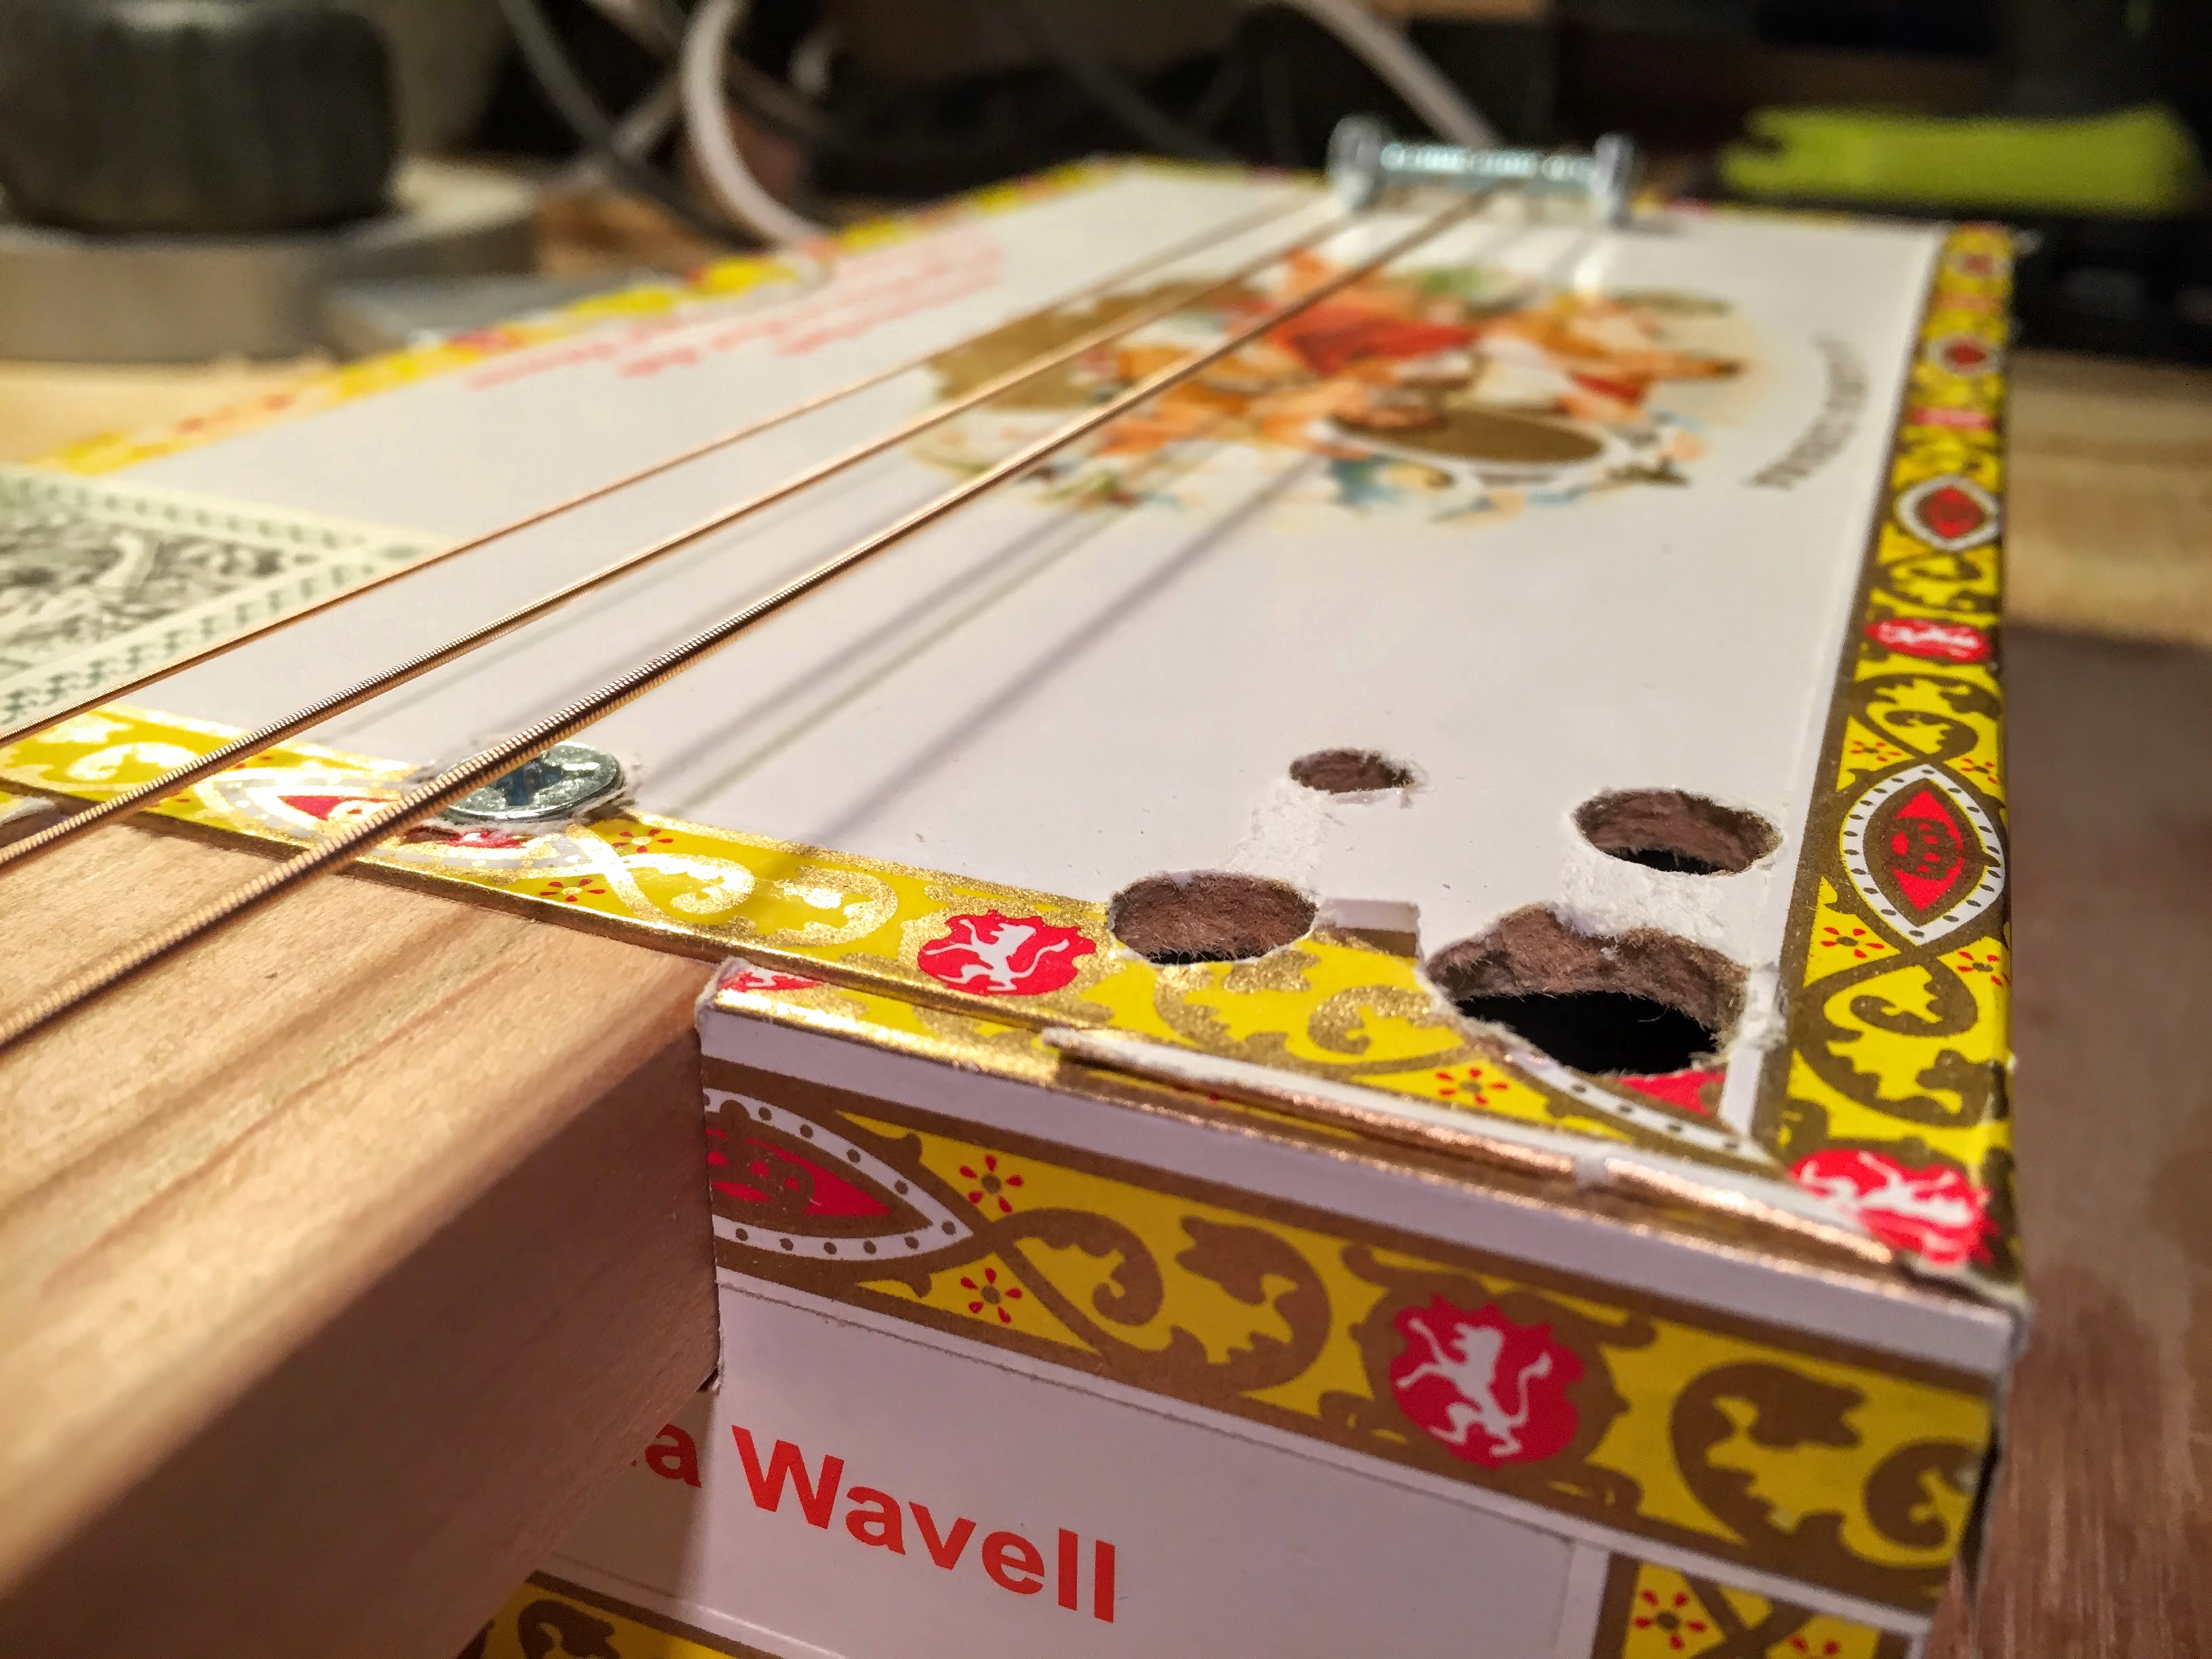
Finishing touches
Tighten the strings just enough to take the slack out of them.
Drill a hole or two (or three!) in the cigar box lid.
These are your sound holes.
You’ve made your cigar box guitar
You’ve just built your own cigar box guitar.
Now, how ’bout that?
Let’s get that thing tuned up.
Head over to our Knowledge-Base for the most comprehensive guide to cigar box strings and tunings found on the internet.
Then head over to our how to play cigar box guitars category to access the growing library of resources to learn to play your brand new cigar box guitar.
If you think this plan is valuable, please share it with a friend on Facebook or wherever you like to strut your newfound knowledge.
And, of course, stay tuned for more cigar box guitar plans…
One thought on “How To Make A Simple Cigar Box Guitar (Metric Included)”
Comments are closed.