
What are Hard-tail Bridges?
Hard-tail bridges are pieces of hardware often seen on solid body electric guitars. They combine bridges and saddles in such a way that the intonation and string action (height over the fretboard) can easily be adjusted post-install. These styles of bridges are best known from Fender’s Stratocaster™ electric guitars.
Because of how they are made, hard-tail bridges work best when used with magnetic pickups (the sort seen on solidbody electric guitars) as opposed to piezo-style pickups. They help with achieving a professional intonation, maintaining a nice low string action, and increasing sustain (due to their solid metal construction).
Some hard-tail bridges also include openings for pickups such as Fender-style single coils and humbuckers. The basic versions just have the bridge and saddle components.
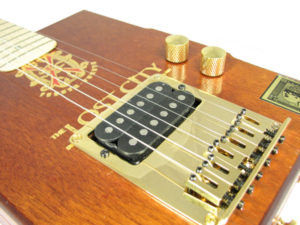
Although they are best known for use on solid body electrics, hard-tail bridges also work great for cigar box guitars. There are now 3 and 4-string varieties available, which make them even more suitable for electric cigar box guitars that have magnetic pickups.
Varieties of Hard-tail Bridges
Most hard-tail bridges are similar in design, though certain key features can vary:
- Number of saddles (determines how many strings)
- Traditionally only 6-string varieties were widely available.
- More recently, 3 and 4-string varieties have become more available, perfect for use on cigar box guitars.
- Larger versions for electric basses are also widely available, even for basses with more than 4 strings.
-

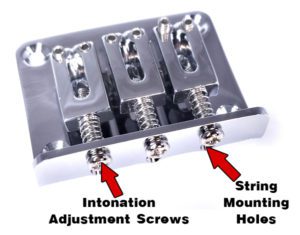
This chrome 3-string hard-tail bridge is a top-loading variety. Note the string holes visible beneath the adjustment screws. Available from CBGitty.com. Individually mountable saddles in the hard-tail bridge style can also be found.
- Top-loading vs. bottom-loading (see description below).
- “Top-loading” means that there are holes in the back plate of the bridge that the strings are fed through, with the ball end of the string resting up against the hole when the string is tuned. This style is generally considered easier to use, but not all varieties are manufactured with this option.
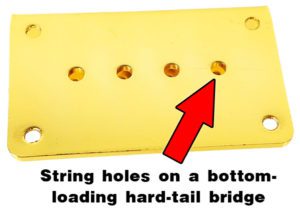
- “Bottom-loading” means that
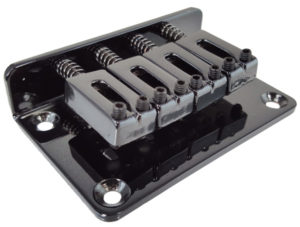
Bottom-loading hard-tail bridges have string holes in the base plate, as shown here. Strings are fed up through the body of the instrument. This gold 4-string hard-tail bridge is available from CBGitty.com. there are holes in the bottom part of the bridge plate. For these, the strings have to be brought up through the body of the instrument, then up through and over the saddle. Usually string ferrules of some sort are used on the back of the guitar to hold the ball end of the strings in place.
- Finish color (various metallic finishes are available)
- Saddle style
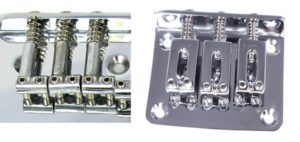
- The style of the individual saddles can vary from manufacturer to
Here are two different styles of saddles that can be found on hard-tail bridges. manufacturer. Some look more like grooved barrels on arms, others are more rectangular, etc. All should be adjustable both forward and backward and up and down though, to allow both intonation and string action to be adjusted.
- The style of the individual saddles can vary from manufacturer to
- Larger in size with opening for pickup
-
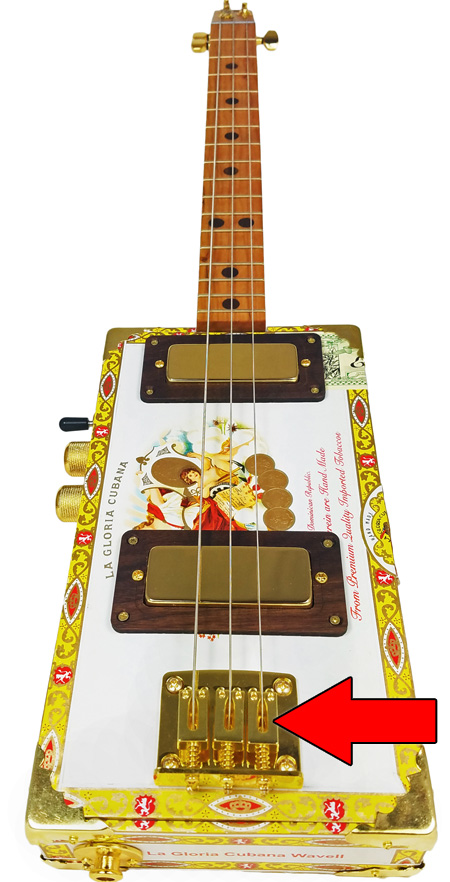
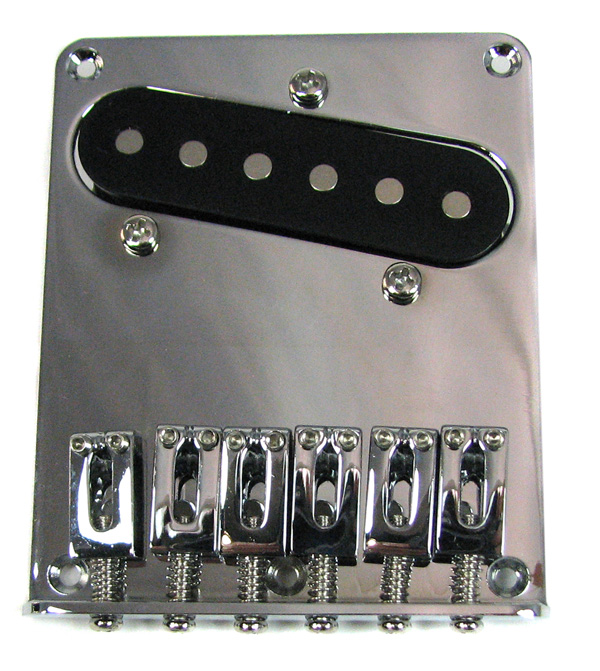
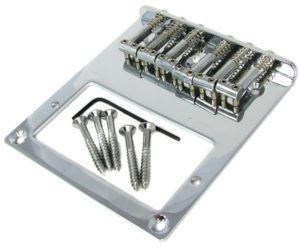
This 6-string hard-tail bridge includes an opening for a standard Fender-sized humbucker pickup. This bridge is available as shown from CBGitty.com. There are a wide range of hard-tail bridges that are larger in size and that include an opening for mounting a magnetic pickup. This can be very handy, as it combines the pickup cover plate and bridge into a single piece of hardware.
-
How to Install Hard-tail Bridges
Because their placement determines where the strings will run, hard-tail bridges should be mounted so that they are centered in relation to the guitar’s neck. This will ensure that the strings are then centered over the neck. Their location lengthwise on the guitar is determined by the instrument’s scale length.
Start by using a screwdriver to adjust the saddles to about halfway along their horizontal range. This will allow you equal adjustability in both directions. You’ll want to position the bridge so that the point where the string leaves the groove on the saddle is exactly X inches from your nut, where X is your intended scale length. So for a 25-inch scale length guitar, mount the bridge so that the string touches the saddle grooves exactly 25 inches away from the fretboard side of the nut. Adjust the screws to dial this in.
If you are using a bottom-loading hard-tail bridge, you should mark the string holes and drill the holes down through the instrument body before mounting the bridge to it. If you are using a top-loading hard-tail bridge, then you don’t need to worry about this.
If you your bridge has a pickup opening, you will want to do any routing/cutting to accommodate the pickup before mounting the hard-tail bridge to the instrument.
You will notice that the saddles also have small set screws on them (usually 2 each) that can be adjusted up or down to get your action (string height above the fretboard) just right for easy playing. See the photo for clarity.
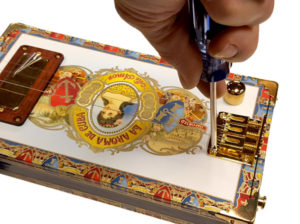
Hard-tail bridges are designed based on the assumption that the guitar’s fretboard will be slightly raised above the surface of the guitar body. Depending on how your guitar is constructed, you may find that the string action set screws don’t extend far enough up or down to get your strings where you want them. In this case, you may need to either add a spacer pad under the bridge to raise it, or make a small recess pocket in the guitar’s soundboard to lower it.
When mounting these bridges, be sure to pre-drill holes for the screws and don’t apply too much torque, or the screw heads may twist off.
Summary
If you want to build an awesome-looking and sounding electric cigar box guitar, then you should try a hard-tail bridge. They can’t be beat for ease of use and adjustability, important features for keeping an electric guitar in full playing condition. Give one a try today – you can check out the selection of bridges over at C. B. Gitty to get started!
One thought on “How to Use Hard-tail Bridges”
Comments are closed.