
What are Sealed-Gear Tuners?
 Sealed-gear tuners (also known as machine heads, tuning pegs and other names) are the type often seen on electric guitars, especially Fender Telecaster™ and Stratocaster™-style guitars.
They are designed so that the mechanical gears of the tuner are sealed into the base, as opposed to open-gear tuners where the worm and pinion gears are visible.
Click here, or on any of the images in this article to see the selection of Sealed-Gear Tuners available from C. B. Gitty Crafter Supply!
One of the claimed benefits of this style of tuner is that it keeps the gears from getting gummed up with dust, dirt and other debris. These days, you are just as likely to see this style of 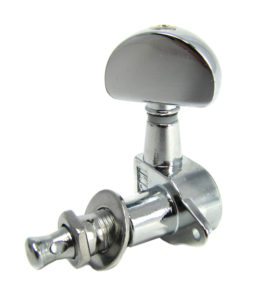 tuners on acoustic guitars as on electric guitars, as they are often felt to be more reliable. They also usually cost a good bit more than open-gear tuners, so that perceived reliability comes at a cost.
Sealed-gear tuners mount to the headstock differently than open-gear tuners. Open-gear tuners usually are anchored by two screws through the backing plate, with the ¼” shaft going up through the headstock and through an optional separate bushing set into the front of the headstock.
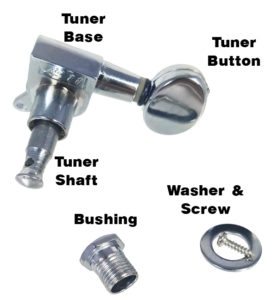 Sealed-gear tuners, on the other hand, usually mount through a larger hole (3/8” is common) and utilize a threaded bushing that screws down into a socket on the base plate, through a washer that rests on the top surface of the headstock. The bushing is tightened down to help hold the tuner in place via friction, and a single screw mounted through the base helps keep it from rotating. See photos below.
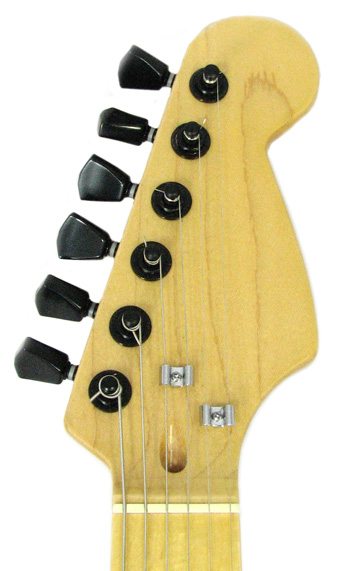
Sealed-gear tuners come in a variety of finishes and design styles. The shape and size of the buttons (the part you turn to change the string’s pitch) vary widely, from lima bean to chevron to tombstones, hearts and more. Finishes range from chrome, gold and black to various satin and faux antiques. The placement of the screw hole flange also varies, with some sticking out at an angle from the base plate, and others at 90 degrees. More exotic varieties of sealed-gear tuners may also be of the “locking” variety, with a small thumb wheel that can be tightened to “lock” the tuner in place once the string is at pitch.
How to Install Sealed-Gear Tuners
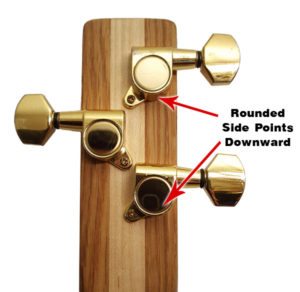 To install sealed gear tuners, first you should do a “dry fit” layout on your headstock to see how they will fit. Make sure that the rounded side of the tuner base plate will be aligned downwards towards the body of the instrument, as shown in the photo. This is the correct “right side up” way to mount them. If mounted upside down, sometimes the gears will slip as string tension increases.
When deciding where to place your tuners, make sure that they are not too close together (screw flanges overlapping with base plates, etc), and make sure that the buttons are far enough apart to comfortably turn. On full-size guitar headstocks this isn’t usually a concern, but on smaller cigar box guitar headstocks it can be a problem if you don’t plan for it. Fortunately as a last-minute fix you can always rotate one or more of the tuners to help make them fit.
Click here, or on any of the images in this article to see the selection of Sealed-Gear Tuners available from C. B. Gitty Crafter Supply!
 Generally, drilling the tuner hole about 3/8” in from the edge of the headstock is best, as it ensures the tuner button will stick out far enough to be easy to turn. Depending on where you got your tuners, you should measure the shank on the base plate to see what diameter hole you need to drill. For the sealed-gear tuners sold by C. B. Gitty, a 3/8” drill bit usually does the trick.
Once your holes are drilled, put the tuners through from the back and place the washer over the shaft. Then put the bushing down through the hole and screw it into the base plate until it is snug.
Do this with all of the tuners and then look at how everything fits. If you need to rotate one or more tuners to get them to fit, do so now. Once you’re sure everything is ready (make sure you have them mounted right-side up first, as shown above), then pre-drill the holes for the mounting screws (1/16” drill bit), and put them in. It is a good idea to use a piece of masking tape wrapped around your drill bit as a depth guide, to keep from drilling through the front of the headstock.
Once the mounting screws are in, use a wrench or socket of appropriate size to tighten down the bushings. Get them nice and snug, but don’t get too carried away – if you see or hear the headstock wood starting to be crushed, or see the finish starting to crack, you are applying too much torque. Firmly but gently tight is what you want.
That’s about it for basic sealed-gear tuner know-how. Happy building!

One thought on “How to Use Sealed-Gear Guitar Tuners”
Comments are closed.